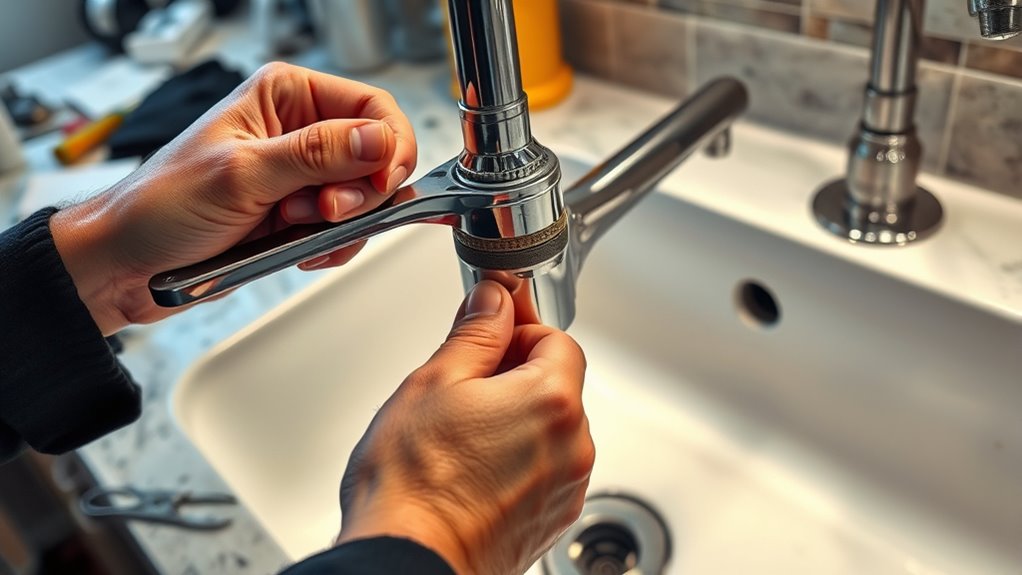
10 Simple Steps to Remove a Kitchen Faucet
Many homeowners find replacing a kitchen faucet to be a daunting task. You’re not alone—this common project can feel overwhelming, especially if you’re unsure where to start.
But with a little guidance, you can tackle it confidently and save money on professional help.
To remove your kitchen faucet, start by shutting off the main water supply and clearing your workspace.
Disconnect spray attachments, then loosen the supply lines with an adjustable wrench.
Use a wrench to remove mounting nuts and gently lift out the old faucet.
Clean the sink surface thoroughly before installing the new fixture, securing it tightly.
Reconnect the water lines, check for leaks, and tighten everything.
If you keep going, you’ll uncover detailed tips for a smooth replacement process.
Key Takeaways
- Turn off the main water supply and disconnect the supply lines using an adjustable wrench.
- Next, remove the spray attachments and hoses from the faucet body. Take your time to loosen everything carefully.
- Then, loosen the mounting nuts or bolts holding the faucet in place. Once they’re free, lift the faucet out of the sink.
- Before installing your new faucet, give the sink surface a good cleaning. This helps everything fit nicely and prevents leaks later.
- Finally, reconnect the water lines, check for any leaks, and make sure all fittings are secure.
Why Removing Your Kitchen Faucet Might Be Necessary
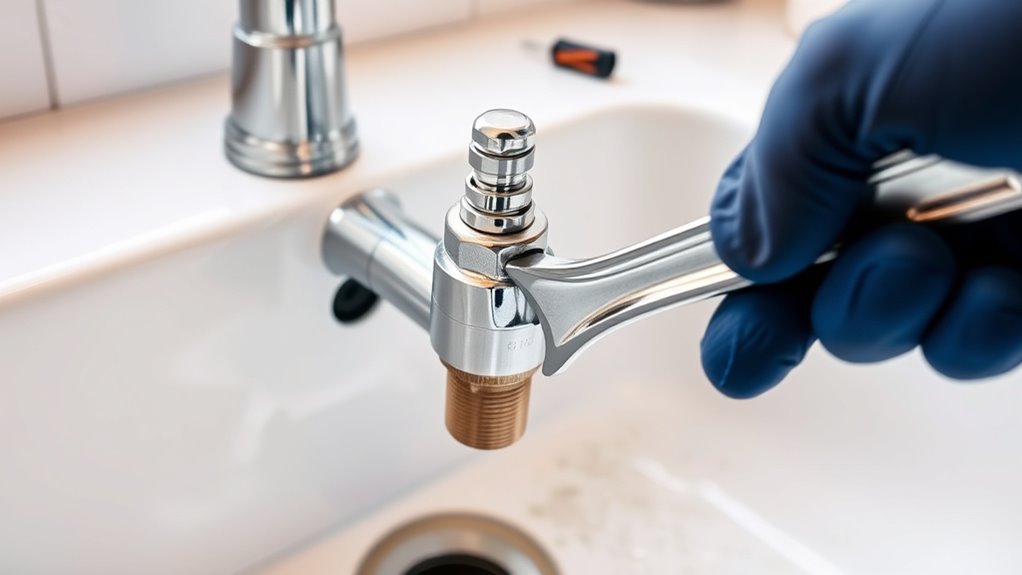
There are several reasons you might need to remove your kitchen faucet, whether it’s for repairs, upgrades, or troubleshooting. If your faucet leaks constantly, removing it lets you inspect and replace worn-out parts.
Upgrading to a modern, more efficient faucet can improve both functionality and look. Sometimes, mineral buildup or corrosion makes it hard to operate or clean your current fixture.
Upgrading your faucet enhances both style and performance, making daily tasks easier and your kitchen more modern.
Removing the faucet can also help when you’re replacing plumbing components or fixing water pressure issues. If you notice leaks behind the wall or under the sink, taking out the faucet gives you better access for repairs.
Whatever your reason, knowing why you need to remove it helps you prepare and handle the process effectively.
Gather Your Tools and Supplies
Before you start removing your kitchen faucet, gather all the tools and supplies you’ll need to make the process smoother. Having everything on hand prevents unnecessary trips to the toolbox and keeps things efficient.
First, get an adjustable wrench to loosen fittings. Second, grab a bucket or towel to catch any water that might leak. Third, have a screwdriver—either flathead or Phillips—ready to remove screws securing the faucet.
You might also want some plumber’s tape for reassembly or replacement parts like a new gasket. Preparing these tools beforehand guarantees a quick, hassle-free removal.
Double-check your faucet’s specific requirements so you won’t miss any essential supplies. Being well-prepared saves time and helps avoid frustration during the process.
Turn Off the Water Supply and Prepare Your Workspace
First, find the main shutoff valve under your sink and turn it off to stop the water.
Then, clear out the area around the sink so you have plenty of space to work.
This will help you stay organized and prevent water from spilling everywhere while you’re working.
Locate Main Shutoff Valve
Locating the main shutoff valve is an essential first step before removing your kitchen faucet. This valve controls water flow to your entire home, so finding it guarantees you can turn off the water quickly.
Start by checking under the sink, where it’s often attached to the wall or floor. If you don’t see it there, look near the water heater or in the basement. Common locations include a dedicated panel or behind an access door.
Here are three key things to look for:
- Pipes running into the wall or floor, indicating where the shutoff might be.
- Valves with handles labeled “Main” or “Water.”
- A box or cover that conceals the shutoff, which you may need to open.
Clear Workspace Area
A clear workspace is key to removing your kitchen faucet safely and easily. Before you begin, turn off the water supply to prevent leaks or water damage. Clear the area around the sink, removing dishes or utensils.
Organize your tools and parts so you’re ready to go. A tidy space helps you work more confidently and reduces stress.
| Calm | Focused | Safe |
|---|---|---|
| Less clutter | Clear mind | Fewer accidents |
| Fewer distractions | Better control | Peace of mind |
| Faster work | Precise movements | Confidence |
Having a clean, organized workspace makes the task smoother and safer. It keeps you in control and helps prevent frustration during the process.
Remove Spray Attachments and Accessories
To remove spray attachments and accessories, start by disconnecting the spray hose from the faucet body. First, locate the spray head and loosen any screws or fittings holding it in place.
Next, gently pull the spray head away from the hose, keeping a towel or bucket handy for any residual water. Finally, inspect the hose for any clips or connectors securing it to the faucet or countertop.
Here’s what to do:
- Loosen and detach the spray head from the hose.
- Remove any mounting screws or brackets holding accessories.
- Disconnect the spray hose from the faucet body, ensuring no water sprays out.
This process clears the way for the faucet removal without damaging nearby parts.
Disconnect Water Lines From the Faucet
Once you’ve removed the spray attachments and accessories, it’s time to disconnect the water lines from the faucet. First, place a bucket or towel under the connections to catch any residual water.
Using an adjustable wrench, loosen the nuts securing the water supply lines to the faucet or shut-off valves. Turn counterclockwise to disconnect. If the fittings are tight or corroded, apply penetrating oil and wait a few minutes before trying again.
Once the connections are loose, carefully detach the lines, keeping the bucket in place. Be prepared for some water to drip out. Check the lines for damage or corrosion and set them aside if you’ll reuse them or plan to replace them with new lines during reinstallation.
Loosen and Remove Mounting Nuts or Bolts
Before you start loosening the mounting nuts or bolts, gather the right tools like a wrench or pliers.
Use a firm, steady motion to turn the nuts counterclockwise. Make sure you don’t strip them.
Proper technique makes removal easier and helps prevent damage to surrounding components.
Tools Needed for Removal
Removing the mounting nuts or bolts that secure your faucet requires the right tools to do the job efficiently. Having these tools ready will make the process smoother and prevent frustration.
Here are the essential tools you’ll need:
- Adjustable wrench to grip and turn nuts and bolts securely.
- Basin wrench designed specifically for tight spaces under sinks.
- Screwdriver (flathead or Phillips) for removing any screws holding the mounting hardware.
Make sure your tools are in good condition for a firm grip. Using the correct tools guarantees you won’t slip or strip the hardware, making your faucet removal faster and easier.
Gather these tools before starting to avoid interruptions during the job.
Proper Nut Loosening Technique
Begin by positioning your adjustable or basin wrench around the mounting nuts or bolts. Verify the wrench’s jaw is snug but not overly tight. Turn the wrench counterclockwise to loosen the nuts.
Apply steady, even pressure. Avoid sudden jerks that could strip the nut or damage surrounding parts. If the nut is stuck, try spraying a penetrating lubricant around it and wait a few minutes before retrying.
Use your wrench for support. If needed, switch to pliers for extra grip. Keep a firm hand and work slowly to prevent slipping. Once the nut moves freely, continue turning until it’s fully loosened.
Carefully remove the nut and set it aside. This prepares you for the next step in faucet removal.
Lift Out the Old Faucet and Check for Sealant Residue
Carefully lift out the old faucet by gripping it firmly and gently wiggling it free from its mounting. Once it’s out, check the area for any leftover sealant or debris. You might find remnants of old plumber’s putty or silicone around the sink opening.
These residues can prevent a proper seal when you install the new faucet. So, it’s important to remove them completely. Look for hardened, crusty material around the base of the faucet hole.
Residues like old putty or silicone can hinder a proper seal; remove them thoroughly for a tight fit.
Also check for gaps or cracks where old sealant has cracked or peeled away. Any remaining blobs of putty or silicone could interfere with a flush fit.
Cleaning this thoroughly will ensure a tight seal for your new faucet.
Clean Sink Surface and Prep for New Faucet
After removing the old faucet and clearing away any leftover sealant, it’s time to give the sink surface a thorough cleaning. Use a non-abrasive cleaner and a sponge or cloth to remove grime, soap scum, and residue.
Rinse the surface with water and dry it completely. This guarantees a smooth, clean area for the new faucet, helping prevent leaks or wobbling.
To stay organized, here’s a quick reference:
| Step | Action | Tips |
|---|---|---|
| 1 | Remove debris and residue | Use a scraper if needed |
| 2 | Clean with a mild cleaner | Avoid harsh chemicals |
| 3 | Rinse thoroughly | Confirm no cleaner remains |
| 4 | Dry the surface | Use a lint-free cloth |
| 5 | Inspect for damage | Fix any cracks or chips |
Install the New Faucet and Secure It Properly
To install the new faucet, start by inserting it into the mounting holes on the sink or countertop, making sure it’s aligned properly. Once in place, tighten the mounting nuts underneath to secure it firmly. Next, check that the faucet is straight and centered before tightening fully.
Here’s what to do:
- Hand-tighten the mounting nuts, then use a wrench to snug them up—just don’t over-tighten.
- Check the faucet’s position and adjust if needed before tightening completely.
- Make sure the faucet is stable and doesn’t move when you gently push or pull it.
This ensures the faucet is securely installed and ready for connecting to the water lines. Proper securing helps prevent leaks and wobbling later.
Reconnect Water Lines, Check for Leaks, and Finalize Installation
Begin by reconnecting the water supply lines to your new faucet, making sure each connection is tight and secure. Turn on the shut-off valves slowly and check for any leaks around the fittings.
If you notice drips or moisture, tighten the connections a little until the leaks stop. Once the water lines are secure, turn on the faucet to verify proper flow and check for leaks at the base and connections.
Let the water run for a few moments to clear out any debris. If you see leaks, tighten fittings as needed. Finally, wipe down the area to remove any excess water or debris.
Make sure everything is secure, and your installation is complete. Your faucet should now be ready for everyday use.
Frequently Asked Questions
Can I Remove a Kitchen Faucet Without Turning off the Water Supply?
You shouldn’t try to remove a kitchen faucet without turning off the water supply. Doing so risks water spraying everywhere, causing damage and potential injury.
First, locate the shut-off valves beneath your sink or the main water supply. Turn them off to stop the water flow.
Then, go ahead with removing the faucet, knowing no water will spill or cause issues. Always prioritize safety and follow proper plumbing steps.
What Tools Are Essential for Faucet Removal?
You’ll need a few essential tools to remove your kitchen faucet. Grab an adjustable wrench to loosen fittings, a basin wrench for hard-to-reach nuts, and an Allen wrench if your faucet has hex screws.
Keep a screwdriver handy for any screws on the faucet itself. Furthermore, have a bucket or towels nearby to catch any water that might drip during the process.
These tools make faucet removal easier and safer.
How Do I Identify the Type of Faucet I Have?
You identify your faucet type by looking at its design and how it’s mounted. Check if it has one handle or two, which tells you if it’s a single-handle or double-handle faucet.
See if it’s mounted on the deck or directly on the wall. Also, look at the shape of the spout and whether it has a pull-out or pull-down spray for added clues.
Pay attention to the connection type, like compression, ball, cartridge, or ceramic disc. Taking pictures or checking the manufacturer’s label can help ensure you identify it accurately.
Is It Necessary to Replace the Mounting Hardware?
Yes, you should replace the mounting hardware if it’s corroded or damaged, like a rusted lock that won’t turn. Fresh hardware makes sure your new faucet is secure and leak-free.
Even if the old hardware looks okay, replacing it can prevent future problems. Using new mounting parts is a small investment that keeps your installation sturdy.
This way, you won’t have to deal with wobbles or leaks down the line.
How Do I Prevent Water Damage During Removal?
You can prevent water damage during removal by turning off the water supply valves first.
Then, open the faucet to let out any remaining water.
Place a towel or bucket under the connections to catch drips.
Carefully disconnect the supply lines, keeping a rag nearby to soak up any leftover water.
Following these steps helps avoid water spills and damage to your cabinets and floor.
Conclusion
Now that you’ve removed and replaced your faucet, your sink is practically a new throne fit for a king or queen!
With just a few simple steps, you’ve turned a stubborn old fixture into a shiny centerpiece that’ll make everyone stare in awe.
Celebrate your DIY victory — your kitchen’s now a sparkling marvel, ready to handle whatever culinary chaos comes its way.
You’re officially a faucet-fixing superhero!