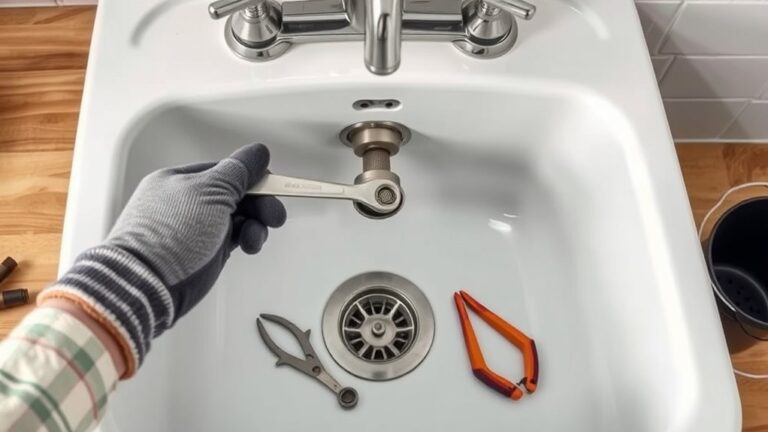
10 Easy Steps to Clean Kitchen Faucet Heads
Many people struggle with keeping their kitchen faucet heads clean and free of mineral buildup. It’s a common frustration, especially when water flow slows down or the faucet starts to look grimy. Don’t worry—you’re not alone in this, and there’s an easy fix.
To clean your kitchen faucet head easily, start by removing the aerator and rinsing it under water, using a small brush for stubborn deposits.
Soak the aerator or faucet head in vinegar for at least 30 minutes to dissolve mineral buildup, then scrub away grime.
Test the water flow and reassemble everything securely. Regular maintenance prevents clogs and keeps your faucet shining—keep exploring to uncover more tips for perfecting your cleaning routine.
Key Takeaways
- Remove the aerator by turning it counterclockwise. Use pliers if it’s really stuck.
- Soak the aerator in white vinegar for at least 30 minutes. This helps dissolve any mineral deposits.
- Use a small brush or toothbrush to scrub away debris from the aerator and faucet head.
- Rinse all parts thoroughly with water. This will wash away vinegar and loosened buildup.
- Reassemble the aerator, reattach it to the faucet, and run water to check for proper flow.
Why Regularly Cleaning Your Kitchen Faucet Matters

Regularly cleaning your kitchen faucet is important because it helps prevent grime, mineral buildup, and bacteria from forming. These can affect both your health and how your sink looks.
Over time, soap scum, hard water stains, and dirt can make your faucet look dull and dirty. These deposits can also clog aerators, which reduces water flow and causes inconvenience.
Bacteria love moist, hard-to-reach spots, so regular cleaning keeps your faucet hygienic. It also helps ensure it works well and stays shiny.
Cleaning your faucet is a simple way to protect your family’s health and make your kitchen a cleaner, safer space. It also helps your faucet last longer and stay looking great.
Gather Your Supplies for an Easy Faucet Clean
Gather all your supplies before you start cleaning to make the process easier.
You’ll want items like a brush, cleaning solution, and gloves to protect your hands.
Having everything ready means your faucet gets cleaned efficiently without any interruptions.
Necessary Cleaning Supplies
To guarantee a smooth and effective cleaning process, gather all the necessary supplies beforehand. You’ll need white vinegar or lemon juice to break down mineral deposits, along with a small bowl or container for soaking the faucet head.
Have a soft cloth or sponge ready to wipe away grime and residue, and a toothbrush or small brush to scrub hard-to-reach areas. You might also want rubber bands or clips to secure a bag of vinegar over the faucet if soaking is needed.
Paper towels or rags can help dry and polish the faucet afterward. Keep in mind, using gentle cleaning agents prevents damage to your faucet’s finish. Preparing these supplies in advance saves time and makes the cleaning process more efficient.
Tools and Protective Gear
Gathering the right tools and protective gear before you start makes cleaning your faucet easier and safer. You’ll want gloves to protect your hands from harsh cleaners and goggles to shield your eyes from splashes.
A small brush or old toothbrush helps scrub away grime, while a microfiber cloth buffs the finish. Keep a basin or bucket nearby for rinsing supplies.
Here’s a quick overview:
| Tool/Protective Gear | Purpose | Tips |
|---|---|---|
| Rubber gloves | Protect skin from chemicals | Use for all cleaning steps |
| Safety goggles | Prevent eye irritation | Wear when scrubbing |
| Small brush | Remove buildup | Use on aerator screens |
| Microfiber cloth | Polish and dry | Finish with for shine |
How to Remove and Clean the Faucet Aerator
Removing the faucet aerator is pretty simple and can really improve your water flow and quality. First, find the aerator at the tip of your faucet spout. Use your hand to turn it counterclockwise.
Removing the faucet aerator is easy and boosts water flow and quality.
If it’s tight, grab it with pliers, but wrap the aerator with a cloth to prevent scratches. Once it’s loose, take it off and check the screen for debris or mineral buildup.
Rinse it under running water and use a brush or toothpick to clear any clogs. Make sure to remove any small parts like washers or screens and keep track of how they fit together.
After cleaning, reassemble the aerator and hand-tighten it back onto the faucet. Turn on the water to check if the flow is clear and steady before finishing.
Soak the Faucet Head in Vinegar to Dissolve Buildup
Soaking your faucet head in vinegar is a quick and easy way to break down mineral deposits and buildup. Just make sure to fully submerge the head. Let it sit for at least 30 minutes for the best results.
This simple method helps loosen grime without risking any damage to your faucet. Proper soaking techniques are key to keeping your faucet clean and functioning well.
Vinegar Effectiveness on Buildup
Vinegar is a powerful and natural solution for breaking down mineral deposits and buildup on your faucet head. Its acetic acid dissolves hard water deposits effectively, helping restore water flow.
To get the best results, use white vinegar because of its acidity and affordability. Soak the faucet head for at least 30 minutes to loosen deposits.
If the buildup is stubborn, extend soaking time up to a few hours. After soaking, rinse thoroughly with water to remove any leftover vinegar and debris.
Vinegar’s acidity targets mineral deposits directly, making it a safe and eco-friendly choice. Regular use prevents buildup from becoming severe, saving you time and effort.
Its natural properties make vinegar an essential part of your cleaning routine.
Proper Soaking Techniques
To effectively dissolve mineral buildup on your faucet head, proper soaking techniques are essential. First, remove the aerator or faucet head and submerge it in a container filled with white vinegar. Make sure the vinegar covers all affected areas.
For stubborn deposits, secure a plastic bag filled with vinegar around the faucet head using a rubber band, and let it soak for at least 1-2 hours. This helps the vinegar break down mineral deposits more effectively.
| Soaking Duration | Best Results |
|---|---|
| 1-2 hours | Loosens light to moderate buildup |
| Overnight | Clears heavy mineral deposits |
| Repeat if needed | Maintains ideal flow and spray pattern |
Scrub Away Mineral Deposits and Grime Effectively
Start by applying a generous amount of white vinegar or a commercial descaling solution directly to the faucet head. Let it sit for about 15 minutes to loosen mineral deposits and grime. Once set, use a soft brush or an old toothbrush to scrub away buildup.
Focus on these key steps:
Prioritize these steps for effective faucet cleaning and mineral buildup removal.
- Target stubborn spots by applying more vinegar directly to areas with heavy deposits.
- Use gentle, circular motions to avoid damaging the surface.
- Pay attention to aerators and small crevices where grime hides.
- Repeat as needed until deposits loosen and grime is removed.
This method guarantees you break down mineral buildup effectively, restoring your faucet’s flow and shine. Stay patient and thorough for the best results.
Rinse and Reassemble Your Faucet
Once you’ve scrubbed away the mineral deposits and grime, it’s time to rinse your faucet thoroughly with clean water. This step makes sure all loosened debris and cleaning residues are washed away, leaving your faucet sparkling and ready for reassembly.
Carefully run water through the spout and spray holes to clear out any remaining dirt. When reassembling, double-check that all parts fit securely to prevent leaks.
Use the table below to remind yourself of the key reassembly steps:
| Step | Tip |
|---|---|
| Reattach parts | Align components properly to avoid damage |
| Tighten connections | Avoid overtightening to prevent leaks |
| Test stability | Verify everything feels secure |
Proper rinsing and careful reassembly will help your faucet function smoothly and look great.
Test Water Flow to Ensure Improvement
After reassembling your faucet, turn on the water to check the flow from both the spout and spray head. See if the water streams smoothly, without sputtering or uneven pressure.
If the flow feels sluggish, here are some things to check:
Make sure all aerators and spray heads are tightly secured.
Look for any remaining debris or blockages in the nozzles.
Ensure the water pressure from your supply line is adequate.
Finally, confirm that no parts were misaligned during reassembly.
Prevent Clogs With Regular Faucet Maintenance
Regular faucet maintenance is essential to prevent clogs and keep your water flow smooth. To do this, regularly remove the aerator and clean it to prevent mineral buildup. Check for debris or sediment that may block water flow and clear it out promptly.
Avoid letting soap scum or hard water deposits accumulate by wiping down the faucet after use. Furthermore, periodically run hot water through the faucet to loosen any deposits inside the pipes.
Keep an eye on water pressure and address any decrease immediately. Using a vinegar solution once a month can help dissolve mineral deposits before they cause clogs.
Consistent upkeep guarantees your faucet stays clear, functions efficiently, and avoids costly repairs down the line.
Troubleshooting Persistent Faucet Problems
When your faucet keeps acting up, it’s important to recognize common problems like leaks or low water flow.
You can often fix these issues with simple troubleshooting tips, such as checking for clogs or worn-out parts.
Common Faucet Malfunctions
Persistent faucet problems often come from common malfunctions that can really frustrate your daily routine. Knowing these issues helps you troubleshoot effectively.
First, a low water flow usually signals clogged aerators or mineral buildup. Second, leaks around the spout or handle typically indicate worn-out washers or faulty cartridges.
Third, inconsistent water temperature can be caused by a malfunctioning mixing valve. Fourth, strange noises when using the faucet might point to loose parts or high water pressure.
Recognizing these malfunctions allows you to target the root cause quickly. Addressing these common issues prevents further damage and keeps your faucet running smoothly.
Regular maintenance, like cleaning aerators and inspecting parts, can save you time and money in the long run.
Effective Troubleshooting Tips
To troubleshoot stubborn faucet problems effectively, start by clearly identifying what’s wrong. Is the water flow low, leaking, or inconsistent? Pinpointing the issue helps you find the right fix faster.
Use the table below to guide your diagnosis:
| Problem | Possible Cause |
|---|---|
| Low water flow | Clogged aerator or supply line |
| Leaking faucet | Worn-out washers or seals |
| Inconsistent pressure | Blocked or damaged cartridge |
| Dripping faucet | Faulty valve or cartridge |
Finding the root cause saves you time and avoids unnecessary repairs. Once you know what’s wrong, you can focus on cleaning, tightening, or replacing the right parts to get your faucet working smoothly again.
Extra Tips to Keep Your Kitchen Faucet Sparkling
Keeping your kitchen faucet sparkling doesn’t have to be a chore. With a few extra tips, you can maintain its shine effortlessly.
First, regularly wipe the faucet with a soft cloth to prevent water spots and soap scum buildup.
Second, avoid harsh chemicals that can damage the finish—stick to mild cleaners or vinegar solutions.
Third, install a water softener if you have hard water to reduce mineral deposits.
Fourth, check for leaks and fix them promptly to prevent corrosion and mineral buildup.
These simple steps not only keep your faucet looking new but also extend its lifespan.
Consistency is key—making these habits part of your routine guarantees your faucet stays sparkling without extra effort.
Frequently Asked Questions
How Often Should I Clean My Kitchen Faucet Head?
You should clean your kitchen faucet head at least once a month to prevent mineral buildup and keep the water flowing nicely.
If you notice reduced pressure or see deposits, it’s a good idea to clean it more often. Regular cleaning helps prevent clogs and keeps your faucet working smoothly.
Using vinegar or a gentle brush makes the cleaning process easier. Staying consistent will keep your faucet clean, hygienic, and in top shape.
Can I Use Lemon Juice Instead of Vinegar?
Yes, you can use lemon juice instead of vinegar to clean your kitchen faucet head. Lemon juice is a natural, effective cleaner that helps break down mineral deposits and grime. Simply soak a cloth or a bag filled with lemon juice around the faucet head, let it sit for a while, then scrub gently.
This method leaves your faucet shiny and fresh-smelling without harsh chemicals. It’s a simple, eco-friendly way to keep your sink looking its best.
What Tools Are Best for Removing Stubborn Mineral Deposits?
You should use a toothbrush or a small, soft-bristled brush to remove stubborn mineral deposits from your faucet head.
A toothpick or needle can help loosen deposits stuck in small holes.
For tougher buildup, a plastic scraper works well without damaging the surface.
Make sure to have a cloth or towel handy to wipe away loosened deposits and keep the area clean during the process.
Is It Safe to Soak the Entire Faucet in Vinegar?
Yes, soaking your entire faucet in vinegar is generally safe if you take some precautions. You should turn off the water supply first, then wrap the faucet in a cloth soaked in vinegar or fill a plastic bag with vinegar and secure it around the faucet with a rubber band.
Avoid prolonged soaking, especially on certain finishes, to prevent damage. Rinse thoroughly afterward to remove any vinegar residue.
How Do I Prevent Future Buildup on My Faucet?
To keep your faucet gleaming and free of stubborn residues, regularly wipe it with a soft cloth after each use—think of it as giving it a gentle hug. Installing a water softener can help if you notice mineral deposits starting to form.
Make sure to clean your aerator monthly to prevent buildup. Avoid harsh chemicals that could wear down the finish. Staying proactive by keeping the area dry helps your faucet shine brightly and work smoothly for years to come.
Conclusion
Think of your faucet as the heartbeat of your kitchen, with its flow symbolizing life and cleanliness. Giving it regular care helps ensure this essential stream stays pure and unfettered.
It’s a simple act that reflects your commitment to a healthy home. Each cleaning renews its promise of freshness and efficiency.
Transform routine maintenance into a ritual of renewal, keeping your faucet shining and functioning at its best.
A well-kept faucet guarantees steady flow, reminding you of the harmony a clean space brings to your daily life.