Install Your Kitchen Sink Drain in 7 Simple Steps
Dealing with a leaky or clogged kitchen sink drain can be frustrating, especially when you’re trying to get dinner on the table or clean up quickly.
Many people struggle with installing or replacing their sink drains, but don’t worry—you’re not alone.
To install your kitchen sink drain in 7 simple steps, start by gathering your tools and materials, then remove the old drain and clean the area.
Assemble and seal the new drain components carefully, connect the drain flange and pipe, and tighten all fittings without overdoing it.
Test for leaks and adjust as needed.
If you keep going, you’ll find helpful tips to guarantee a leak-proof, professional finish on your sink drain.
Key Takeaways
- Gather all the tools and materials you’ll need. Make sure your workspace is ready by turning off the water supply and clearing away any debris.
- Next, remove the old drain. Take your time and clean the surface thoroughly before installing the new drain assembly.
- Assemble the drain parts under the sink. Don’t forget to apply sealant to prevent any leaks.
- Install the drain flange into the sink. Tighten the fittings securely, but be careful not to overtighten.
- Finally, test for leaks. Run water and check all connections. If you spot any leaks, re-tighten or adjust as needed.
Gather Your Tools and Materials for Kitchen Sink Drain Installation
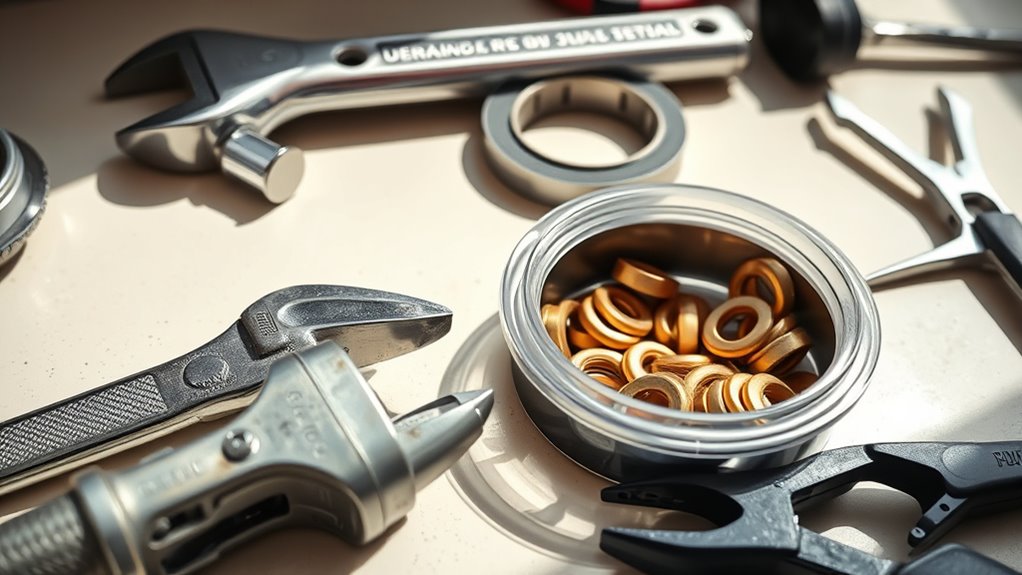
Gather all your tools and materials before starting your kitchen sink drain installation to make the process smoother. You’ll need a pipe wrench, channel lock pliers, plumber’s putty, a bucket, and a rag.
Gather tools and materials beforehand to ensure a smooth kitchen sink drain installation.
Have a new drain assembly ready, including the drain flange, tailpiece, and locknut. Don’t forget Teflon tape or plumber’s tape to seal threaded connections.
Check if you need any extra parts like a gasket or washers, depending on your sink model. Keep everything within easy reach so you don’t have to search for items mid-project.
Getting your tools and materials organized ahead of time saves you time and frustration. Once everything’s set, you’re ready to remove the old drain and prepare for the new installation.
Remove the Old Sink Drain and Prepare the Area
Before removing the old sink drain, make sure to turn off the water supply so you don’t make a mess.
Clear out any debris from the drain area to give yourself easy access to the pipes.
This will help you work safely and efficiently as you get ready for the installation.
Turning Off Water Supply
To begin removing the old sink drain, start by turning off the main water supply to prevent any leaks or water damage. This step guarantees you won’t be caught off guard by unexpected water flow while working.
Before proceeding, double-check that the water is fully shut off by turning on the faucet and confirming no water comes out.
Here are a few tips to keep in mind:
- Gather your tools beforehand so you’re ready to go.
- Make sure the area around the sink is dry to avoid slipping.
- Have a bucket nearby to catch any residual water that may drip.
Taking these precautions helps you work smoothly and safely, setting a solid foundation for installing your new sink drain.
Clearing the Drain Area
Start by removing any remaining water from the drain area to prevent messes. Use a sponge or cloth to soak up water and dry the space thoroughly.
Next, loosen and remove the old sink drain with a wrench or pliers, turning counter-clockwise. Check the area for debris, old gasket material, or corrosion, and clean it off.
Preparing the surface helps ensure a tight seal for the new drain. To stay organized, here’s a quick reference:
| Step | Tool Needed | Key Tip |
|---|---|---|
| Remove water | Sponge or cloth | Keep the area dry for a clean fit |
| Loosen drain | Pliers or wrench | Turn counter-clockwise |
| Clean surface | Scraper or brush | Remove old gasket and debris |
| Inspect area | Your eyes | Confirm no damage or corrosion |
| Dry the area | Cloth | Prevent leaks with proper seal |
This will clear the way for a smooth installation.
Assemble and Seal the New Drain Components
First, gather all the necessary parts to make sure you have everything before you start.
Next, connect the drain components securely, following the manufacturer’s instructions.
Finally, apply sealant carefully to prevent leaks and create a watertight seal.
Gather Necessary Parts
Gather all the necessary parts for your kitchen sink drain before you start the installation. This way, you’ll have everything on hand and avoid any interruptions.
You’ll usually need a drain assembly kit, which includes the strainer, gasket, and locknut. Also, gather pipe sections and connectors that fit your plumbing. Don’t forget plumber’s putty or sealant to prevent leaks.
Check your sink’s specifications to make sure the parts are compatible. Lay everything out on a clean surface for easy access. Double-check the instructions that come with your kit so you understand what each piece does.
Having all the parts ready makes the process smoother and helps you avoid mistakes. Once everything’s gathered, you’re all set to assemble and seal the components properly, ensuring a leak-free, secure installation.
Connect Drain Components
Begin by assembling the drain components underneath the sink, making sure each piece is clean and free of debris. Fit the tailpiece into the sink drain opening, then attach the trap adapter or slip nut to connect the tailpiece to the P-trap.
Tighten the slip nuts securely, but don’t over-tighten, as this can crack plastic parts. Connect the P-trap to the drain extension or waste pipe, ensuring everything lines up properly.
Make sure the washers or gaskets are in place to prevent leaks. Check that all connections are snug and properly seated. Take your time to ensure each piece is aligned correctly and the fittings are tight enough to prevent leaks but not so tight that they damage the components.
Apply Sealant Properly
To guarantee a leak-proof connection, carefully apply sealant to the threaded or gasketed areas of your drain components before final assembly. Use a small amount of plumber’s putty or silicone sealant, making sure you cover all mating surfaces evenly.
Too much sealant can cause messes and blockages, while too little might lead to leaks. Once you’ve applied the sealant, tighten the fittings securely but avoid over-tightening, which can damage the seals.
Remember, a good seal is key to preventing future drips and water damage. Use a consistent bead of sealant around the gasket or threads, then wipe away any excess with a cloth for a clean finish.
Double-check the connections before tightening fully to ensure everything is properly aligned and sealed.
Install the Drain Flange and Connect the Drain Pipe
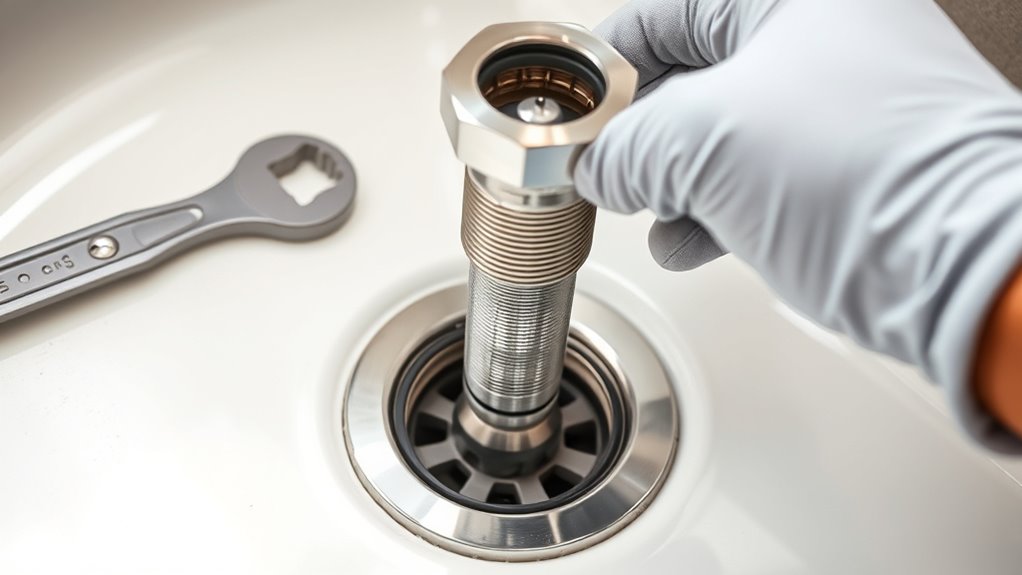
Start by inserting the drain flange into the sink’s drain opening, making sure the rubber gasket is properly seated to create a watertight seal. Push the flange down firmly so it sits flush against the sink’s surface.
From underneath, thread the lock nut onto the flange’s threaded stem and tighten it by hand. Use pliers to secure it further, but don’t overtighten, as this could crack the sink.
Hand-tighten the lock nut, then use pliers carefully—avoid overtightening to prevent cracking the sink.
Next, connect the drain pipe to the flange’s tailpiece. Slide the slip nut and washer onto the pipe, then tighten the nut onto the flange’s threaded fitting. Make sure the connection is snug but not overly tight to prevent leaks.
Finally, adjust the pipe alignment if needed, ensuring the drain slopes toward the trap for proper drainage.
Secure and Tighten All Drain Connections
Make certain all drain connections are secure by tightening each slip nut and fitting properly. Loose connections can cause leaks or water damage, so double-check each joint. Use a wrench or pliers to tighten fittings, but avoid overtightening, which could crack the pipe or fittings.
As you tighten, verify that washers and gaskets stay in place to prevent leaks. Here are some tips to keep in mind: check for any visible gaps or misalignments after tightening. Use plumber’s tape on threaded connections for extra security.
Test each connection by gently tugging to confirm they’re snug. Taking a few extra moments now will save you headaches down the line. Properly secured connections guarantee your sink stays leak-free and functioning smoothly.
Test for Leaks and Make Adjustments
Once all drain connections are tightened and secure, it’s time to check for leaks. Turn on your faucet and let water run into the sink. Watch all the joints and connections carefully.
If you see drips or water escaping, tighten the fittings a bit more or reseal with plumber’s tape if needed.
| Leak Detected? | Action to Take |
|---|---|
| Yes | Tighten fittings or reseal |
| No | Move on to the next step |
| Minor leaks | Add extra sealant |
| Major leaks | Disassemble and reassemble |
| Persistent | Call a professional |
Making sure your drain is leak-free helps prevent water damage and keeps your kitchen dry. Take your time and double-check all the connections.
Troubleshoot Common Drain Leaks and Finish Up
Even after securing all connections, leaks can still happen if fittings aren’t sealed properly or if debris is blocking the seals. To fix this, carefully check each connection. Tighten fittings gently because over-tightening can damage seals. Also, look for debris or old plumber’s putty that might prevent a good seal.
Here are some quick tips:
- Re-tighten fittings gradually, avoiding over-tightening.
- Clean all seals and threads before reassembling.
- Use plumber’s tape on threaded connections for a better seal.
Once you’ve fixed the leaks, run water to test your work. Check all joints for drips. If leaks still happen, take everything apart and double-check the fittings. When everything stays dry, you’ve successfully finished your sink drain installation.
Frequently Asked Questions
How Do I Prevent Future Clogs in My New Sink Drain?
To prevent future clogs, use a drain strainer to catch food and debris, and clean it regularly. This simple step helps keep big particles out of your pipes.
Avoid pouring grease or oil down the drain, since they solidify and can cause blockages over time. Instead, let them cool and dispose of them in the trash.
Run hot water after each use to help break down soap scum and residue. Doing this regularly keeps your drain flowing smoothly.
Periodically flush the drain with a mixture of baking soda and vinegar. It’s a natural way to keep your pipes clean and prevent stubborn clogs.
These habits will help your sink drain smoothly and save you from future headaches.
Can I Install a Sink Drain Without Professional Tools?
Yes, you can install a sink drain without professional tools if you’re comfortable with basic plumbing.
You’ll need a few simple tools like a wrench, pliers, and a screwdriver, which are usually available at home or affordable at hardware stores.
Follow the manufacturer’s instructions carefully, work step-by-step, and make certain all connections are tight to prevent leaks.
Take your time, and you’ll be able to do it successfully.
What Is the Average Cost to Replace a Kitchen Sink Drain?
Replacing a kitchen sink drain usually costs between $150 and $350. The total depends on the drain type, material, and whether you hire a pro or do it yourself.
If you hire a plumber, labor costs are usually the biggest part of the bill. Doing it yourself can save money, with parts typically costing between $10 and $50.
Be ready for extra repairs if any issues come up during the process.
How Long Does a Typical Drain Installation Take?
A typical drain installation usually takes about 1 to 2 hours. It’s a good idea to set aside enough time to carefully remove the old drain, prepare the new parts, and make sure everything is sealed properly.
If you’re experienced, it might go a bit faster. But if you run into unexpected issues or have to work around tight spaces, it could take longer. Planning for a couple of hours helps ensure you’re not rushed and can do the job right.
Are There Eco-Friendly or Biodegradable Drain Sealing Options?
Yes, there are eco-friendly and biodegradable drain sealing options available. You can choose seals made from natural materials like cork, bamboo, or biodegradable rubber, which break down safely over time.
These options help reduce environmental impact compared to traditional synthetic seals. When selecting a seal, make sure it fits well and provides a watertight seal to prevent leaks while supporting your eco-conscious choices.
Conclusion
Now that you’ve completed the installation, your sink is ready for use. But remember, even the tiniest leak can cause bigger problems down the line. Keep a close eye on your drain over the next few days, and don’t hesitate to revisit your work if needed.
Sometimes, the smallest adjustments make all the difference. With patience and attention, you’ve set the stage for a leak-free, trouble-free kitchen. Are you prepared for what’s next with your new kitchen sink drain?