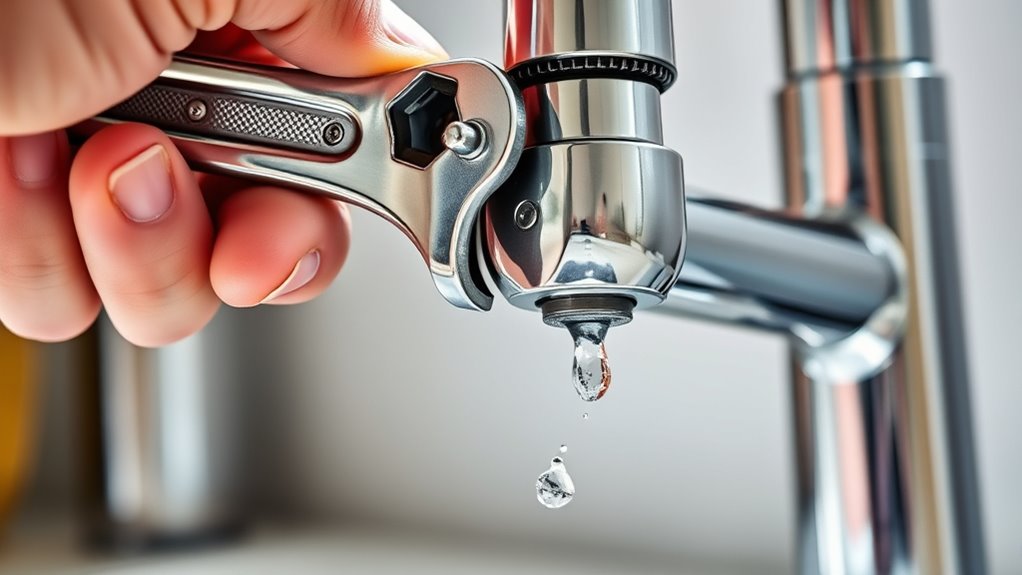
7 Steps to Fix a Leaky Kitchen Faucet
Dealing with a leaky kitchen faucet is more common than you might think, and it can be pretty frustrating. Many people struggle with constant dripping sounds or wasting water without even realizing it.
The good news is, fixing a leaky faucet is often straightforward, and you don’t always need a professional to get the job done.
First, identify where the leak is coming from and gather the necessary tools like a wrench, screwdrivers, and replacement parts.
Then, turn off the water supply and prepare your workspace.
Disassemble the faucet carefully to access internal components, check for damage, and replace worn parts like washers or O-rings.
Reassemble the faucet tightly, turn the water back on, and test for leaks.
If issues persist, there are key signs it’s time to call in a professional.
Key Takeaways
- Turn off the water supply and make sure to relieve any pressure before you start disassembling the faucet.
- Next, remove the handles and take a look at the internal parts like washers and O-rings. These are often the culprits behind leaks.
- Check for any signs of corrosion, cracks, or wear and tear on the parts. If something looks damaged, it’s best to replace it.
- When reassembling, make sure all the pieces fit snugly. Be careful not to over-tighten, as that can cause more problems.
- Finally, turn the water back on and watch for leaks. If it’s still dripping, double-check your work or replace additional parts if needed.
Identify Why Your Faucet Is Leaking and Gather Your Tools
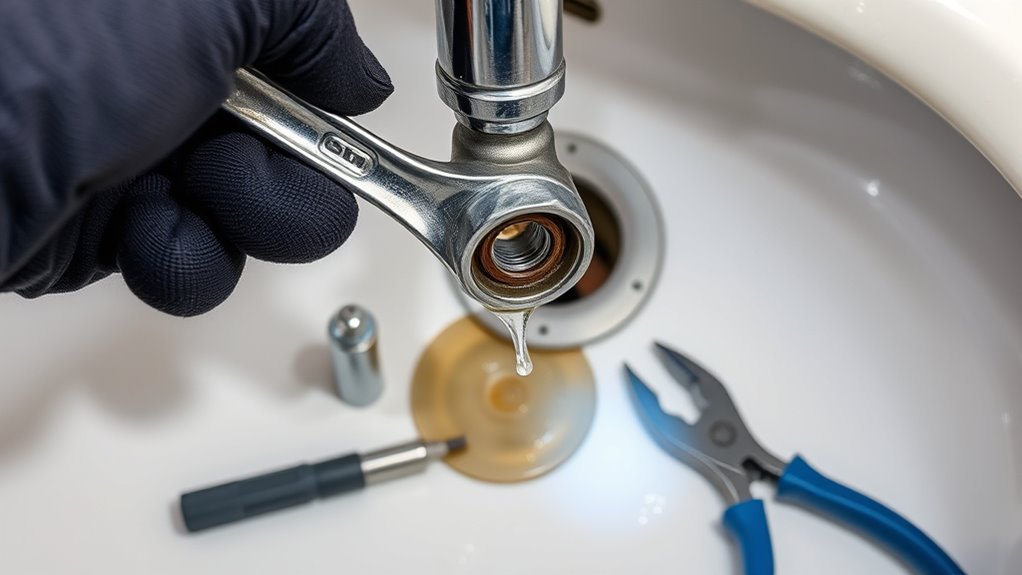
Before you start fixing your leaky faucet, it’s important to figure out what’s causing the leak and gather the right tools. Take a close look at the faucet—listen for drips, check for water pooling, or spot any visible cracks.
Try to identify if the leak is coming from the spout, handle, or base. Once you know what’s wrong, gather your tools: an adjustable wrench, screwdrivers, replacement washers, O-rings, and some plumber’s grease.
Identify if the leak is from the spout, handle, or base before gathering your tools and fixing it.
Having everything ready saves you time and prevents multiple trips to the hardware store. If possible, check your faucet’s model so you get the correct replacement parts.
Properly identifying the problem helps you fix it efficiently. Preparing your tools beforehand makes the repair smoother and avoids frustration or delays.
Turn Off Water and Prepare Your Workspace
To avoid water damage and make your repair safer, it’s essential to shut off the water supply before starting any work on your faucet. First, locate the shut-off valves under the sink. Next, turn them clockwise until they stop to cut off water flow. Then, open the faucet handle to release any remaining water pressure.
Finally, clear the area around the sink, removing any items that could get in your way. Here’s what you should do:
- Find and turn off the shut-off valves under the sink
- Open the faucet to drain remaining water
- Gather your tools and parts nearby
- Place a towel or bucket beneath the area to catch any drips
This process guarantees a dry, safe workspace for your repair.
Take Your Faucet Apart to Access Internal Parts
Carefully remove the faucet handles to access the internal parts. Use the right tools to avoid damaging the components.
Once the handles are off, you can safely examine and replace the faulty parts.
Remove Faucet Handles Carefully
Gently remove the faucet handles to access the internal components. You’ll need to loosen or unscrew the handle screws carefully to avoid damaging any parts. Once loose, lift the handles straight up, being cautious not to force them if they resist.
Picture these steps:
- Grasp the handle firmly with your hand.
- Use a screwdriver to unscrew the mounting screw.
- Carefully lift the handle, keeping an eye on any clips or washers.
- Set the handle aside in a safe spot to prevent damage.
This gentle approach prevents parts from breaking or becoming misaligned. Take your time, and if you encounter resistance, double-check for hidden screws or clips before proceeding.
Access Internal Components Safely
Once you’ve removed the handles, you can get to the internal parts of your faucet. Carefully look for any hidden screws or clips that might be holding the cartridge, valve, or other parts in place.
Use a wrench or pliers if needed, but be gentle. Avoid using too much force so you don’t damage anything. Keep all small parts, like O-rings and seals, in a safe container so they don’t get lost.
Before you go any further, turn off the water supply. This helps prevent leaks or water damage as you work. Handle all components gently to avoid cracks or breakage.
Once the internal parts are exposed, take a moment to see how everything fits together. This careful approach makes replacing or fixing parts easier and helps prevent new issues.
Check and Replace Worn or Damaged Components
Inspect all the components for signs of wear, corrosion, or cracks. If you notice any damaged parts, identify which ones need replacing.
Replacing faulty components will help stop the leak and restore proper faucet function.
Inspect for Wear and Tear
Over time, wear and tear can cause the internal components of your kitchen faucet to degrade, leading to leaks or drips. It’s important to carefully inspect these parts for damage.
Look for cracked or corroded rubber washers that no longer seal tightly. Also, check for worn-out O-rings that have become brittle or misshapen.
Inspect the valve stems for rust or pits that can hinder proper operation. Damaged or deformed cartridges that control water flow should also be replaced.
Be on the lookout for any signs of mineral buildup or corrosion. If you notice any of these issues, it’s a clear sign that you need to replace the worn parts.
Addressing these issues early can prevent further damage and keep your faucet working smoothly.
Identify Damaged Parts
To identify damaged parts in your faucet, carefully examine each component for signs of wear or breakage. Look for cracks, corrosion, or mineral buildup on the spout, handles, and valve assembly. Check the O-rings and rubber washers for cracking, brittleness, or signs of leakage.
Inspect the cartridge or ceramic disc for any chips, warping, or difficulty moving. If you notice any corrosion or mineral deposits, it could be affecting the part’s function. Pay close attention to areas where water leaks or drips persist despite turning off the faucet.
Damaged or worn parts often cause leaks, so identifying these issues early helps you determine what needs replacing. A thorough visual inspection guarantees you target the right components for repair, saving time and effort.
Replace Faulty Components
Once you’ve identified the damaged parts, the next step is to replace them with new components to stop the leak and restore proper function. Start by shutting off the water supply and draining any remaining water.
Then, carefully remove the faulty parts. Here are the key components to replace:
- O-rings, small rubber rings that seal between parts and prevent leaks.
- Cartridge, the valve inside that controls water flow and can wear out.
- Washers, flat rubber or metal discs that create a seal.
- Valve stems, the part that moves when you turn the handle, sometimes corroded or damaged.
Replace each component with a new one of the same size and type. Reassemble the faucet carefully, making sure all parts fit snugly.
Reassemble the Faucet and Test for Leaks
Begin by carefully reassembling the faucet, making sure each part fits securely in its designated spot. Tighten all screws, nuts, and connections, but be careful not to over-tighten and cause damage.
Once everything is in place, slowly turn on the water supply. Watch the faucet as you run water through it, and look for any signs of leaks around the base, spout, or connections.
Turn on water slowly, watch for leaks around the base, spout, and connections to ensure proper reassembly.
Pay close attention to areas where you previously saw issues. If you notice any dripping or moisture, turn off the water and double-check your fittings.
When no leaks are visible, run the water for a few minutes to make sure everything works smoothly. If the faucet stays leak-free, you’ve successfully finished the reassembly and testing.
What to Do if the Leak Persists or Drips Continue
If your faucet still drips after reassembly, it’s important to find out what’s really causing the problem before trying anything else. Start by inspecting the valve seat for any debris or damage that might be causing the leak.
Next, check the O-rings for cracks or signs of wear. Then, look at the cartridge or washer for deterioration or damage. Lastly, make sure all connections are tight and sealed properly.
Here’s what you should do:
First, visualize removing the handle to get access to the internal parts.
Next, imagine wiping away any mineral deposits or grime from the seat.
Then, picture replacing worn O-rings or washers.
Finally, envision tightening fittings to stop leaks at the base.
When to Call a Plumber for Persistent Leaks
Persistent leaks that refuse to stop despite your efforts often point to a more complex problem that needs a professional to fix. If you’ve replaced washers, tightened fittings, and the leak still persists, it’s time to call in a plumber. Watch for signs like continuous dripping, rising water bills, or water pooling under the sink.
Delaying repairs can lead to more damage or mold growth, so don’t wait too long.
| Leak Severity | Signs to Call a Plumber | Potential Issue |
|---|---|---|
| Mild | Leak persists after fixes | Faulty valve or cartridge |
| Moderate | Leak worsens over time | Cracked pipe or fitting |
| Severe | Water damage or flooding | Major pipe damage or corrosion |
Pay attention to these signs, and don’t hesitate to seek professional help when needed.
Frequently Asked Questions
How Often Should I Inspect My Kitchen Faucet for Leaks?
You should inspect your kitchen faucet for leaks at least once a month. Regular checks help you catch drips or leaks early, preventing water waste and potential damage.
Look for dripping sounds, water stains, or decreased water pressure. If you notice any signs, address them promptly.
Staying proactive keeps your faucet functioning smoothly, saves water, and avoids costly repairs down the line.
Can I Fix a Leaky Faucet Without Turning off the Water Supply?
Did you know that ongoing leaks can waste over 3,000 gallons of water annually?
You shouldn’t try fixing a leaky faucet without turning off the water supply.
Doing so risks water spraying everywhere, causing damage and mess.
Always shut off the water valve before attempting repairs.
This keeps you safe, prevents water waste, and makes the job much easier.
Rushing without turning off the water can lead to bigger problems.
What Are Common Causes of Faucet Leaks Besides Worn Parts?
Besides worn parts, mineral buildup can cause leaks by clogging or damaging the valve seat. This happens when minerals from hard water accumulate over time.
Loose or improperly tightened fittings can also be a culprit. They often lead to leaks because they aren’t sealing properly.
A damaged or corroded O-ring or washer might not seem worn out but can still cause leaks, especially as they age or if your water quality is poor.
Even if the parts look fine, a cracked or warped valve seat or cartridge can cause leaks. Damage like this can happen without visible wear.
How Long Does a Typical Faucet Repair Take?
A typical faucet repair usually takes about 30 minutes to an hour, but it really depends on how complicated the problem is and how much experience you have.
If you’re familiar with plumbing, you might get it done faster. But if you need to gather tools or troubleshoot issues, it could take longer.
Be patient and work carefully. First, turn off the water supply, then carefully replace or fix the faulty parts.
Rushing through it could cause more damage or leaks, so take your time and follow each step.
Are There Eco-Friendly Ways to Reduce Water Wastage From Leaks?
Yes, you can reduce water wastage from leaks eco-friendly by fixing leaks promptly, which saves water and energy. Use water-efficient fixtures like low-flow aerators and dual-flush or pressure-assisted toilets.
Catch drips early and consider installing smart leak detectors that alert you of leaks immediately. Furthermore, reuse greywater for outdoor watering or cleaning, and practice mindful water use habits to minimize unnecessary consumption and waste.
Conclusion
Think of your faucet as a fragile heart. Once it starts to leak, it signals trouble inside.
By following these steps, you’re mending its beat, restoring flow, and preventing further damage.
But sometimes, despite your efforts, the leak persists like a stubborn echo.
In those moments, don’t hesitate to call in a professional. Sometimes, only a skilled hand can truly silence the drip.
This way, your plumbing’s rhythm can return to harmony.
Remember, for persistent issues, seeking help from a professional ensures your leak gets fixed right the first time.