Easy Guide to Paint Kitchen Cabinets Without Sanding
Many homeowners dream of giving their kitchens a fresh look but dread the hassle of sanding. You’re not alone—most people struggle with the prep work and fear it’ll be too complicated or messy.
You can easily paint your kitchen cabinets without sanding by starting with thorough cleaning to remove grease and dirt.
Use a high-quality bonding primer to guarantee good adhesion and a smooth finish.
Apply thin coats of water-based or latex paint with a foam roller or brush, working in the grain and maintaining a wet edge.
If you want expert tips and step-by-step instructions, keep going—you’ll find everything you need for a professional look.
Key Takeaways
- Start by cleaning your cabinets really well to get rid of any grease and dirt. This step is key for the paint to stick properly.
- Next, use a high-quality bonding primer. It helps the paint grip better without needing to sand the surface.
- When applying the paint, use thin coats of water-based or latex paint. A foam roller works great for large areas, and a small brush can handle the details.
- Keep your brush or roller wet as you work to avoid uneven edges. Smooth out any drips right away to get that professional-looking finish.
- Let the paint dry completely and give it enough time to cure before putting everything back in place. If you notice chips or scratches later, just do some touch-ups.
Do I Need to Sand Cabinets Before Painting?
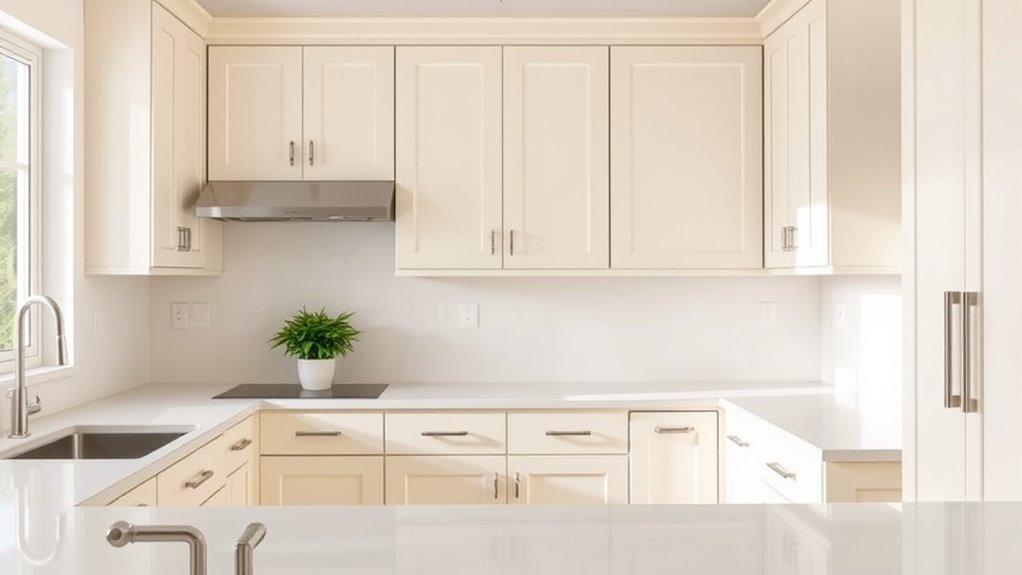
Many homeowners wonder if they need to sand their cabinets before painting. The short answer is: not always.
If your cabinets have a smooth, glossy surface or are painted with a durable finish, sanding might be unnecessary. Skipping sanding can save you time and effort.
However, if your cabinets are stained, have peeling paint, or show rough spots, light preparation is essential.
In these cases, a quick clean and a bit of sanding help the new paint stick better and last longer.
You don’t need to strip or sand deeply—just enough to create a slightly rough surface for the paint to grip.
This approach makes your painting process easier without sacrificing a professional look.
How to Clean and Prepare Cabinets for No-Sand Painting
Start by removing all grease, dirt, and grime from your cabinets to make sure the paint sticks properly. Use a gentle degreaser or a mix of warm water and dish soap, then wipe everything down with a clean cloth.
Next, rinse thoroughly to wash away any soap residue. Dry the cabinets completely with a towel to prevent moisture issues. To check if the surface will hold paint well, lightly sand any glossy or smooth areas—no need for full sanding.
Here’s a quick overview:
| Step | Tools Needed | Purpose |
|---|---|---|
| Clean with degreaser | Sponge or cloth | Remove grease and dirt |
| Rinse | Water and cloth | Eliminate soap residue |
| Dry thoroughly | Towel | Prevent moisture problems |
| Light sanding | Fine-grit sandpaper | Improve paint grip (if needed) |
| Check surface | Visual inspection | Ensure surface is smooth and clean |
Choosing the Best Primer and Paint for a Smooth Finish
Choosing the right primer and paint is key to getting a smooth, professional-looking finish on your kitchen cabinets. Start with a high-quality, bonding primer made specifically for cabinetry to ensure good adhesion and prevent chipping.
Use high-quality bonding primer for a durable, professional cabinet finish.
Look for primers that block stains and odors, especially if your cabinets have discoloration or knots. For the paint, go for a durable, semi-gloss or satin finish, which is easy to clean and looks sleek.
Choose a water-based or latex paint for quick drying and low odor. Use a paint with good leveling properties to minimize brush or roller marks, ensuring a smooth surface.
Investing in quality products might cost a bit more, but it guarantees a professional look and long-lasting results.
Applying Bonding Primer for Better Adhesion
Applying a bonding primer is essential to ensure your paint sticks firmly to the cabinet surface, especially if you’re working with smooth or glossy finishes. This primer creates a strong bond between the surface and your paint, helping prevent peeling or chipping over time.
To get the best results, apply the primer evenly with a brush or roller, making sure to cover all areas thoroughly. Let it dry completely before moving on to painting. Using the right bonding primer for kitchen cabinets guarantees a durable and professional-looking finish.
Here’s a quick comparison to help you choose:
| Primer Type | Best For | Drying Time |
|---|---|---|
| Water-based | Smooth, glossy surfaces | 1-2 hours |
| Oil-based | Stains, uneven surfaces | 4-6 hours |
| Bonding Primer | Difficult surfaces, laminate | 2-4 hours |
| Multi-surface | Various surfaces | 2-3 hours |
This step helps create a solid foundation for your paint job.
How to Apply Paint Without Sanding for a Flawless Look
After making sure your surface has a good bonding primer, you can get a smooth, professional finish without sanding. Pick a high-quality, self-leveling paint made for cabinets or furniture.
Use a high-density foam roller for large areas and a small brush for corners and details. Apply the paint in thin, even coats, working with the grain to avoid streaks. Keep a wet edge to prevent lap marks, and don’t rush the drying time between coats.
If you see drips or uneven spots, gently smooth them out with a clean, damp brush before the paint dries. Remember, patience is key—multiple thin coats will give you a flawless, durable finish without sanding.
Tips for Achieving a Professional Finish With Minimal Tools
Achieving a professional-looking finish with minimal tools is totally doable if you focus on proper technique and prep. Start with a clean, dust-free surface to ensure smooth paint application.
Use good-quality brushes or foam rollers to reduce streaks and brush marks. Work in thin, even coats because thick layers can cause drips and an uneven finish.
Keep your tools clean and well-maintained during the process to avoid debris on the surface. Use painter’s tape to protect edges and hardware, helping you get sharp lines and a polished look.
Good lighting is also key. It helps you spot missed spots or uneven areas as you go. With these simple tips, you can get a sleek, professional finish without a big toolkit.
Drying and Curing Times for Painted Cabinets
Once you’ve finished painting your cabinets, it’s important to give the paint enough time to dry and cure properly. This is key to getting a durable, professional-looking finish.
Usually, your cabinets will be dry to the touch within 24 hours, but this can vary based on the type of paint and humidity levels. To ensure the paint fully cures, wait at least 7 days before using or cleaning your cabinets heavily.
During this curing period, avoid harsh cleaning or scrubbing, as the paint needs time to harden and bond properly. If you’re in a rush, you can use a fan or dehumidifier to help speed up the drying process, but don’t rush the curing. Patience is really important for long-lasting, beautiful cabinets.
How to Maintain Your Painted Cabinets for Longevity
To keep your painted cabinets looking their best for years to come, regular maintenance is key. Proper care helps prevent chipping, fading, and dirt buildup, so they stay attractive and durable.
Clean spills right away with a soft, damp cloth to avoid stains. Use gentle, non-abrasive cleaners to protect the finish. Stay away from harsh chemicals and too much moisture, which can weaken the paint over time.
It’s a good idea to regularly check for chips or scratches. Touch up those spots early to stop further damage. Applying a light coat of wax or furniture polish now and then can boost the shine and add extra protection.
Troubleshooting Common Issues When Painting Cabinets Without Sanding
When painting cabinets without sanding, you might run into issues like poor paint adhesion, surface imperfections, or the paint not lasting as long. Tackling these problems early helps ensure a smooth, durable finish.
Let’s look at some simple solutions to keep your cabinets looking their best.
Adhesion Problems and Solutions
Adhesion issues are a common challenge when painting kitchen cabinets without sanding, but they can often be prevented with the right preparation. To make sure your paint sticks well, start with a clean, degreased surface.
Use a high-quality primer designed for glossy or smooth surfaces to improve adhesion. Don’t skip this step, even if you’re using a bonding paint. Also, make sure to paint in good conditions—avoid high humidity or extreme temperatures.
Clean thoroughly before painting. Use a suitable primer for your surface. Apply paint in proper temperature and humidity. Avoid rushing the drying process.
Following these tips helps create a solid bond, preventing peeling or chipping down the line.
Surface Imperfections Handling
Dealing with surface imperfections is a common hurdle when painting kitchen cabinets without sanding, but many issues can be easily fixed with the right techniques. Small dents or scratches can be filled with a high-quality wood filler, then smoothed out with a damp cloth.
For uneven surfaces, lightly sanding with a fine-grit sandpaper after the filler dries helps create a smoother base. If you notice brush strokes or drips, use a high-quality brush or foam roller, applying thin coats and keeping a wet edge to avoid marks.
Blemishes or rough patches can be gently sanded or smoothed with a damp sponge. Always clean the surface thoroughly before touch-ups, and give everything enough time to dry. This will help you achieve a flawless finish.
Paint Durability Challenges
Painting cabinets without sanding can lead to durability issues if you don’t address common challenges early on. Without proper preparation, the paint might peel, chip, or fade sooner than expected. To avoid these problems, pay attention to the surface condition and your application techniques.
Here are some key challenges to watch for:
- Poor adhesion from greasy or waxy surfaces
- Not cleaning the surface properly before painting
- Using the wrong type of paint or primer
- Applying coats that are too thick or uneven
Making sure the surface is thoroughly cleaned, choosing the right products, and applying thin, even layers can make a big difference in durability. Remember, even if you skip sanding, proper prep and technique are essential for long-lasting results.
When to Call a Professional or Try Alternative Methods
If your project seems too complicated or you’re unsure about your skills, it’s a good idea to consider hiring a professional.
For smaller or simpler jobs, trying alternative methods might save you time and frustration.
Trust your judgment to decide when it’s best to get expert help or go ahead on your own.
Assess Project Complexity
Before you start painting your kitchen cabinets without sanding, it’s important to evaluate how complex the project might be. Some jobs are pretty easy, while others might need a pro or different methods.
Think about these factors:
- Existing cabinet condition: Are they heavily chipped, peeling, or damaged?
- Type of finish: Are they coated with a glossy or lacquered surface that’s tough to paint over?
- Material: Are they made of laminate, veneer, or solid wood? This affects how well the paint will stick.
- Time and tools: Do you have enough time, supplies, and experience to handle tricky surfaces or stubborn finishes?
If any of these points seem challenging, it’s a good idea to call in a professional or explore other techniques. Doing a proper assessment helps ensure your project looks great and lasts a long time.
Consider Skill Level
When you assess your skill level, you’ll get a clearer idea of whether you should tackle the project yourself or bring in a professional. If you have experience with painting and a steady hand, you might feel confident to handle it.
However, if you’re new to DIY projects or unsure about your techniques, hiring a professional can save you time and avoid costly mistakes. Consider the complexity of your cabinets and your comfort with tasks like surface preparation, brushwork, and clean-up.
If you’re hesitant or lack the necessary tools, it’s better to call in an expert. Remember, a professional can guarantee a smooth, high-quality finish, especially for intricate or large-scale projects.
Your skill level ultimately determines whether you execute the job or seek expert help.
Final Tips for a Durable and Beautiful Kitchen Cabinet Makeover
Achieving a durable and beautiful kitchen cabinet makeover depends on proper finishing techniques and thoughtful maintenance. Paying attention to the final steps can really make a difference in how long your paint lasts.
Make sure to give your cabinets enough time to dry and cure before you start using them. This helps the paint set properly and last longer.
Regular cleaning with gentle, non-abrasive cleaners will keep your cabinets looking fresh and prevent damage. Using cabinet liners or protective pads is also a good idea to prevent scratches.
If you notice any chips or scuffs, touch them up right away. This helps maintain a smooth, beautiful finish for years to come.
Wrapping Up: Your Easy Guide to No-Sand Cabinet Painting
To guarantee your no-sand cabinet painting project is a success, keep these final tips in mind. Regular maintenance helps preserve your finish, and knowing how to troubleshoot common issues can save you time and frustration.
With these steps, you’ll enjoy a beautiful, long-lasting transformation.
Final Tips for Success
As you wrap up your project, keep these final tips in mind to guarantee a smooth and successful finish. First, make sure you remove any painter’s tape carefully before the paint fully cures to avoid peeling.
Second, avoid heavy use of the cabinets immediately; give the paint at least a few days to cure fully. Third, inspect your work for any uneven spots or drips and touch them up promptly.
Finally, keep your workspace well-ventilated to speed up drying and reduce odors. Use gentle cleaning methods to preserve your finish and avoid excessive moisture around freshly painted cabinets.
Store touch-up supplies nearby for quick fixes and follow manufacturer drying times for the best results.
Maintaining Your Finish
Maintaining the finish on your painted cabinets is key to keeping them looking fresh and vibrant for years to come. Regular cleaning is essential; use a soft cloth or sponge with mild soap and water to wipe away dirt and grease.
Avoid harsh chemicals or abrasive scrubbers, as they can damage your paint. After cleaning, dry the surfaces thoroughly to prevent moisture buildup.
To protect your finish, consider applying a clear sealant or topcoat every few years, especially in high-traffic areas. Be mindful of sharp or heavy objects that could scratch or chip the paint, and use protective pads on cabinet handles and drawer pulls.
With consistent care, your no-sand paint job will stay stunning and durable, maintaining its beauty with minimal effort.
Troubleshooting Common Issues
Even with careful preparation and application, you might run into some common issues when painting your cabinets without sanding. These problems can be frustrating, but most are fixable with the right approach.
Uneven Finish: If your paint looks patchy or streaky, try applying thin, even coats. Make sure to allow enough drying time between layers for the best results.
Chipping or Peeling: This often happens if the surface wasn’t thoroughly cleaned or if you used incompatible paint. Lightly sand the area or add a primer before repainting.
Bubbles or Blisters: Excess moisture or applying paint too thick can cause bubbling. Use thinner coats and work in a well-ventilated space to help prevent this.
Sticky Surface: If the paint feels tacky, it might not be fully dry or the paint may be incompatible. Give it more time to dry or add a suitable topcoat to seal everything in.
Frequently Asked Questions
Can I Paint Over Laminated or Glossy Cabinet Surfaces?
Yes, you can paint over laminated or glossy cabinet surfaces. To ensure good adhesion, start by cleaning the surface thoroughly. Then, lightly sand or de-gloss it with a non-abrasive pad.
Next, apply a bonding primer made for slick surfaces. This helps the paint stick better and creates a smooth base. Once the primer is dry, you’re ready to paint with your chosen finish.
This process gives you a smooth, long-lasting transformation without needing to sand down the entire surface.
What Are the Best Tools for Painting Without Sanding?
You’ll want quality brushes and foam rollers for a smooth finish when painting without sanding. Use a high-quality, angled brush for corners and detailed areas, and a foam roller for large, flat surfaces.
Consider a paint sprayer if you want a professional look and faster application. Make sure your tools are clean and compatible with your chosen paint type to ensure even coverage and reduce brush marks.
How Do I Prevent Brush Strokes or Uneven Texture?
Think of your brush like a skilled artist’s hand guiding a masterpiece, steady and gentle. To prevent brush strokes or uneven texture, use high-quality brushes and apply thin, even coats.
Keep a wet edge by overlapping slightly while painting, and don’t press too hard. Lightly brush in one direction to smooth out streaks, and let each layer dry completely before adding another.
Patience is key to achieving a flawless, professional look.
Is It Necessary to Remove Cabinet Hardware Before Painting?
Yes, you should remove cabinet hardware before painting. Taking off handles, knobs, and hinges helps you paint evenly and reach all surfaces without anything blocking your way.
It also keeps paint from getting on the hardware, which makes cleanup a lot easier. Plus, removing the hardware reduces the chance of accidentally damaging it or getting paint on decorative parts.
Once the paint is dry, you can reattach your hardware for a clean, professional look.
How Long Will the Paint Job Last Without Sanding Preparation?
Surprisingly, your paint job might last quite a while without sanding—if the surface is already smooth and you’re lucky.
But without proper prep, expect it to chip, peel, or fade sooner than you’d like. Even if you skip sanding, make sure to clean and prime thoroughly.
Otherwise, your new coat may not stick well, leading to more touch-ups down the road.
Conclusion
You’ve just learned how to transform your kitchen cabinets effortlessly without the mess of sanding.
While DIY can be rewarding, sometimes the perfect finish calls for a professional touch or alternative methods. Remember, patience and the right products make all the difference.
So, whether you’re tackling this project yourself or seeking expert help, your dream kitchen is within reach. It can be beautiful, durable, and ready to impress—all without the dust and hassle of traditional sanding.