7 Simple Steps to Replace Kitchen Cabinets
Many homeowners dream of updating their kitchens but feel overwhelmed by the thought of replacing their cabinets. You’re not alone—this project can seem daunting, but with a little guidance, it’s totally doable.
Start by accurately measuring your kitchen space, including cabinets and walls, to guarantee a perfect fit. Choose cabinets and materials that match your style and are durable.
Clear your countertops, turn off water and power, and protect your floors before removing old cabinets carefully.
When installing new ones, secure and level them properly, then add hardware for a finished look.
For a professional result, address any issues like gaps or misalignments.
Keep going to uncover more tips for a smooth upgrade.
Key Takeaways
- Measure your kitchen space accurately and pick cabinets that fit your layout and style preferences.
- Remove the old cabinets carefully. If needed, disconnect plumbing and electrical connections first.
- Clear your countertops, protect the floors, and gather all the tools you’ll need before starting.
- When installing the new cabinets, start with corner units. Make sure they are level and securely attached.
- Finish up by adding hardware, caulking gaps, and cleaning the surfaces for a polished look.
How to Measure Your Kitchen Space Accurately
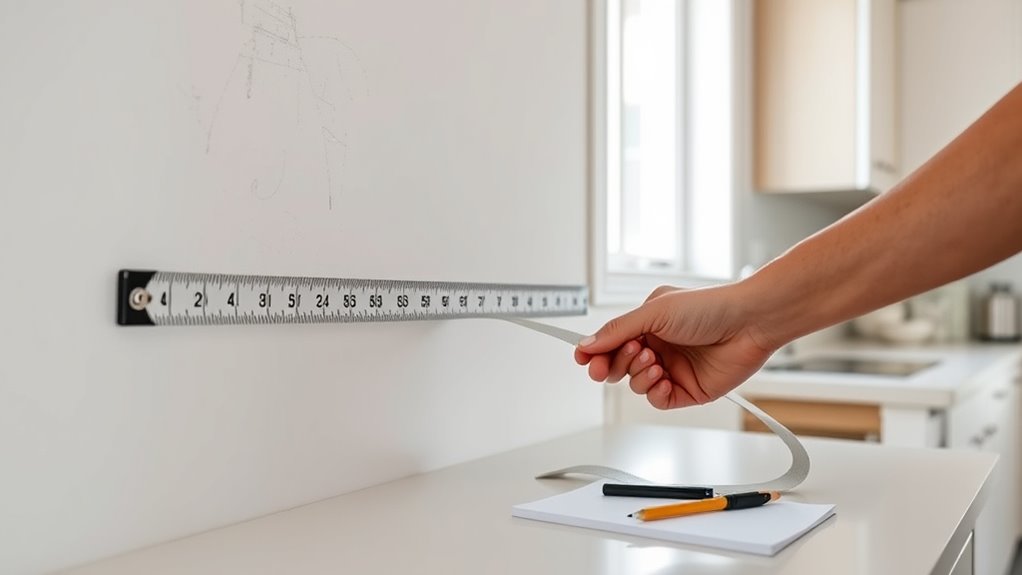
Before you start replacing your kitchen cabinets, it’s really important to measure the space accurately. Grab a tape measure, pencil, and paper to get started.
Measure the width and height of your current cabinets and write down these numbers. Make sure to measure from wall to wall, including any outlets or moldings that stick out.
For depth, measure from the front of the cabinet to the back wall, taking into account any trim or molding. Check for uneven walls or irregularities, and note them down because they can affect how everything fits.
Double-check all your measurements to avoid mistakes. It’s a good idea to measure each space twice for accuracy. Getting precise measurements ensures your new cabinets will fit perfectly and helps you avoid costly errors during installation.
Choosing the Best Cabinets and Materials for Your Kitchen
Selecting the right cabinets and materials is key to creating a functional and attractive kitchen. Think about your style preferences—are you into a modern, traditional, or farmhouse look?
Consider durability and how much maintenance each material needs. Solid wood cabinets have a classic feel and last a long time, but they can be more expensive.
MDF or plywood are more budget-friendly options and tend to resist warping better. For finishes, pick between paint, stain, or laminate depending on the look you want.
Don’t forget your storage needs—deep drawers, adjustable shelves, and soft-close hinges can make your kitchen more user-friendly.
Finally, match your cabinet styles and hardware with your overall kitchen design. By taking your needs and style into account, you’ll choose cabinets and materials that are both beautiful and practical.
Preparing Your Kitchen for New Cabinets
To guarantee a smooth cabinet replacement process, you need to properly prepare your kitchen space. Clear countertops of all items to create a spacious work area. Remove small appliances, dishes, and decorations to prevent damage and make space for tools.
Clear countertops and remove small items to ensure a safe, spacious workspace for cabinet replacement.
Turn off the water supply if you’re replacing cabinets near sinks, and disconnect plumbing if necessary. Cover floors with drop cloths or plastic sheeting to protect against dust and debris.
Make sure you have adequate lighting so you can see clearly during the work. Measure doorways and pathways to confirm that new cabinets can pass through easily.
Finally, gather all necessary tools and materials so you’re ready to start without interruptions. Proper preparation minimizes delays and keeps your workspace safe and organized.
Removing Old Cabinets Safely and Efficiently
Before you start removing the old cabinets, gather all your tools like a screwdriver, pry bar, and level. It’s a good idea to have everything ready before you begin.
Make sure to turn off the water, electricity, and gas supplies first. This helps you avoid any accidents while working.
Carefully detach the cabinets, taking your time. Be gentle to prevent damage to the walls or anything around them.
Gather Necessary Tools
Gathering the right tools is essential to removing your old cabinets safely and efficiently. You’ll need a cordless drill, a pry bar, a screwdriver, a putty knife, and a level.
A stud finder helps locate wall studs for secure removal. Safety gear like gloves and safety glasses protect you during the process.
A measuring tape is useful for planning your next steps, while a utility knife can help score caulk or paint. Keep a bucket or trash bag nearby to collect debris.
Having these tools ready prevents unnecessary trips to the store and speeds up the process. Make sure all tools are in good condition and easily accessible before you start removing the cabinets. This will help ensure a smooth, safe removal.
Turn Off Utilities Safely
Turning off the utilities is an essential step to guarantee safety while removing old cabinets.
Before you start, locate your main water shutoff valve and turn it off to prevent leaks or water damage. Next, switch off the circuit breakers for your kitchen appliances, including the dishwasher, microwave, and garbage disposal.
This prevents accidental electrical shocks. Confirm that all power sources are disconnected by testing outlets or appliances. If you have gas lines, turn off the gas supply at the main valve to avoid leaks or fires.
Taking these precautions minimizes risks and keeps you safe during the removal process. Always double-check that utilities are fully shut off before proceeding to remove the cabinets to prevent accidents or damage.
Remove Cabinets Carefully
Carefully removing your old cabinets takes patience and attention to detail to avoid damaging nearby surfaces or getting hurt. Start by loosening screws or nails that hold the cabinets in place, working from the top down.
Use a pry bar gently to detach the cabinets, applying even pressure so you don’t damage walls or floors. Be aware of any electrical wires or plumbing inside the walls and disconnect them safely beforehand.
Remember, taking your time makes cleanup and repairs easier later. Here’s a quick guide:
| Step | Tool Needed | Tip |
|---|---|---|
| Loosen fasteners | Screwdriver, drill | Work slowly to avoid stripping screws |
| Detach cabinet from wall | Pry bar, crowbar | Use even pressure to prevent damage |
| Disconnect utilities | Pliers, wrench | Turn off power and water first |
| Remove cabinet entirely | Helpers, gloves | Lift steadily to avoid dropping |
Installing Your New Kitchen Cabinets With Confidence
Installing your new kitchen cabinets with confidence starts by following a clear, step-by-step plan and staying organized throughout the process.
First, measure your space carefully to guarantee your cabinets fit perfectly. Use a level to mark the wall where the top of the cabinets will sit, and locate studs with a stud finder.
Begin by attaching the upper cabinets first, anchoring them securely into the studs. Use a helper if needed to hold cabinets in place.
Once the upper units are secure, move on to the base cabinets, making sure they’re level and aligned with the upper cabinets.
Double-check measurements as you go, and tighten all screws firmly. Staying methodical and patient will help you achieve a professional-looking installation with confidence.
Finishing Touches for a Professional Look
To achieve a polished, professional look for your kitchen, focus on finishing touches that enhance both functionality and style. Start by installing new hardware, like knobs and pulls, to instantly update your cabinets’ appearance. Choose finishes that match your overall kitchen decor for a cohesive look.
Next, check all doors and drawers to make sure they open smoothly and are aligned properly. Adjust hinges if needed to improve their operation. Adding trim or molding around cabinet edges creates a seamless transition between cabinets and walls.
Finally, give all surfaces a thorough cleaning to remove dust and fingerprints. This makes your cabinets look fresh and pristine. These small details really make a big difference in creating a professional, finished look that boosts your kitchen’s style and usability.
Estimating Costs and Troubleshooting Common Challenges
Once you’ve added the finishing touches, it’s time to think about costs and potential challenges. Estimating expenses early helps you stay within budget and avoid surprises.
Make sure to include costs for materials, tools, and labor. Unexpected issues like hidden water damage or outdated wiring can come up, so plan for some contingencies.
To handle challenges better, double-check measurements before ordering. Keep extra materials nearby in case you need to make corrections. Also, research common installation problems and solutions to be prepared.
Frequently Asked Questions
How Long Does a Typical Kitchen Cabinet Replacement Take?
A typical kitchen cabinet replacement takes about one to three weeks, depending on the project’s complexity and your contractor’s schedule. You might spend a few days removing old cabinets, followed by a few days for delivery and installation.
If you choose custom cabinets or add updates like countertops or backsplashes, it could take longer. Planning ahead helps you stay on track and keeps disruptions in your kitchen to a minimum.
Can I Install New Cabinets Myself Without Professional Help?
Yes, you can install new cabinets yourself if you’re comfortable with basic carpentry and have the right tools.
Start by measuring carefully, then remove the old cabinets and prepare the wall.
Follow the installation instructions for your new cabinets, making sure they’re level and securely anchored.
Take your time, double-check measurements, and ask for help if needed.
With patience and attention to detail, you can do it yourself successfully.
What Tools Are Essential for Replacing Kitchen Cabinets?
You’ll need a few essential tools to replace your kitchen cabinets. Grab a drill with drill bits for screws, and a cordless screwdriver if you prefer.
A level is important to make sure everything’s straight and even. Also, have a tape measure handy for accurate measurements.
Use a pry bar to remove the old cabinets carefully. And don’t forget a stud finder to locate wall studs behind the drywall.
Clamps are useful for holding pieces in place while you work. Safety gear like gloves and goggles are a must to protect yourself during the process.
These tools make the job easier and help ensure your cabinets are installed perfectly.
How Do I Dispose of or Recycle Old Cabinets Responsibly?
Think of your old cabinets as treasure chests waiting for a new purpose. You can donate them to charities or Habitat for Humanity, giving them a second life.
If they’re not salvageable, check local recycling centers that accept wood and metal. Avoid dumping them in landfills because it harms the environment.
Are There Eco-Friendly Cabinet Options Available?
Yes, eco-friendly cabinet options are available. You can choose cabinets made from sustainably sourced or recycled materials like bamboo or reclaimed wood.
Look for products with environmental certifications such as FSC or GREENGUARD. Also, consider cabinets with low-VOC finishes to reduce indoor air pollution.
Conclusion
Replacing your kitchen cabinets is like turning a blank canvas into a masterpiece—each step a brushstroke shaping your dream space. With patience and care, you’ll craft a kitchen that reflects your style and spirit.
Remember, even the smallest details can transform the ordinary into extraordinary. Welcome the journey, and soon you’ll stand back to admire your handiwork.
By following these simple steps to replace kitchen cabinets, you’ll create a space that’s both beautiful and functional. And in the end, you’ll feel proud knowing you transformed your kitchen with your own hands.