7 Simple Steps to Replace Your Kitchen Sink
Are you tired of dealing with a worn-out or outdated kitchen sink but feel overwhelmed by the idea of replacing it? You’re not alone—many people struggle with DIY projects like this, unsure where to start.
Luckily, replacing your kitchen sink can be straightforward if you follow a few simple steps.
To replace your kitchen sink, start by gathering tools and preparing your workspace. Turn off the water and disconnect old plumbing, then carefully remove the old sink.
Install the new sink, securing it in place and connecting the plumbing properly. Check for leaks and tighten connections if needed, then clean up your area.
If you follow these steps, you’ll have a smoothly functioning new sink. Stick with it, and you’ll master every detail involved—making your kitchen feel fresh and new in no time.
Key Takeaways
- Gather your tools, prepare the workspace, and double-check that the sink fits properly before you begin.
- Turn off the water supply and drain the pipes to avoid any spills.
- Disconnect the plumbing, remove the old sink, and then carefully install the new one, making sure it’s secure.
- Reconnect the water and drain lines, then turn the water back on to check for leaks.
- Seal the edges, inspect all connections, and make sure everything looks clean and leak-free.
Gather Tools and Prepare Your Workspace
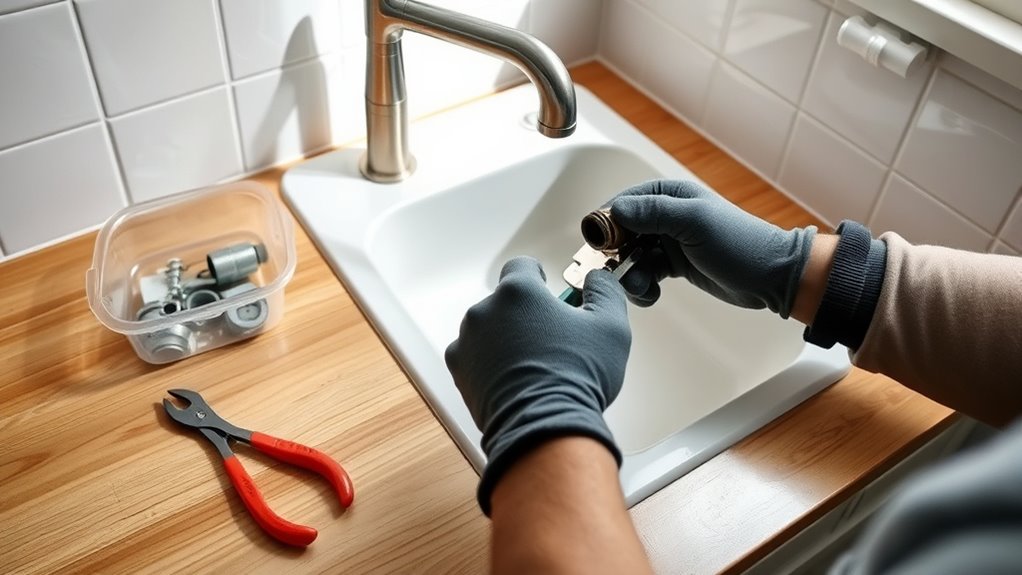
Before you start removing your old sink, gather all the tools you’ll need and clear your workspace. You’ll want a wrench, screwdriver, pliers, a bucket, and rags nearby for easy access.
Make sure the area around the sink is clean and free of clutter to avoid any accidents. Lay down a towel or mat to protect your countertop from scratches.
Check your new sink’s dimensions and compare them with the existing opening to ensure a proper fit. Prepare any sealant or plumber’s putty you might need later.
Clearing the space makes the process smoother and safer. Having everything within reach helps prevent unnecessary delays. Once your workspace is ready, you can move on to turning off the water and removing the old sink.
Turn Off Water and Remove Your Old Sink
First, find your main water shutoff valve and turn it off to stop the flow. Then, drain any remaining water from the pipes and disconnect all plumbing connections from the sink.
Once these steps are complete, you’ll be ready to remove the old sink safely.
Locate Main Water Shutoff
Locating your main water shutoff valve is an important first step before disconnecting your old sink. This valve controls water flow to your entire home, so knowing where it is helps you quickly shut off the water if needed.
Usually, the main shutoff is near the edge of your house—often in the basement, crawl space, garage, or utility area. Look for a large valve or a lever that turns clockwise to shut off the water.
If you’re unsure, check for a big pipe entering the house’s foundation or walls. Once you find it, turn the valve clockwise until it stops to cut off the water supply.
To confirm, open a nearby faucet. If water stops flowing, you’ve successfully shut off the water and are ready to proceed with removing the sink.
Drain Remaining Water
To drain the remaining water from your sink, start by turning off the shutoff valves under the sink. Once they’re closed, place a bucket or bowl beneath the drain to catch any leftover water.
Next, turn on the faucet to let out any trapped water in the pipes. You might see water slowly flowing into the bucket, a small puddle on the countertop, or drips escaping from the open drain.
You could also hear a gurgling sound as the water clears or notice the sink becoming noticeably emptier. This step makes sure no water is left, preventing spills or messes when you remove the sink.
Be thorough and double-check for any remaining water in the pipes or trap. Once you’ve drained everything, you’re ready to disconnect the plumbing and remove the old sink.
Disconnect Plumbing Connections
With the water drained and the sink emptied, it’s time to turn off the water supply before disconnecting the plumbing. Locate the shutoff valves under the sink and turn them clockwise to stop the water flow. Use a wrench if needed.
Next, disconnect the supply lines from the faucet using adjustable pliers. Be prepared for residual water to drip out. Keep a bucket handy to catch any remaining water.
Install the New Sink and Connect Plumbing
Now that the old sink is gone, place the new sink securely in position.
Next, connect the drain assembly and attach the water supply lines, making sure everything fits tightly.
Once all the connections are secure, turn on the water to check for leaks and make sure everything works properly.
Secure Sink Placement
Once you’ve prepared the sink and the countertop opening, carefully position the new sink into place, making sure it sits flush and level. As you do, hold it steady to prevent shifting.
You’ll want to see a clean, even gap around the edges, which shows proper alignment. To secure the sink, you’ll typically use clips or mounting brackets underneath.
Visualize these as sturdy connectors that clamp the sink to the countertop. Think of them as metal clips tightening against the sink rim, rubber gaskets preventing leaks, screws securing clips in place, and leveling shims adjusting height.
A steady hand ensures even pressure, and these components work together to keep your sink firm and stable. Once secured, it’s ready for the final plumbing connections.
Connect Drain Assembly
After securing the sink in place, it’s time to connect the drain assembly. First, slide the rubber gasket and flange onto the drain pipe from beneath the sink.
Insert the drain body into the sink’s drain hole, making sure the flange sits flush against the sink surface. From underneath, screw the locknut onto the drain tailpiece to secure it.
Tighten it by hand, then use a wrench for a snug fit. Be careful not to overtighten. Next, attach the slip nuts and washers to the drain pipe, connecting it to the house’s main drain line.
Confirm all connections are hand-tight, then give them a gentle tighten with a wrench. Check for leaks by running water into the sink and inspecting the drain connections.
Attach Water Supply
Begin by attaching the water supply lines to the corresponding faucet valves on the new sink. You’ll want to tighten the connections securely but avoid over-tightening to prevent damage. As you connect, picture the flexible hoses winding smoothly behind the sink, ready to deliver hot and cold water.
Make sure to match the supply lines with the correct valves—hot on the left, cold on the right. Visualize the following: tightening fittings with a wrench until snug, ensuring washers are in place for leak prevention, and connecting hoses to the appropriate valves.
Check that no kinks exist in the lines, and have a towel nearby for any minor leaks during testing. Once everything is connected, slowly turn on the water valves to check for leaks and proper flow.
Check for Leaks and Test Functionality
Before you finish installing your new sink, it’s essential to check for leaks and confirm everything works properly. Turn on the water supply gradually and run both hot and cold water.
Watch for any drips around the connections, especially where you attached supply lines and the drain. Check under the sink for any signs of leaks or pooling water.
Tighten fittings if needed, but avoid over-tightening, which can cause damage. Test the sink’s drainage by filling it with water and seeing how quickly it drains.
Make sure the faucet operates smoothly and listen for any unusual noises or vibrations. If you notice leaks or issues, fix them immediately before completing your installation.
Proper testing helps ensure your sink functions well and prevents future problems.
Clean Up and Finish Your Installation
Once you’ve confirmed that your sink is leak-free and working properly, it’s time to clean up the workspace and finish the installation. Clear away tools, old packaging, and any debris from your work area.
Wipe down surfaces to remove dust, grease, or leftover caulk. Check that all connections are tight and secure. Now, take a moment to admire your work and make sure everything looks neat and installed correctly.
As you finish, consider these details:
- Wipe the countertop and sink surface for a polished look
- Tighten any loose fittings or mounting brackets
- Apply a fresh bead of silicone caulk along edges for a clean seal
- Dispose of packaging and debris responsibly
Finally, run water again to double-check for leaks before calling it complete.
Troubleshoot Plumbing Leaks and Common Problems
After installing your new sink, it’s important to check for common plumbing issues that can arise. Start by running water and inspecting all connections for leaks.
Tighten any loose fittings, but don’t overtighten, as this can damage the seals. If you notice drips from the faucet or under the sink, identify the source—whether it’s a loose connection or a faulty seal—and fix it promptly.
Check the drain for leaks or slow drainage, which could mean a poor seal or a clog. If you see water pooling around the base, reseal the area with plumber’s putty or silicone.
Inspect the drain for leaks or slow drainage; reseal with plumber’s putty or silicone if water pools around the base.
Keep an eye on water pressure; fluctuations might indicate a problem with the supply lines. Address these issues early to guarantee a leak-free, functioning sink.
Final Tips for a Successful Sink Replacement
To guarantee your sink replacement is successful, take the time to double-check all connections and fittings before finishing up. Ensuring everything is tight and secure helps prevent leaks and future headaches.
Before sealing the countertop, inspect the drain, water supply lines, and faucet connections. Look for any gaps or loose fittings and tighten them if needed.
Consider running water briefly to test for leaks and make sure everything is working properly.
Imagine the smooth flow of water without drips or puddles on the floor. Visualize a faucet that turns easily and stays steady.
Think about the sleek, clean appearance of your new sink, free of water stains or drips.
- Tightened drain connections
- Secure water supply lines
- Properly sealed edges
- Leak-free fittings
- Fully functional faucet
Frequently Asked Questions
How Do I Choose the Right Size Sink for My Kitchen?
To choose the right size sink, start by measuring your countertop space carefully. Keep in mind the clearance around the sink for appliances and easy movement.
Think about how many people use your kitchen regularly. Larger families might need a bigger sink to handle more dishes and prep work.
Make sure the sink’s dimensions match your cabinet size. It should fit comfortably without overhanging or feeling cramped.
Finally, consider your typical tasks. If you often wash large pots, go for a deeper, wider sink to make your chores easier.
Can I Replace a Sink Without Professional Help?
Think of replacing your sink as sailing a small boat through calm waters. You can do it yourself if you’re comfortable with basic tools.
You’ll need to turn off the water, disconnect the pipes, remove the old sink, and carefully install the new one.
While it’s doable, be patient and precise. If you hit rough waters or feel unsure, don’t hesitate to call in a professional to help navigate the process safely.
What Type of Sealant Is Best for a New Sink?
You should use a high-quality silicone sealant for your new sink. Silicone is flexible, waterproof, and sticks well to both the sink and countertop, helping prevent leaks.
Make sure to pick a food-safe, mold-resistant type, especially for kitchen use. This will keep things safe and help prevent mold growth over time.
Apply a continuous bead of sealant around the rim of the sink before setting it into place. Then, smooth it out with a caulk tool or your finger for a neat finish.
Finally, wipe away any excess for a clean, secure seal that will last.
How Long Does a Typical Sink Replacement Take?
A typical sink replacement takes about 2 to 4 hours, depending on your experience and the complexity of the job.
You’ll start by turning off the water and disconnecting the plumbing, then removing the old sink.
Once that’s done, fit and seal the new sink, then reconnect the plumbing and check for leaks.
If you’re familiar with basic tools, you can usually get it done quickly within this timeframe.
Are There Eco-Friendly Options for Kitchen Sinks?
Imagine a sparkling, eco-friendly kitchen sink that blends style with sustainability. Yes, there are options like sinks made from recycled materials, bamboo composites, or low-impact ceramics.
These choices help reduce your environmental footprint while still being durable and elegant. By choosing such sinks, you support green living and add a beautiful, functional piece to your kitchen.
Sustainable options can be stylish, practical, and good for the planet.
Conclusion
Replacing your kitchen sink might seem intimidating, but with patience and the right steps, you can do it yourself. Imagine Sarah, who replaced her sink in a weekend, saving money and gaining confidence. Her story shows that even complex tasks become manageable when broken down into simple steps.
So, take your time, follow the guide, and soon you’ll enjoy a fresh, new sink. This project will make your kitchen feel almost brand new again. Replacing your kitchen sink can be a rewarding DIY task with the right approach.