How to Cook Canned Corned Beef Hash Crispy in 10 Easy Steps
Many people love corned beef hash but struggle to get that perfect, crispy texture everyone craves. It’s a common challenge, especially when trying to cook canned corned beef hash to crispy perfection.
To cook crispy canned corned beef hash, start by choosing quality meat with a good fat-to-meat ratio and minimal liquid. Use a heavy skillet and preheat it over medium heat, then swirl in some oil.
Spread the hash evenly and press it down to create a uniform layer. Cook over medium-high heat until you see a deep golden crust, flipping only once.
For extra flavor, add seasonings or toppings. Want to master perfect crispiness? Keep exploring for detailed tips.
Key Takeaways
- Use a heavy-bottomed skillet and preheat it over medium heat. This helps ensure the hash cooks evenly and gets crispy.
- Spread the hash out in the pan so it’s in a thin, even layer. Press it down gently and cook at medium-high heat to help develop that nice golden crust.
- Wait until the bottom turns a deep golden brown before flipping. This way, you’ll get a good crisp on both sides.
- Don’t overcrowd the pan. Giving the hash space to sear properly prevents it from becoming soggy.
- Finish things off with your favorite seasonings. You can also add toppings like fried eggs or cheese for extra flavor and texture.
How to Choose the Best Canned Corned Beef for Crispy Hash
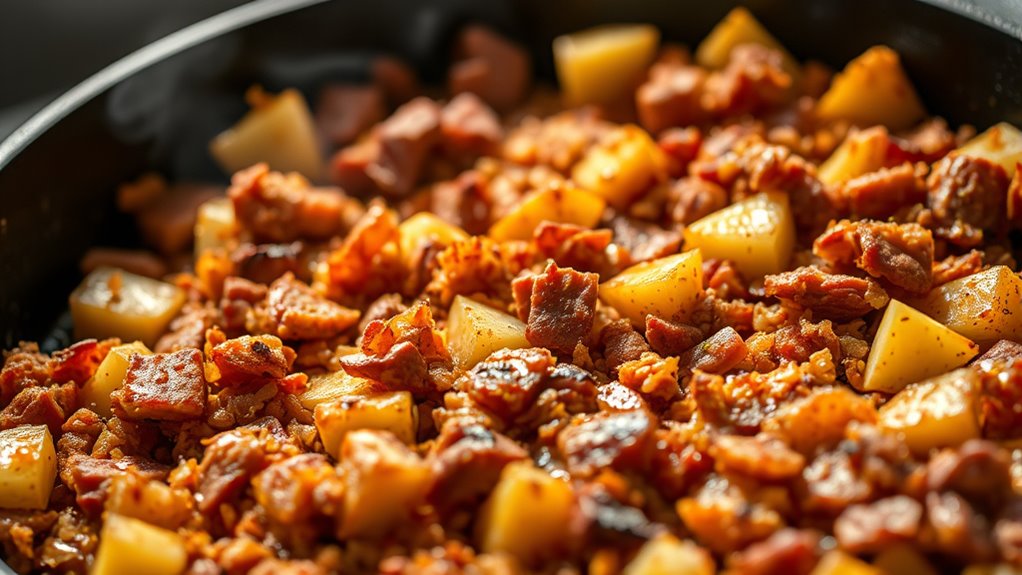
When choosing canned corned beef for crispy hash, look for high-quality, well-preserved options. Check the label for a good fat-to-meat ratio, which boosts flavor and helps make your hash crispy.
Choose high-quality canned corned beef with a good fat-to-meat ratio for flavorful, crispy hash.
Pick cans that are firm and don’t have too much liquid or oil, as those can make your hash soggy. Also, choose products with minimal additives or preservatives for better taste and health.
Always check the expiration date to ensure freshness. If you can, go for brands known for quality and consistency.
Keep in mind that textures can vary—some brands are chunkier, others more shredded—so choose what fits your preferred hash style.
Preparing Your Pan for Perfectly Crispy Corned Beef Hash
Start by choosing a heavy-bottomed pan to ensure even heat distribution. Preheat it over medium heat until it’s hot enough to sizzle when you add the hash. This step helps you get that perfect, crispy crust you’re after.
Choose the Right Pan
Choosing the right pan is key to getting that perfectly crispy corned beef hash. A good pan spreads heat evenly and helps browning happen without sticking.
Ideally, go for a heavy-bottomed skillet or cast iron pan. These hold heat well and create a nice, crispy crust. Non-stick pans might prevent sticking but don’t give you that sear, so they’re not the best for crispiness.
Make sure the pan’s size matches your portion. Overcrowding can cause steaming instead of frying, which you don’t want.
Preheat for Crispiness
Preheating your pan sets the stage for that irresistible crispy crust. To start, turn your stove to medium-high heat and let the pan heat up for a few minutes.
You want the surface hot enough that when you add the oil, it shimmers. This guarantees the hash will sizzle immediately, promoting crispiness. Avoid adding oil too early or letting the pan overheat, which can cause sticking or burning.
Once the oil is hot, gently swirl it around to coat the bottom evenly. A properly preheated pan creates a perfect foundation for the hash to fry evenly and develop that golden, crispy exterior.
This step is essential for achieving the texture and crunch that makes canned corned beef hash so delicious.
How to Spread and Layer Your Hash for Maximum Crunch
To get that perfect crunch, spread your hash evenly across the pan.
Use a gentle touch to layer the mixture, making sure there are no thick spots.
Thick areas won’t crisp properly, so spreading evenly is key.
Proper spreading and layering help create a consistent, crispy surface everywhere.
Even Hash Layering
Achieving a crispy, evenly cooked hash starts with how you layer it in the pan. Spread the hash mixture evenly across the surface, avoiding thick piles that trap moisture. Use the back of a spatula to press down gently, creating a uniform layer about half an inch thick.
This guarantees consistent contact with the pan, promoting even browning. Don’t leave gaps or uneven spots, as these can cause uneven cooking and sogginess. If you’re making a larger batch, consider dividing it into sections and layering each one smoothly before flipping or stirring.
The goal is a compact, flat layer that cooks uniformly, giving you that perfect crispy exterior without burning or undercooking. Proper layering is key to achieving that ideal crunch.
Proper Spreading Techniques
Mastering proper spreading techniques is essential for getting that perfect crispy hash. Start by evenly distributing the canned corned beef hash across the skillet’s surface.
Use the back of a spatula or a flat utensil to press the hash down firmly, creating a compact, uniform layer. Avoid piling the hash too high; a thinner layer crisps better and cooks evenly.
If layering, spread each layer smoothly and press it down to guarantee contact with the pan, which promotes crunch. Shaping the hash into a consistent, flat surface helps heat circulate uniformly.
Don’t forget to leave space around the edges; this allows the heat to reach all parts, maximizing crispiness. By spreading and layering carefully, you’ll achieve that irresistibly crunchy, golden crust.
What Heat Settings Make Your Hash Extra Crispy?
For your hash to turn extra crispy, setting the right heat is essential. Start with medium heat to warm the pan and evenly heat the ingredients.
Once the hash begins to sizzle, increase the heat to medium-high. This helps create a crispy crust without burning the food.
Keep a close eye, as too high heat can cause burning before crispiness develops. If you notice the hash browning too quickly or sticking, lower the heat slightly.
The goal is to let the moisture evaporate gradually, forming a golden, crunchy exterior. Adjust the heat as needed during cooking to maintain a steady sizzle.
With the right heat settings, you’ll get a perfectly crispy hash that’s flavorful and satisfying.
Why Not Overcrowd the Pan When Cooking Hash?
When you overcrowd the pan, heat isn’t evenly distributed, which can lead to uneven cooking.
This often results in soggy hash instead of crispy, well-cooked pieces.
To get the best texture, cook your hash in batches if needed.
This ensures even heat distribution and better results.
Even Heat Distribution
Overcrowding the pan can cause uneven heat distribution, leading to uneven cooking and soggy hash. When you pack too much in, heat can’t circulate properly, so some parts cook faster while others stay underdone.
This results in inconsistent textures and keeps the hash from becoming crispy. To get even cooking, spread the hash out in a single, even layer, giving each piece enough contact with the hot surface.
Use a large enough pan or cook in batches if needed. Avoid stirring too often at first; instead, let the hash sit undisturbed to develop a crispy crust.
Proper heat distribution ensures the entire batch cooks evenly, giving you that crispy exterior and well-cooked interior you want.
Prevents Soggy Hash
Overloading the pan traps moisture and prevents the hash from crisping up properly. When you crowd the pan, steam builds up, making the hash soggy instead of crispy. To avoid this, cook in batches if needed, giving each piece enough space.
This allows the heat to circulate evenly, helping the hash develop a golden crust. Using a large, flat skillet over medium-high heat also promotes even cooking and crispiness. Resist the temptation to stir constantly; let the hash sit undisturbed for a few minutes to form a crust before flipping.
When and How to Flip Your Hash for Better Crispiness
Achieving that perfect crispy crust on your corned beef hash really depends on timing and technique. Wait until the bottom is deeply golden brown before you try flipping it.
You’ll know it’s ready when the edges lift easily from the pan, showing a firm crust. Use a large spatula to gently loosen the hash, then slide a wide spatula or even a plate underneath to flip it in one smooth motion.
If the hash breaks apart, that’s okay. Just press it back down and keep cooking. For even crispiness, flip only once or twice during cooking. Flipping too often stops the crust from forming.
Patience is key. Wait for that beautiful, crispy layer to develop before turning your hash.
Flavor Tips: Seasoning Your Corned Beef Hash for Better Taste
To boost the flavor of your corned beef hash, start with a well-balanced seasoning blend that enhances its savory taste. Use salt and black pepper as your base, then add a touch of smoked paprika for depth and a pinch of garlic powder for extra aroma.
A splash of Worcestershire sauce can enrich the meaty richness, while a dash of hot sauce adds subtle heat. If you like a hint of sweetness, sprinkle in a little brown sugar or drizzle honey.
Fresh herbs like chopped parsley or thyme brighten the dish and provide a fresh contrast. Taste as you go, adjusting seasonings to suit your preference.
Proper seasoning transforms simple canned corned beef hash into a flavorful, satisfying meal.
How to Know When Your Hash Is Crispy and Ready to Serve
You’ll know your hash is crispy and ready to serve when the bottom has a deep golden-brown crust that’s firm to the touch. Gently lift a corner with a spatula—if it lifts easily and shows a consistent, crispy surface, it’s done.
The edges should be slightly darker but not burnt. Look for a satisfying crunch when you press the surface.
| Indicator | What to Observe |
|---|---|
| Color | Deep golden-brown crust |
| Texture | Firm and crispy surface |
| Ease of lifting | Spatula slides easily underneath |
| Sound | Crunching sound when pressed or bitten |
| Uniformity | Even crust without burnt spots |
Troubleshooting Soggy or Burned Hash: Tips and Fixes
Even with careful attention, your hash can sometimes turn out soggy or burnt. If that happens, don’t panic. For soggy hash, let it sit in the skillet longer to let excess moisture evaporate, or turn up the heat a bit to help crisp it up.
If your hash turns soggy or burnt, stay calm—adjust heat, cook longer, or remove burnt sections to perfect it.
If it’s burnt, remove the burned sections right away to stop bitterness from spreading. Lower the heat and add a little oil or butter to help restore that crispy texture.
Use a non-stick skillet for better control over browning. Pat the hash with paper towels to absorb any extra moisture. Adjust the cooking temperature to prevent burning.
Flip and rotate the hash often to get an even crisp. These tips will help you troubleshoot and make perfect, crispy hash every time.
Creative Variations to Elevate Your Crispy Corned Beef Hash
Elevating your crispy corned beef hash is all about adding bold flavors and unexpected ingredients that boost its savory goodness. Try mixing in sautéed onions, garlic, or peppers for extra depth.
Spices like smoked paprika, cumin, or chili powder can add smoky or spicy notes. For a fresh twist, top your hash with a fried egg or sprinkle chopped herbs like parsley or chives.
Incorporate cheese—cheddar, Swiss, or feta—for creamy richness. You can also fold in cooked vegetables like spinach, mushrooms, or diced tomatoes for added texture and nutrients.
For a unique flavor boost, add a splash of hot sauce, Worcestershire, or soy sauce. These variations let you customize your hash, making each serving a new, exciting experience.
Frequently Asked Questions
Can I Use Homemade Corned Beef Instead of Canned for Hash?
Yes, you can use homemade corned beef instead of canned for hash. Just shred or chop your cooked homemade corned beef into small pieces, then follow your recipe as usual.
Keep in mind that homemade corned beef might be less salty and more tender, so adjust your seasonings accordingly. Searing it in a hot skillet will still give you that crispy, delicious texture you want in your hash.
What’s the Best Oil to Achieve Maximum Crispiness?
The best oil for maximum crispiness is vegetable or canola oil because they have high smoke points and neutral flavors. This helps your hash get perfectly crispy without overpowering flavors.
Coincidentally, these oils heat quickly and evenly, which helps you achieve that beautiful golden-brown crust. Using a generous amount of oil can also ensure even frying.
All of this combines to give your hash that irresistible crunch you’re aiming for.
How Long Does It Usually Take to Make Hash Crispy?
It usually takes about 5 to 7 minutes per side to make your canned corned beef hash crispy. Start by cooking it over medium-high heat, pressing it down gently with a spatula.
Let the bottom brown evenly before flipping. Cook the other side until it’s golden and crispy. Keep an eye on it to prevent burning, and adjust the heat as needed for the perfect crispiness.
Can I Prepare Hash Ahead of Time and Reheat It?
Ever wondered if you can prepare hash ahead and reheat it? Absolutely! You can cook the hash, let it cool, then store it in an airtight container in the fridge for up to two days.
When you’re ready, reheat it in a skillet or microwave. For extra crispiness, cook it a few minutes longer in the skillet. Just make sure it’s heated thoroughly before serving.
Is It Necessary to Add Additional Seasoning or Spices?
You don’t need to add extra seasoning or spices if you like the flavor of the canned corned beef hash as it is.
But if you want to give it a little boost, a pinch of black pepper, garlic powder, or paprika can add a nice touch.
Taste the hash first to see if it needs more flavor, then adjust according to your preferences.
Conclusion
Now that you know the secrets to crispy corned beef hash, you’ll turn your stovetop into a culinary playground. With a little patience and the right technique, your hash will be as golden and crispy as the sun’s first rays.
Just remember, don’t rush or overcrowd the pan. Think of it like nurturing a perfect garden. Soon, you’ll be serving up a breakfast masterpiece that’s bound to impress your taste buds and anyone lucky enough to join you.
Enjoy your crispy corned beef hash and make every breakfast special!