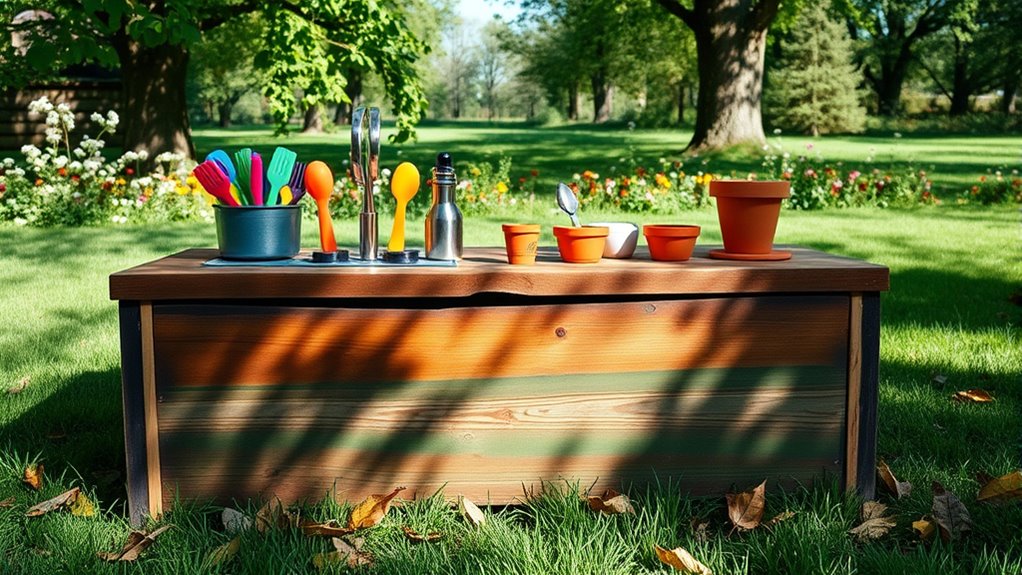
DIY Guide to Build a Mud Kitchen for Kids
Building a mud kitchen for kids can be a fun project, but many parents feel overwhelmed by the idea of creating a safe and engaging play space. You’re not alone—finding the right balance between durability, safety, and imagination can be tricky.
Luckily, with some planning and the right materials, you can craft a charming mud kitchen that sparks your child’s creativity.
To build a mud kitchen for kids, start by planning the design with shelves, a sink, and storage, making sure it’s accessible and safe for their age. Choose a shaded, level spot close to your house, and gather weather-resistant wood, paint, and kid-safe tools.
Build a sturdy base, add surfaces and accessories, and personalize it with colorful decorations.
Keep safety and maintenance in mind, and investigate ways to encourage imaginative play. With a little effort, you’ll create a delightful outdoor space your kids will love. More tips await if you keep going.
Key Takeaways
- Plan the design with accessible features, durable materials, and personalized touches to inspire creativity.
- Choose a shaded, level location close to water and the house for supervision. This makes it easier to keep an eye on the kids while they play.
- Gather safe, weather-resistant materials and tools. Be sure to follow safety precautions during construction to avoid accidents.
- Build on a sturdy, well-drained base. Make sure it is securely anchored for stability and safety so the kitchen doesn’t wobble or tip over.
- Maintain the kitchen regularly by cleaning surfaces and checking for damage. This helps ensure safe and fun play for the kids.
How to Plan Your DIY Mud Kitchen for Kids
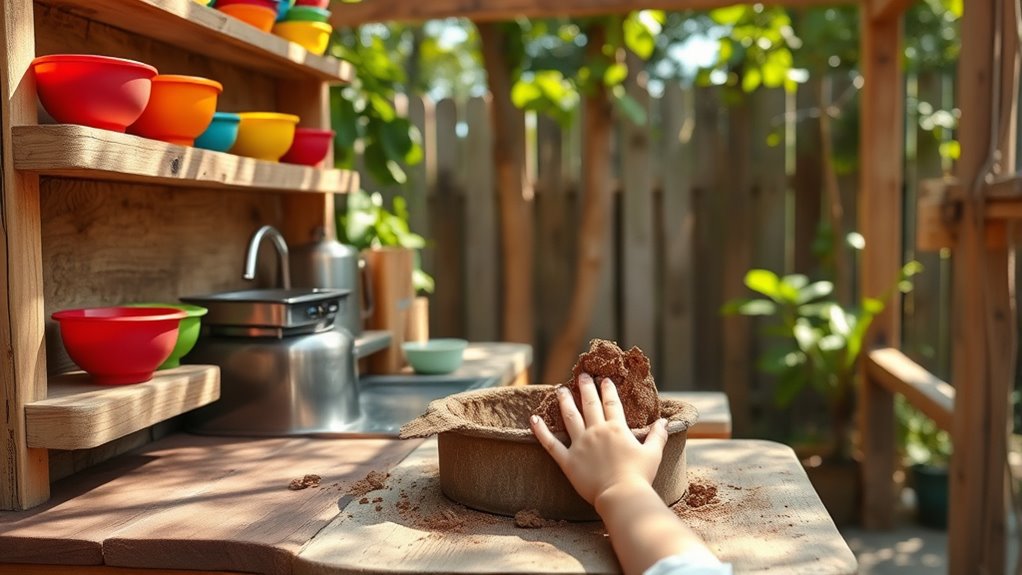
Before you start building your DIY mud kitchen, it’s important to plan carefully to make sure it fits your child’s needs and your space.
Think about what features will spark your child’s imagination—shelves, a sink, or storage compartments.
Consider adding shelves, a sink, or storage to inspire your child’s creativity and make the mud kitchen more engaging.
Consider their age and height so the workspace is accessible and comfortable for them.
Measure your available area to see what size will work without overcrowding your yard or playroom.
Decide on the materials you’ll use, aiming for ones that are durable and safe.
Make a list of essential elements, but leave room for creative additions later.
Planning ahead helps you avoid costly mistakes and makes sure your mud kitchen is both fun and functional for years to come.
Choosing the Best Location for Your Mud Kitchen
Choosing the right spot for your mud kitchen sets the stage for endless outdoor fun. Look for a shaded area to keep it cool and protect your kids from sunburns.
Make sure the location is level and stable so it’s safe for kids to play and set up their activities. Keep it close enough to the house for easy supervision and access to water, but far enough away to prevent messes from spreading inside.
Consider placing it on a surface that drains well, like gravel or packed dirt, to manage spills easily. Also, check for nearby trees or bushes that can serve as natural backgrounds or windbreaks.
A well-chosen spot will encourage kids to play freely and keep cleanup manageable.
Gather Materials and Tools for Your Mud Kitchen
To build your mud kitchen, you’ll want to collect essential materials like wood, paint, and waterproof sealant. Don’t forget some basic tools too.
Make a checklist of items such as a saw, hammer, screwdriver, and measuring tape to make sure you’re all set. Having everything ready before you start will make the process smoother and more fun.
Essential Materials List
Gathering the right materials and tools is key to creating a fun and functional mud kitchen for kids. You’ll want items that are durable, safe, and easy to clean, so they can stand up to play.
Here’s a list of the main materials you’ll need:
| Materials | Purpose |
|---|---|
| Wooden pallets or crates | Structure and storage |
| Large plastic container or basin | Mixing and playing |
| Non-toxic paint or sealant | Weatherproofing and decoration |
| Old kitchen utensils or toys | Accessories and tools |
| Waterproof fabric or tarp | Covering and protection |
Make sure all materials are kid-safe and weather-resistant. Focus on sturdy, washable items that encourage imaginative play and can handle outdoor conditions.
Necessary Tools Checklist
Before you start building your mud kitchen, it’s important to have the right tools handy. This will help make the process smooth and safe.
You’ll need basic power tools like a drill, screwdriver, and saw to assemble everything. A measuring tape and level will help ensure everything is precise and stable.
Keep a hammer and nails or screws nearby for fastening parts together. Safety gear like gloves, goggles, and dust masks are essential to protect you during construction.
Don’t forget hand tools like a wrench, pliers, and a screwdriver for adjustments. If you’re painting or sealing wood, have brushes and paint ready.
Having these tools prepared saves time and keeps your project safe, efficient, and fun from start to finish.
Build the Base Structure of Your Mud Kitchen
Start by choosing a sturdy, flat surface for the base of your mud kitchen, like a large wooden pallet or a thick piece of plywood. Make sure it’s level and stable to support your kids’ activities.
If needed, clean the surface thoroughly to remove dirt or splinters. For extra durability, you can seal or paint the wood to protect it from moisture.
Think about elevating the base slightly with blocks or legs if you want to prevent water from pooling. Secure the base to the ground if you expect rough play or strong winds.
This foundation gives you a solid, safe platform for building the rest of your mud kitchen, helping it stay stable and last longer for your kid’s outdoor play.
Add Surfaces and Accessories for Fun Play
Adding surfaces and accessories makes your mud kitchen a fun, engaging space that sparks creativity. You can include a sturdy table or countertop for mixing, pouring, and pretending to cook.
Install hooks or shelves to hold tools like spatulas, whisks, and small pots, making everything easy to access. Incorporate items like toy utensils, measuring cups, and empty containers to encourage imaginative play.
Consider adding a small sink or water station for washing up. Bright colors and themed accessories, such as pretend food or recipe cards, boost the play experience.
Adding a small sink and colorful accessories enhances imaginative play and makes the mud kitchen more fun.
These additions turn an ordinary space into a lively, interactive environment where kids can experiment, create, and have endless fun. They also help develop motor skills and social abilities.
Decorate and Personalize Your Mud Kitchen
You can make your mud kitchen stand out by choosing bright, cheerful colors that spark your child’s imagination.
Adding personal touches like painted signs or favorite characters makes it distinctly theirs.
Incorporating natural elements like stones or plants creates a more inviting, nature-inspired play space.
Choose Bright, Fun Colors
Choosing bright, fun colors for your mud kitchen instantly makes it inviting and exciting for kids. Vibrant hues like cheerful yellows, playful blues, and lively reds catch their attention and spark creativity.
Use bold colors for the main structure to create a lively focal point in your yard or play area. You can also paint smaller accents or details in contrasting shades to add visual interest.
Bright colors make the space feel cheerful and energetic, encouraging kids to investigate and play freely. Keep in mind, you don’t have to stick to traditional colors—feel free to mix and match to reflect your child’s personality.
The goal is to make the mud kitchen a colorful, joyful spot where imagination can flourish.
Add Personal Touches
Personal touches make your mud kitchen uniquely fun and inviting. They turn it into a special space your child will love to spend time in.
Add name signs or painted designs to give it a one-of-a-kind look. You can also hang small chalkboards for drawing or writing menus, which encourages creativity.
Incorporate stickers, decals, or stencils that match your child’s interests, like animals or favorite characters. This personalization helps make the space feel more special.
Label shelves to help your child organize utensils and ingredients easily. You can use stencils or hand-paint patterns that reflect their personality for a cozy touch.
Adding small decorations like a tiny apron or mini utensils can make the space feel warm and inviting. These details make the kitchen more attractive and inspire imagination.
Most importantly, these personal touches make pretend play more engaging and help your child feel a sense of ownership over their mud kitchen.
Incorporate Nature Elements
Adding natural elements to your mud kitchen brings a fresh, lively vibe that sparks your child’s imagination. Incorporate stones, shells, or pinecones around the workspace to create a tactile environment.
Hang small branches or leaves as decorative accents, encouraging your child to investigate textures and shapes. Use flower pots or natural baskets to hold utensils or small toys, blending practicality with nature.
You can also attach twine or vines to the structure for a playful feel. These elements not only personalize the space but also foster a deeper connection with nature.
Safety Tips and Maintenance for Outdoor Use
Ensuring your DIY mud kitchen stays safe and in good condition means doing regular maintenance and keeping safety in mind. Always check for loose nails, sharp edges, or splinters before kids start playing.
Keep the area clean by removing debris and washing surfaces often. This helps prevent mold or bacteria from growing. Use non-toxic, weather-resistant paints and finishes to protect the materials from the weather.
Inspect for damaged wood or loose hardware regularly to catch problems early. Clean and sanitize the surfaces after each use to keep everything hygienic. Store tools and supplies out of children’s reach to keep them safe.
Lastly, cover or store the kitchen during harsh weather to prevent damage and prolong its life.
Encourage Imaginative Play in Your Mud Kitchen
Creating opportunities for imaginative play is the key to making your mud kitchen a magical space where kids can let their creativity run wild. Encourage them to invent recipes, pretend they’re chefs, or run a pretend café.
Provide a variety of utensils, bowls, and cups to inspire different scenarios. Use colorful, themed accessories like toy vegetables, pots, or aprons to spark storytelling and role-playing.
Ask open-ended questions to challenge their imagination, like “What’s cooking today?” or “Who’s your customer?” Let them organize their space and create their own rules.
Troubleshoot Common DIY Mud Kitchen Challenges
When building a DIY mud kitchen, you might run into common issues like water drainage, unstable structures, or messes. Luckily, these are easy to fix with some simple solutions.
To improve water drainage, add a slight slope to the surface or raise the base. This helps water flow away easily and keeps the area dry.
Enhance water drainage by angling surfaces or elevating the base to keep your mud kitchen dry and functional.
For stability, secure the structure with brackets or anchor it to a wall or fence. Regularly check joints and fastenings to prevent wobbling.
Managing mess is easier with washable paints, splash guards, or lining surfaces with plastic sheets. Keep cleaning supplies nearby for quick cleanup.
Consider using weather-resistant materials to make your mud kitchen last longer. You can also incorporate removable trays for simple cleaning.
Design the kitchen with proper drainage holes to avoid water buildup. These small tweaks make a big difference in keeping the space fun and functional.
Frequently Asked Questions
How Do I Make the Mud Kitchen Weatherproof?
To make your mud kitchen weatherproof, start by sealing all wood surfaces with outdoor-grade sealant or waterproof paint. This helps it stand up to rain and moisture better.
When you’re not using it, cover it with a waterproof roof or a large outdoor tarp. This keeps it protected from the elements and helps it last longer.
Raise the mud kitchen off the ground on legs or pallets. This prevents water from seeping in and causing damage.
Regularly check for signs of wear or damage. Reapply sealant as needed to keep everything well-protected and weather-resistant.
What Age Range Is Suitable for a Mud Kitchen?
A mud kitchen is suitable for children aged 2 to 8 years old. You should consider the child’s developmental stage, interests, and safety.
Younger kids, around 2-4 years, will enjoy simple, sensory play. Older children, 5-8 years, can handle more complex activities.
Always supervise play and make sure the equipment is safe and age-appropriate. Encourage creativity and outdoor fun.
Can I Include a Water Source in the Mud Kitchen?
Absolutely, adding a water source really brings the mud kitchen to life! You can include a small sink, a tap, or even a simple basin to encourage imaginative play.
Just make sure to secure water connections properly and supervise children during use for safety. A water source not only makes the experience more realistic but also boosts sensory fun, helping your little chefs develop fine motor skills and creativity in a playful, engaging environment.
How Do I Clean and Sanitize the Mud Kitchen Safely?
You can clean and sanitize the mud kitchen by rinsing all surfaces with warm, soapy water after each use.
Use a gentle disinfectant, like diluted vinegar or a mild bleach solution, and wipe everything down thoroughly.
Be sure to rinse off any residue and let the surfaces air dry.
Regular cleaning helps prevent bacteria buildup and keeps the mud kitchen safe and hygienic for your kids to enjoy.
Are There Eco-Friendly Materials Recommended for Construction?
You should use eco-friendly materials like untreated wood, bamboo, or recycled pallets, as they’re safer for kids and better for the environment. Did you know that bamboo grows up to 35 inches per day and regenerates quickly? These sustainable options reduce chemical exposure and environmental impact.
Conclusion
Now, with your DIY mud kitchen complete, you’re ready for a world of giggles, muddy messes, and endless creativity. Watch your little chef turn a simple corner into a lively culinary kingdom where imagination runs wild.
Let the dirt turn into magic as your kids dive into messy, joyful play. Get ready for a tidal wave of fun and chaos—there’s nothing quite like building, playing, and creating muddy memories that last forever.
So, get those little hands dirty and let the mud-slinging adventures begin with your new mud kitchen!