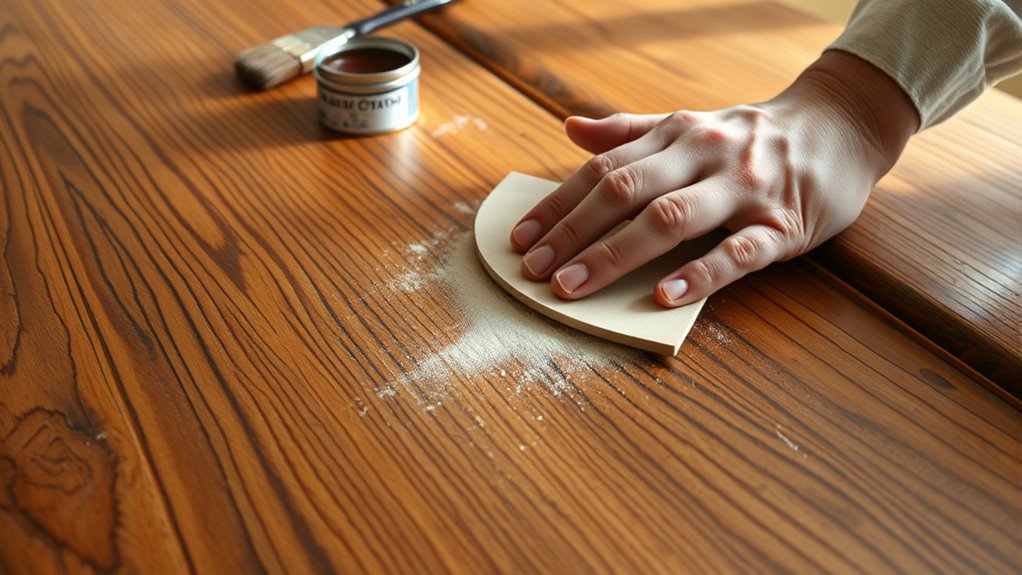
Step-by-Step Guide to Refinish Your Wooden Kitchen Table
Are you tired of looking at that worn-out wooden kitchen table and wishing you could bring it back to life? You’re definitely not alone—many people struggle with figuring out how to refinish furniture and get that fresh, new look.
Luckily, with a little effort, you can transform your table and enjoy a beautiful centerpiece in your kitchen again.
To refinish your wooden kitchen table, start by clearing your workspace and protecting nearby surfaces. Next, choose the right sandpaper and quality materials like stain and sealant.
Sand the surface smoothly, removing old finishes and imperfections.
After staining, apply multiple thin coats of sealant, letting each dry completely. For the best results, maintain the table with gentle cleaning and touch-ups.
If you want to guarantee a flawless finish, plenty of helpful advice is available to guide you through the process.
Key Takeaways
- Prepare a clean, well-ventilated workspace and gather all the tools and materials you’ll need before you start.
- Sand the table thoroughly using different grit sandpapers. This will help remove the old finish and smooth out the surface.
- Apply primer, stain, or paint in thin, even coats. Make sure to let each layer dry completely before adding the next.
- Seal the finished surface with polyurethane or wax to protect it and make it more durable.
- If you notice bubbles, streaks, or an uneven finish, address these issues quickly. Light sanding and reapplying the finish can help fix them.
How to Prepare Your Workspace for Refinishing

Before you start refinishing your wooden kitchen table, it’s essential to prepare your workspace thoroughly. Clear the area of any clutter, including dishes, utensils, and decorations, so you have plenty of room to work.
Cover nearby surfaces with drop cloths or old sheets to protect them from dust, stains, and debris. Make sure your workspace is well-ventilated by opening windows or turning on fans; this helps disperse fumes from paints or varnishes.
Gather all necessary tools and materials beforehand so you won’t have to search for anything in the middle of your project. Keep a trash bag nearby for waste like old finishes or used rags.
Creating a clean, organized environment ensures your refinishing process goes smoothly and safely, giving you the best results.
Choosing the Best Materials and Tools
Choosing the right materials and tools is crucial for a successful refinishing project. Quality supplies ensure durability and a smooth finish.
Pick sandpaper with different grits for proper surface prep—coarse for stripping, fine for smoothing. Use a high-quality primer and paint or stain that are suitable for wood.
Invest in brushes, rollers, and a sanding block for even application. Safety gear like masks and gloves keep you protected during sanding and painting.
Tips to Avoid Common Refinishing Mistakes
To avoid common refinishing mistakes, start by properly preparing the surface to ensure the finish sticks well. Taking the time to do this right makes a big difference.
Always use quality materials and carefully follow the application instructions. This helps you achieve a smooth, durable finish that looks professional.
Paying attention to these steps will make your project easier and result in a better-looking finished product.
Proper Surface Preparation
Proper surface preparation is essential to ensure a smooth, professional finish on your wooden kitchen table. Start by thoroughly cleaning the surface to remove dust, grease, and grime. Use gentle soap and water or a specialized cleaner, then let it dry completely.
Next, sand the table to remove old finish, scratches, or rough patches using medium-grit sandpaper. Follow with fine-grit sandpaper for a smooth surface. Be sure to sand in the direction of the wood grain to prevent scratches.
Remove all dust with a tack cloth or vacuum. Skipping or rushing this step can lead to uneven coverage, peeling, or a blotchy appearance. Proper prep helps your finish adhere well and results in a sleek, durable surface.
Use Quality Materials
Using high-quality materials is essential to achieving a professional-looking finish that lasts. Cheap or low-grade paints, stains, and sealants might seem like a way to save money, but they often lead to chipping, peeling, or uneven color.
Invest in good-quality brushes and rollers to ensure smooth application and minimize streaks. Choose durable, stain-resistant finishes designed specifically for furniture, and always read product labels carefully.
Using reputable brands can prevent issues like improper drying or poor adhesion. Remember, your results depend a lot on the materials you pick, so don’t cut corners.
Quality materials not only make your project look better but also help it last longer. This makes your effort truly worthwhile.
Follow Application Guidelines
Choosing high-quality materials sets a strong foundation, but following the right application techniques guarantees your finish looks smooth and professional. Always read and follow the manufacturer’s instructions carefully. Skipping steps can lead to uneven coverage or peeling.
When applying paint, stain, or finish, use consistent strokes and don’t rush. Multiple thin coats give better results than one thick layer. Make sure to let each coat dry completely before applying the next to prevent smudges or bubbles.
Keep your tools clean and well-maintained to help ensure a smooth application. Avoid over-brushing, which can cause streaks, and don’t apply finishes in overly humid or cold conditions. These can affect drying time and how well the finish sticks.
How to Sand Your Wooden Table Properly
Start by removing any loose debris or old finish from the surface with a vacuum or a damp cloth. This clears the way for effective sanding.
Choose the right grit sandpaper: start with a medium grit (around 120) to remove scratches or old stain, then switch to a finer grit (220) for a smooth finish.
Use even, circular motions to avoid gouging the wood. Keep the surface consistent and avoid applying too much pressure.
Here’s a quick guide:
| Step | Tip |
|---|---|
| Selecting sandpaper | Use medium then fine grit for best results |
| Sand in motions | Keep it even; circular or back-and-forth |
| Check progress | Wipe to see if surface is smooth |
| Clean surface | Remove dust before staining |
Proper sanding guarantees your table’s surface is ready for the next steps.
Applying Stain for a Flawless Finish
Once you’ve prepared the surface, applying stain evenly is key to achieving a flawless finish. Use a clean cloth or brush to apply the stain in the direction of the wood grain.
Work in manageable sections to prevent uneven drying. Start with a small amount of stain and spread it thinly, building up color gradually.
Wipe off excess stain after a few minutes with a clean cloth to avoid blotches. If you want a darker finish, apply additional coats once the previous layer is dry, usually after a few hours.
Keep your application consistent in pressure and motion to guarantee an even coat. Taking your time and paying attention to detail will give your table a smooth, professional look.
Sealing and Protecting Your Refinished Table
Sealing and protecting your refinished table is key to keeping it looking great and lasting longer. Once the stain and finish are dry, apply a high-quality sealant like polyurethane or clear wax to protect the surface from scratches, moisture, and everyday wear.
Use a clean brush or soft cloth to apply the sealant evenly, following the manufacturer’s instructions. Work in a well-ventilated area and avoid overapplying to prevent drips or uneven coverage.
Multiple thin coats are better than one thick layer, providing better protection. After applying the final coat, let it cure completely before using the table.
Proper sealing keeps your refinished table beautiful and functional for years to come.
How to Maintain Your Wooden Table After Refinishing
To keep your refinished wooden table looking its best, clean it regularly with gentle techniques that don’t damage the surface.
Applying a protective coating periodically helps guard against scratches and spills. Being mindful of daily habits can prevent unnecessary damage.
Consistent maintenance guarantees your table stays beautiful for years to come.
Regular Cleaning Techniques
Keeping your refinished wooden table looking its best requires regular cleaning with gentle techniques. Use a soft, damp cloth to wipe down the surface, avoiding excess moisture that can damage the finish.
For stubborn spots or smudges, mix a little mild dish soap with water and gently clean the area. Then, wipe with a clean, damp cloth to remove any residue.
Avoid harsh chemicals, abrasives, or steel wool, which can scratch or dull the finish. Dry the surface immediately with a soft towel to prevent water spots.
Regular dusting helps prevent buildup and keeps your table looking fresh. By sticking to these simple cleaning methods, you preserve the beauty of your refinished wood without harming its finish.
Protective Surface Applications
Applying a protective layer to your wooden table is crucial for keeping it looking great and lasting longer after refinishing. A good finish like clear polyurethane or wax acts as a barrier against spills, stains, and daily wear.
Before applying, make sure the surface is clean and free of dust. Use a soft cloth or brush to spread the protective product evenly, following the manufacturer’s instructions.
It’s better to do multiple thin coats rather than one thick one, and let each layer dry properly. Once fully cured, this layer will boost the table’s shine and protect the refinished surface.
Regularly check the coating and reapply as needed to keep your table looking beautiful over time. Proper surface protection helps your investment last longer and keeps your table looking its best.
Preventing Daily Damage
Even after refinishing your wooden table, daily habits are key to keeping it looking great and lasting longer. To avoid scratches and stains, always use coasters under glasses and don’t put hot items directly on the surface.
Wipe up spills right away to stop moisture from seeping in and damaging the finish. Use a soft cloth with a gentle cleaner to keep it clean—avoid harsh chemicals that can wear down the finish.
Regular dusting helps prevent debris from scratching the surface. Place felt pads on furniture legs to avoid scuffs when moving items around.
Troubleshooting Common Refinishing Problems
Refinishing a wooden kitchen table can sometimes bring unexpected challenges, but catching common problems early can save you time and frustration. If your finish isn’t smooth or if you notice bubbles or uneven color, don’t panic. These issues often come from improper sanding, applying finish too thick, or rushing the process.
Here’s what you might feel:
| Problem | Emotion/Impact |
|---|---|
| Bubbles or blisters | Frustration and doubt |
| Uneven color or streaks | Disappointment and hesitation |
| Sticky or tacky surface | Confusion and concern |
| Scratches or gouges | Disappointment and regret |
| Finish peeling or flaking | Worry and disappointment |
The key is to address issues quickly by lightly sanding, cleaning thoroughly, and applying thin coats. Patience really does lead to a flawless finish.
Frequently Asked Questions
How Long Does the Refinishing Process Typically Take?
Refinishing your wooden kitchen table usually takes about 2 to 5 days, depending on the project’s complexity and drying times. You’ll spend time sanding, cleaning, and applying stain or paint, with some steps needing drying periods.
If you’re careful and give each coat enough drying time, the process might stretch closer to five days. Rushing through can mess up the finish, so patience is key to getting a smooth, long-lasting result.
Can I Refinish a Table With Existing Damage or Deep Scratches?
Yes, you can refinish a table with existing damage or deep scratches, but you’ll need to prepare properly. Start by sanding the surface thoroughly to remove loose or damaged wood.
Then, fill deep scratches with wood filler. Once it’s dry, sand again to get a smooth finish. Keep in mind, severe damage might mean replacing parts or calling in a professional.
But for minor to moderate issues, refinishing can often fix the problem and give your table a fresh look.
What Are Eco-Friendly or Non-Toxic Refinishing Options?
You can choose eco-friendly options like water-based polyurethane, which is low in VOCs and safe for your home. For example, a homeowner in Portland used it on their antique table and got a durable finish without harmful fumes.
This type of finish dries quickly, smells less, and is non-toxic, making it perfect for kitchens. By choosing such products, you help protect your family and the environment while restoring your table’s beauty.
Is It Necessary to Remove the Old Finish Completely?
No, it’s not always necessary to remove the old finish completely. If the existing finish is in good condition, you can lightly sand it to create a better surface for the new finish to adhere.
But if the old finish is peeling, damaged, or has deep stains, stripping it entirely will ensure a smoother, more durable result. Just assess the condition first, then choose the best approach for your project.
How Often Should I Refinish My Wooden Kitchen Table?
You should refinish your wooden kitchen table every 3 to 5 years. Did you know that a well-maintained table can last for decades? Regular refinishing not only keeps it looking beautiful but also protects the wood from damage and wear.
If you notice scratches, dullness, or stains, it’s probably time to give it a fresh coat. Proper maintenance helps your table stay stunning and functional for many years to come.
Conclusion
Refinishing your wooden kitchen table is a rewarding project that restores beauty and prolongs its life. If you follow the proper steps and avoid common pitfalls, you’ll achieve a professional-looking finish.
Patience and attention to detail are key. Remember, taking your time ensures the best results and a smoother process.
Studies show that completing DIY projects like refinishing a table can boost confidence and reduce stress. It’s a great way to improve your space and your well-being at the same time.