10 Simple Steps to Remove a Kitchen Faucet
Are you tired of dealing with a stubborn or leaky kitchen faucet and unsure how to remove it? You’re not alone—many people struggle with this task, especially if it’s their first time.
Removing a kitchen faucet can seem tricky, but with a few simple steps, you can do it yourself and get ready for a fresh new look or a repair.
To remove your kitchen faucet, start by shutting off the water supply under the sink and protecting your countertop with cloths or plastic.
Next, disconnect the water lines and remove the aerator.
Loosen and take out the mounting hardware, then carefully lift the faucet away.
Check and clean the mounting surface before installing the new faucet or reassembling.
Finally, turn the water back on, check for leaks, and clean your work area.
For detailed guidance, keep exploring these steps.
Key Takeaways
- Turn off the main water supply and disconnect the hot and cold water lines under the sink.
- Remove the aerator and any mounting hardware that’s holding the faucet in place.
Use a wrench to loosen and remove the nuts or clips securing the faucet.
Once all the fasteners are out, carefully lift the faucet from the sink.
Take a moment to clean the area and get ready for the new faucet.
Check for any leftover water or debris before you start installing the new one.
Gather Your Tools and Supplies for Faucet Removal
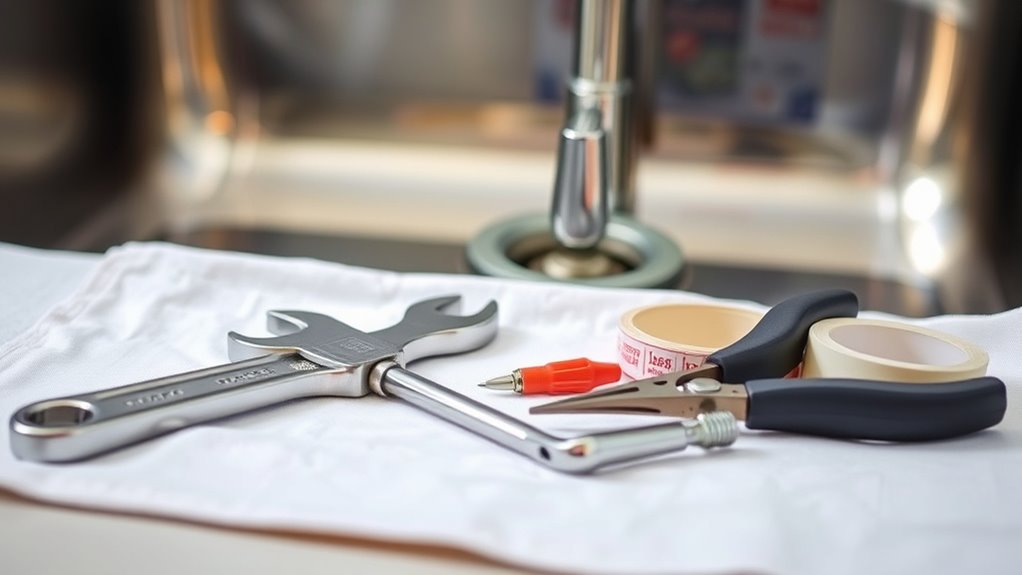
Before you start removing your kitchen faucet, make sure you have all the tools and supplies you’ll need. You’ll want a wrench or adjustable pliers to loosen fittings, a screwdriver for mounting hardware, and a bucket or towel to catch any leftover water.
Having some plumber’s tape on hand is helpful for sealing threads when installing the new faucet. It’s also a good idea to grab a rag or cloth for cleaning up spills and wiping down parts.
Keep plumber’s tape and a rag nearby to ensure a clean, leak-free faucet installation.
If you’re upgrading, don’t forget to have your replacement faucet ready to go. Check your toolkit beforehand to confirm you have everything needed.
Gathering everything in advance keeps things from getting interrupted and makes the process smoother. Being prepared with the right tools will save you time and frustration during your faucet replacement.
Turn Off the Water Supply to Your Kitchen Faucet
Start by finding the main water valve, which is usually near your water meter or main pipe.
Turn off the shut-off valve under the sink, along with the hot and cold water valves.
This will stop water flow completely and make sure there’s no water running when you remove your faucet.
Locate Main Water Valve
To turn off the water supply to your kitchen faucet, locate the main water valve that controls water flow to your entire home or just the line feeding the kitchen. This valve is usually near the water meter, often in the basement, garage, or utility area.
Look for a large, round handle or a lever that’s easy to turn off. Once you find it, turn the valve clockwise to shut off the water. Check if the valve is labeled for quick identification.
Make sure the house’s main switch isn’t already off before proceeding. Confirm no water is flowing by opening the faucet slightly. Knowing the difference between main and localized shut-off valves can help.
Keep a flashlight nearby for better visibility. This makes it easier to find the valve, especially in dimly lit areas.
Shut Off Under Sink
Locate the shut-off valves under your sink. These are usually two small handles or levers attached to the pipes beneath the faucet. Turn each handle clockwise to shut off the water supply.
Make sure both the hot and cold water valves are fully closed. This will prevent any leaks during removal. If you’re having trouble finding the valves, look for small circular or lever-style handles connected directly to the water lines.
It’s a good idea to open a nearby faucet after shutting the valves. This helps release any remaining pressure and ensures the water is fully off. Once the water stops flowing, you’re ready to disconnect the faucet without risking spills or damage.
Turn Off Hot and Cold
Before removing your kitchen faucet, make sure the water supply is fully shut off to prevent leaks. You need to turn off both the hot and cold water valves under the sink.
Locate the shut-off valves, usually near the base of the sink, and turn them clockwise until they stop. Double-check that no water is flowing by opening the faucet slightly.
This step keeps water from spraying or leaking during removal. Remember, neglecting this can lead to messes and water damage.
- Confirm valves are fully closed
- Test the faucet to verify no water flows
- Use a wrench if valves are stiff
- Keep a towel nearby for spills
- Prepare a bucket for any residual water
Protect Your Countertop and Prepare Your Work Area
Before you start removing the faucet, cover nearby surfaces with a cloth or plastic. This helps prevent any damage during the process.
Clear your workspace of items that might get in the way or fall into the sink. Creating a neat, organized area makes the job safer and easier.
Cover Surrounding Surfaces
Start by covering the surrounding surfaces to protect your countertop from water splashes, debris, and potential damage. This keeps your workspace clean and prevents costly repairs. Use a drop cloth, old towels, or plastic sheeting to shield the area.
Secure the coverings with painter’s tape to prevent slipping. Remove or move items like soap dispensers, sponge holders, or cutting boards that could get in the way. Protect nearby cabinets and backsplash with cardboard or additional plastic.
Covering these surfaces minimizes mess and keeps your work area organized. Remember, a tidy workspace makes the removal process smoother and quicker. Staying prepared with proper coverings guarantees your project stays clean, safe, and hassle-free from start to finish.
Clear Workspace Area
Clear your workspace by removing any items from the countertop that could get in the way or be damaged during the removal process. This includes soap dispensers, sponges, dishes, and small appliances. Clearing the area gives you space to work safely and prevents accidental damage or spills.
Cover nearby surfaces with a cloth or plastic sheet to protect them from water splashes or falling parts. Make sure you have enough room to access the faucet and tools comfortably. Organizing your workspace beforehand helps you work more efficiently and reduces frustration.
Once everything is cleared and protected, you’re ready to proceed with removing the faucet without worry about clutter or damage. A clean, organized area makes the job smoother and safer.
Remove the Aerator and Disconnect Water Lines
Begin by removing the aerator, which is usually a small, mesh-covered cap at the end of the faucet spout. Use your hand or pliers to unscrew it counterclockwise. Once it’s off, check the aerator for any debris or mineral buildup.
Next, turn off the water supply valves underneath the sink to avoid leaks. Keep a towel or bucket nearby to catch any leftover water. Carefully disconnect the water supply lines from the faucet with an adjustable wrench.
Remember to note which line is hot and which is cold so you can reconnect everything correctly later. Be gentle when loosening the fittings to prevent any damage.
Loosen and Take Out the Faucet Mounting Hardware
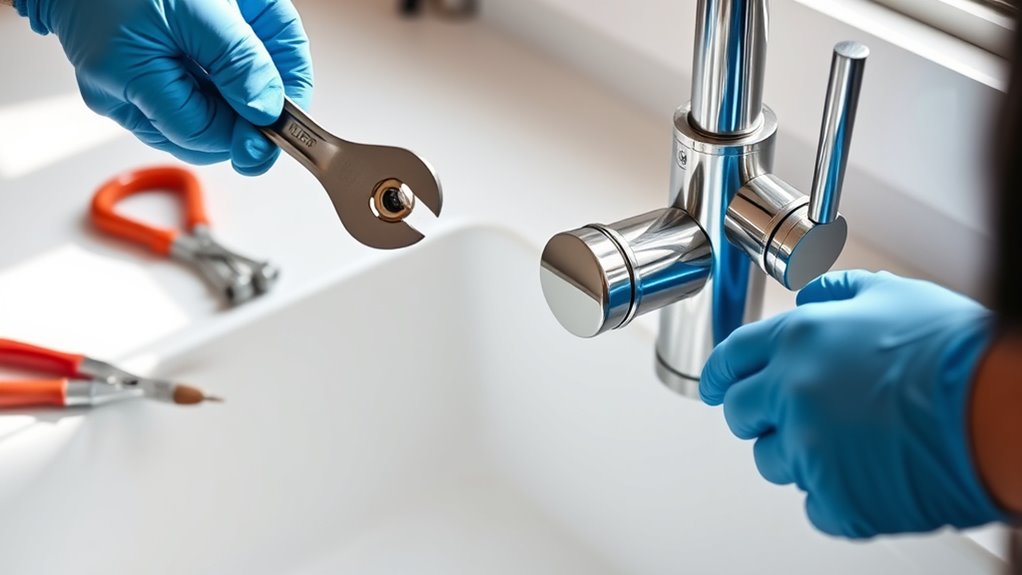
To remove the faucet, start by loosening the mounting hardware that holds it to the sink. Find the nuts or bolts underneath that secure the faucet in place.
Use a wrench or pliers to turn them counterclockwise. If they’re tight or corroded, apply some penetrating oil and wait a few minutes before trying again.
Keep a bucket or towel nearby to catch any water or debris that might fall. Once the nuts or bolts are loose, carefully lift the faucet upward to free it from the sink.
Be gentle so you don’t damage the sink or surrounding surfaces. With the hardware removed, the faucet is now ready to be fully detached in the next step.
Carefully Detach the Kitchen Faucet From the Sink or Countertop
Before you start removing the faucet, turn off the water supply to prevent leaks. Then, loosen the mounting hardware holding the faucet in place.
With the water off and the hardware loosened, you can carefully detach the faucet from the sink or countertop.
Turn Off Water Supply
Turning off the water supply is an important first step before removing your kitchen faucet. If you don’t shut off the water, you might end up with a messy leak or water damage.
Find the shut-off valves under your sink, usually near the back. Turn each valve clockwise until the water flow stops completely.
If you can’t find individual valves, turn off the main water supply to your home. Before you proceed, open the faucet to drain any remaining water in the lines.
Use a bucket or towel to catch drips and prevent a mess. This will help you work more smoothly and avoid water damage.
Loosen Mounting Hardware
Begin by locating the mounting hardware that secures the faucet to the sink or countertop. Usually, it’s underneath the sink, hidden behind a panel or access hole.
You’ll likely see nuts, bolts, or mounting clips holding the faucet in place. Use a basin wrench or an adjustable wrench to loosen these fasteners.
Turn counterclockwise to loosen and remove the nuts or clips. Keep a container nearby to catch any water or debris that may fall.
Be gentle to avoid damaging the sink or stripping the hardware. Once the mounting hardware is fully loosened, you can carefully lift the faucet away from the sink or countertop.
Double-check that all fasteners are removed before attempting to detach the faucet completely.
Check the Mounting Surface for Damage and Clean It
Inspect the mounting surface carefully to make sure it’s in good shape before removing the faucet. Look for cracks, chips, or corrosion that could cause leaks or problems later on. If you spot damage, you might need to repair or replace the surface first.
Clean the area well to remove grime, soap scum, or mineral deposits. A clean, smooth surface helps create a secure seal when installing the new faucet and makes the process easier.
Check for any warping or unevenness that could affect installation. Also, ensure the surface is dry and free of old adhesive or sealant residue before proceeding. This way, you’ll have a solid base for your new faucet.
Install the New Faucet or Reassemble the Old One
To install a new faucet or reassemble the old one, start by carefully aligning the faucet’s mounting hardware with the prepared surface. Make sure the faucet lines up properly with the mounting holes and that any gaskets are in place.
Hand-tighten the mounting nuts or screws to hold the faucet steady. Once everything is aligned, use a wrench to tighten the nuts securely, but avoid over-tightening, which could damage the fittings.
Connect the water supply lines to the faucet’s inlet ports, ensuring they’re snug but not overly tight. Double-check all connections for proper placement. Take your time during this step to prevent leaks or misalignments.
When everything feels secure, you’re ready to move on to testing the faucet’s functionality.
Test for Leaks and Ensure Proper Functionality
After securing all connections, turn on the water supply valves slowly to let water flow through the faucet. Check for any leaks around the base, supply lines, and aerator. Run both hot and cold water to make sure everything works smoothly and the temperature stays consistent.
Listen for any strange noises or irregular flow, which might mean there’s a problem. Watch the water flow to see if it’s steady and at the right pressure. If you notice leaks or weak flow, tighten the connections a little or double-check the seals.
Make sure the faucet handles move easily and shut off completely. Running the water for a few minutes can help catch issues early on.
Inspect connections for drips or moisture. Verify the water temperature and flow rate. Test both hot and cold settings. Check for any loose fittings and confirm the faucet functions correctly.
Clean Up Your Workspace and Finalize the Faucet Removal
Once you’ve confirmed everything is working properly and there are no leaks, it’s time to clean up your workspace and finish removing the faucet. Start by removing any tools, towels, or debris from the area.
Next, wipe down the sink and surrounding surfaces to get rid of dust, grime, or leftover parts. Check that all mounting hardware and hoses are accounted for, and store any reusable components for future use.
If you disconnected the water supply lines, cap or plug the openings to keep debris out. Dispose of or recycle the old faucet per your local regulations. Finally, inspect your work area to make sure nothing was overlooked.
A clean, organized space not only completes the job but also prepares you for installing a new faucet or tackling future repairs.
Frequently Asked Questions
How Do I Identify the Type of Faucet I Have?
To identify your faucet type, start by examining its design. Look to see if it has just one handle or two handles. That will tell you if it’s a single-handle or double-handle faucet.
Next, check the base to see if it’s mounted on the deck or on the wall. Also, take a look at the spout shape and see if there’s a sprayer attached.
Remove the aerator to find out if it’s a cartridge, compression, or ball type. Knowing this info will help you figure out the exact style of your faucet.
What Safety Precautions Should I Take During Removal?
Think of safety as your shield when removing a kitchen faucet. You should turn off the water supply first to prevent splashes, then unplug any nearby electrical devices to avoid shocks.
Wear gloves and safety goggles to protect your skin and eyes from debris or sudden sprays. Use a bucket or towel to catch drips, and work slowly to avoid damaging plumbing or fixtures.
These precautions keep you safe and the job smooth.
Can I Remove the Faucet Without Professional Help?
Yes, you can remove a kitchen faucet without professional help if you’re comfortable with basic plumbing.
First, turn off the water supply and disconnect the water lines. Use the right tools to loosen the mounting nuts and carefully lift the faucet out.
Make sure to follow safety precautions, like wearing gloves and eye protection. If you run into complex connections or feel unsure, it’s best to call a professional.
How Do I Deal With Stubborn or Corroded Fittings?
When dealing with stubborn or corroded fittings, don’t give up just yet. Applying penetrating oil like WD-40 and letting it sit for a few minutes can work wonders.
Next, grab a wrench with a firm grip and turn slowly. Tapping gently with a hammer can also help loosen things up.
If that still doesn’t do the trick, try heating the fittings slightly to expand the metal and break the corrosion. Patience and the right tools will get the job done.
What Are Common Mistakes to Avoid When Removing a Faucet?
When removing a faucet, don’t rush the process because it can cause damage or leaks. Take your time to avoid mistakes.
Make sure to turn off the water supply before you start. Forgetting this step can lead to water spraying everywhere and making a mess.
Don’t use too much force on fittings. They can break if you’re too aggressive, which means more trouble later.
Having the right tools on hand is important. Also, keep a bucket nearby to catch any water that might drip or spill during removal.
Lastly, don’t forget to protect your sink surface. Using a cloth or pad can help prevent scratches or damage while you work.
Conclusion
With the old faucet gone, you’ve cleared the stage for a fresh start—like opening a window to a brighter, more efficient kitchen.
Now, your space is ready to welcome a sleek new centerpiece or to rest easy with a job well done.
Just as a painter steps back to admire their masterpiece, take a moment to appreciate your handiwork.
Your kitchen’s new heartbeat is ready to flow smoothly, bringing renewed life to your daily routines.
And with your faucet replacement complete, you can enjoy a functional, stylish kitchen that works as hard as you do.