10 Simple Steps to Install Kitchen Countertops Like a Pro
Thinking about installing kitchen countertops yourself? You’re not alone—many homeowners find this project daunting and tricky to get just right. But with a little guidance, you can tackle it confidently and save some money too.
Start by accurately measuring your kitchen space, including countertops, cabinets, and features like sinks. Choose a durable, stylish material that fits your needs and gather all necessary tools.
Prepare your cabinets, ensuring they’re level and secure. Carefully cut the countertops to size, then secure and fasten them properly. Seal and finish the surface for protection, and troubleshoot any issues during installation.
Finish with a clean, thorough inspection, and with a bit more guidance, you’ll master the process seamlessly.
Key Takeaways
- Measure and plan carefully. Make sure to account for any irregularities and overhangs before choosing your materials.
- Prepare your cabinets and surfaces first. Clean everything thoroughly, and level or reinforce surfaces to ensure a stable base.
- When cutting the countertops, use the right tools for a precise cut. Take your time to align everything carefully and secure the pieces in place.
- Seal the seams, edges, and surface properly. Use the right sealants to give it a professional look and make it durable.
- Lastly, inspect your work. Clean up the area and perform regular maintenance to keep your countertops looking great and lasting longer.
Measure Your Kitchen Space Accurately for the Perfect Countertop Fit
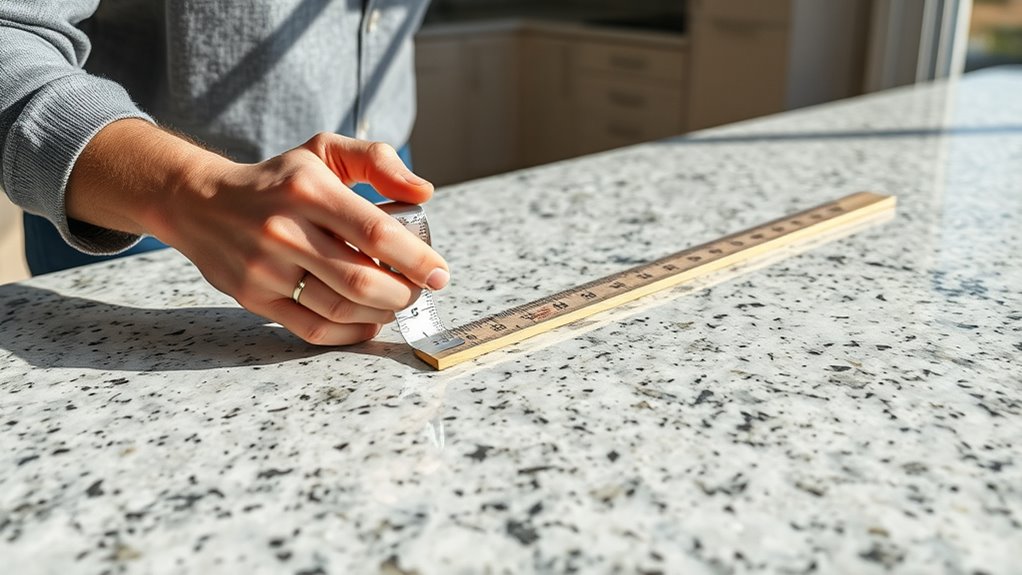
Before you buy your new countertop, it’s essential to measure your kitchen space accurately. Start by measuring the length and width of each surface where you’ll install the countertop. Use a tape measure and write down each measurement clearly.
Don’t forget to account for any irregularities, like curves or angled walls. Measure the height from the floor to the top of the existing cabinets or base structure.
If you plan to add features like a sink or cooktop, measure their dimensions separately. Double-check your measurements to avoid mistakes.
Precise measurements guarantee your new countertop fits perfectly and minimizes material waste. Taking the time now to measure carefully will save you headaches during installation and help you achieve a professional-looking finish.
Choose the Best Countertop Material and Style for Your Kitchen
Selecting the right countertop material and style is a key step that sets the tone for your entire kitchen. You should consider durability, maintenance, and how it looks.
If you want a low-maintenance surface, quartz or granite work well because they’re durable and come in lots of styles. For a budget-friendly option, laminate is versatile and easy to install.
Wood counters give a warm, rustic feel but need regular sealing to keep them looking nice. If style is your focus, marble adds elegance but is softer and can stain more easily.
Wood counters add warmth but require sealing; marble exudes elegance but stains easily and is softer.
Think about how you cook, your lifestyle, and your overall kitchen design. Match your countertop with your cabinets and backsplash to create a cohesive look.
In the end, choosing a material that balances function and style will help your kitchen stay beautiful and practical for years.
Gather the Tools and Materials Needed for Your Countertop Installation
Gather all the essential tools and materials you’ll need for your countertop installation before you get started.
This includes items like a saw, level, adhesive, and the countertop itself, along with any safety gear.
Having everything ready ensures the process goes smoothly and efficiently.
Essential Tools Checklist
Gathering the right tools and materials is key to making sure your countertop installation goes smoothly. You’ll need a circular saw or handsaw to cut the countertops to size, along with a drill for fastening.
A level helps ensure your counters sit perfectly flat, while clamps hold pieces securely during installation. A tape measure and square are essential for accurate measurements and straight cuts.
Safety gear like goggles and gloves protect you during cutting and handling. Don’t forget a silicone caulk gun for sealing seams and a putty knife to smooth out adhesives.
Having these tools ready saves time and helps prevent frustration. Make sure your workspace is organized so everything is within reach for a seamless, professional-looking install.
Required Materials Overview
To ensure a smooth installation, gather all your materials before you start. First, pick your countertop material—like granite, quartz, or laminate—and make sure you have enough to cover your workspace.
You’ll also need a measuring tape, a level, and a straightedge for accurate alignment. Don’t forget adhesives or sealants suitable for your surface, along with screws, brackets, or clips to secure everything in place.
Safety gear like gloves and goggles are important too. If you need to make adjustments, have a saw or cutting tools ready. Keep a pencil or marker handy for marking cuts or placement points.
Having everything organized and ready will make the process easier and help you avoid delays during your countertop installation.
Prepare Your Cabinets and Surface for a Secure, Flawless Installation
Start by thoroughly cleaning your cabinets and countertop surface to remove dust, grease, and debris. This helps ensure a strong, secure bond for your new countertops.
Once everything is clean, check that the surface is level and smooth. Sand down any uneven spots or high edges for the best results.
Next, make sure your cabinets are sturdy and securely attached to the wall. Reinforce them if needed to prevent any shifting.
Finally, measure the entire area carefully to verify the dimensions. Mark where the countertops will sit, including any overhangs or edges.
Safely Cutting Your Countertops to the Right Size
Before you start cutting, double-check your measurements to guarantee accuracy. Use the right tools designed for countertop materials, and always secure the surface so it doesn’t slip.
Taking these steps helps you cut safely and ensures a perfect fit. It’s all about being careful and prepared before you make any cuts.
Measure Carefully Before Cutting
Careful measurement is key to making sure your countertops fit just right and prevent costly mistakes. Take your time and double-check each measurement before marking your cuts. Accurate measurements help create a seamless fit and avoid gaps or overhangs.
To measure effectively, start by measuring the length and width of your space, including any cabinets or appliances. Use a pencil and a straightedge to mark your countertop dimensions clearly.
Verify your measurements at least twice to catch any errors before you cut. Always measure from multiple points to account for any irregularities in the space.
Use Proper Cutting Tools
Using the right cutting tools guarantees your countertops are trimmed accurately and safely. Choose tools suited for your material, like a circular saw with a carbide blade for stone or a fine-tooth handsaw for laminate.
Using improper tools can cause chips, uneven cuts, or accidents. Always wear safety gear such as goggles and gloves. Keep your workspace stable and well-lit.
Remember, the right tool makes all the difference in achieving a clean, precise cut.
| Tool | Material Compatibility |
|---|---|
| Circular Saw | Stone, laminate, solid surface |
| Jigsaw | Curved cuts in various materials |
| Handsaw | Laminate, soft woods |
| Tile Cutter | Ceramic or porcelain tiles |
| Oscillating Tool | Fine detail cuts in multiple surfaces |
Secure Countertop During Cuts
Securing your countertop firmly in place is key to safe and accurate cuts. If the surface shifts, you could end up with uneven edges or even cause injury.
To keep everything stable, use clamps to hold the countertop securely to a sturdy work surface. Placing non-slip pads or rags underneath helps prevent slipping.
Double-check your measurements before cutting. Make sure the mark is visible and properly aligned.
Ensure clamps are tight but not so tight that they damage the material. Avoid applying excessive pressure that could crack or chip the countertop.
Keep your hands clear of the cutting path and always wear safety goggles. Properly securing your countertop makes the cut safer and leads to a cleaner, more precise edge.
Step-by-Step Guide to Installing Your Countertop
Installing your countertop starts with careful preparation. First, measure your space precisely, marking where the countertop will sit. Make sure your cabinets are level and secure before placing the countertop.
Wear safety gear like gloves and goggles to protect yourself during handling and cutting. Gently lift the countertop into position, supporting it from underneath.
Align it carefully with your markings and ensure it’s flush with the cabinets. Use clamps to hold it temporarily if needed. Double-check the fit and make any necessary adjustments.
Once everything looks good, drill pilot holes through the countertop into the cabinets for permanent fastening. Use the right screws to secure it, being careful not to over-tighten and cause cracking.
Take your time to confirm everything is aligned and stable before moving on.
Seal and Finish Your Countertop for Long-Lasting Shine and Durability
Applying a high-quality sealant and finish is key to protecting your countertop and keeping it looking great for years. Start by giving the surface a thorough clean to remove dust and debris, which helps the sealant stick better.
Next, pick a sealant that suits your countertop material—whether it’s granite, quartz, or laminate. Then, follow these simple steps:
- Spread the sealant evenly with a clean cloth or brush, making sure to cover all surfaces well.
- Let it cure according to the manufacturer’s instructions, usually 24 to 48 hours.
- Finish up by applying a protective top coat or polish for extra shine and durability.
This process guards against stains, moisture, and everyday wear, leaving your countertop with a beautiful, long-lasting finish.
Troubleshooting Common Countertop Installation Problems
Even with careful planning, countertop installation can sometimes run into issues that need quick fixes. Common problems include uneven surfaces, gaps, or misaligned edges.
To fix uneven surfaces, use shims or carefully adjust supports. For gaps, sealing with high-quality adhesive or silicone caulk usually works well. Misaligned edges might need a bit of sanding or repositioning before final securing.
Here’s a quick troubleshooting guide:
| Issue | Solution |
|---|---|
| Uneven surface | Use shims or gently sand high spots |
| Gaps between sections | Apply flexible caulk or epoxy for sealing |
| Misaligned edges | Reposition and secure, then sand if needed |
| Cracks or chips | Repair with epoxy or putty |
| Loose fittings | Tighten screws or re-glue as needed |
Stay patient and make adjustments promptly to ensure a professional-looking finish.
Clean and Inspect Your Countertop for a Professional Finish
Once you’ve addressed any installation issues, the next step is to thoroughly clean and inspect your countertop to achieve a polished, professional look. Start by wiping down the surface with a gentle cleaner to remove dust, debris, and fingerprints. This helps ensure no dirt affects the final finish.
Next, examine the seams and edges closely for gaps, bubbles, or uneven spots—these can detract from a seamless appearance. Finally, check for any scratches, chips, or stains that may need touch-up or polishing.
Maintain Your Kitchen Countertops to Keep Them Looking Great
To keep your kitchen countertops looking pristine, develop a regular maintenance routine that includes gentle cleaning and prompt attention to spills.
Use a soft cloth or sponge with mild soap and water to remove dirt without scratching the surface. Avoid harsh chemicals or abrasive pads that can damage the finish.
Wipe up spills immediately, especially acidic substances like citrus or vinegar, to prevent staining or etching. Seal porous materials periodically to keep them resistant to stains and moisture.
Place coasters, trivets, or cutting boards under hot pots and knives to prevent damage. Regularly inspect for chips or cracks and address issues promptly to avoid worsening the damage.
Consistent care keeps your countertops looking new and extends their lifespan.
Frequently Asked Questions
Can I Install Countertops Myself Without Professional Help?
Yes, you can install countertops yourself if you’re comfortable with basic tools and measurements. Start by measuring your space accurately, then cut the countertop to fit.
Follow installation steps carefully, including securing the countertop properly and sealing edges. If you’re unsure about cutting or handling heavy materials, think about hiring a professional to avoid costly mistakes.
With patience and the right tools, DIY installation is definitely doable.
What Are the Best Ways to Prevent Countertop Damage During Installation?
Did you know improper handling causes 30% of countertop damages? To avoid this, always use thick, soft cloths or foam pads under heavy tools and appliances.
Lift rather than slide your countertops to prevent scratches or cracks. Securing your work surface with clamps can also help stop it from shifting.
Before cutting or drilling, protect edges with painter’s tape. These simple steps keep your countertops looking great during installation, saving you time and money.
How Do I Handle Uneven or Sloped Cabinet Surfaces?
To handle uneven or sloped cabinet surfaces, start by measuring the highest point. Mark a level line across all the cabinets so you have a clear guide.
Next, use shims or a leveling compound under the countertop to create a flat, even surface. Once it’s level, secure the countertop firmly, adjusting the shims as needed.
This method helps your countertop sit evenly, which prevents gaps or stress points that could cause damage over time.
Are There Eco-Friendly Countertop Options Available?
Think of eco-friendly countertops as a green sprout in your kitchen’s garden. Yes, plenty of options exist, like bamboo, recycled glass, and cork, each symbolizing sustainability and renewal.
You can choose materials that are renewable, low in VOCs, and made from recycled content. These options not only reduce environmental impact but also add unique beauty to your space.
They allow you to cook and live more consciously.
How Often Should I Reseal or Maintain My Countertops?
You should reseal your countertops every 1 to 3 years, depending on the material and how much you use them.
Regular maintenance means cleaning with gentle, non-abrasive products and wiping up spills right away to avoid stains or damage.
For natural stone, resealing is especially important to keep it looking good and lasting longer.
Keep an eye on the surface; if water stops beadings, it’s time to reseal.
Staying on top of these simple steps helps your countertops stay beautiful and durable for years to come.
Conclusion
Now that you’ve mastered each step, your kitchen countertops will look as if a master artisan from the Renaissance crafted them. Just like a skilled blacksmith, your attention to detail guarantees durability and beauty.
Keep your workspace tidy, double-check measurements, and take your time. Before you know it, your kitchen will shine like a polished gem, ready for family feasts and friendly banter.
With patience and care, you’ve turned a simple project into a timeless masterpiece. Your kitchen countertops will not only look great but will also stand the test of time.