7 Simple Steps to Remove Kitchen Sink Drain
Dealing with a clogged or leaking kitchen sink drain can be really frustrating. Many people struggle with figuring out how to remove and replace it without making a mess or causing more damage.
If you’re tired of dealing with persistent issues, you’re not alone—removing your kitchen sink drain is a common DIY task that can save you time and money.
To remove your kitchen sink drain, start by gathering your tools like a wrench, pliers, and a bucket, then turn off the water supply.
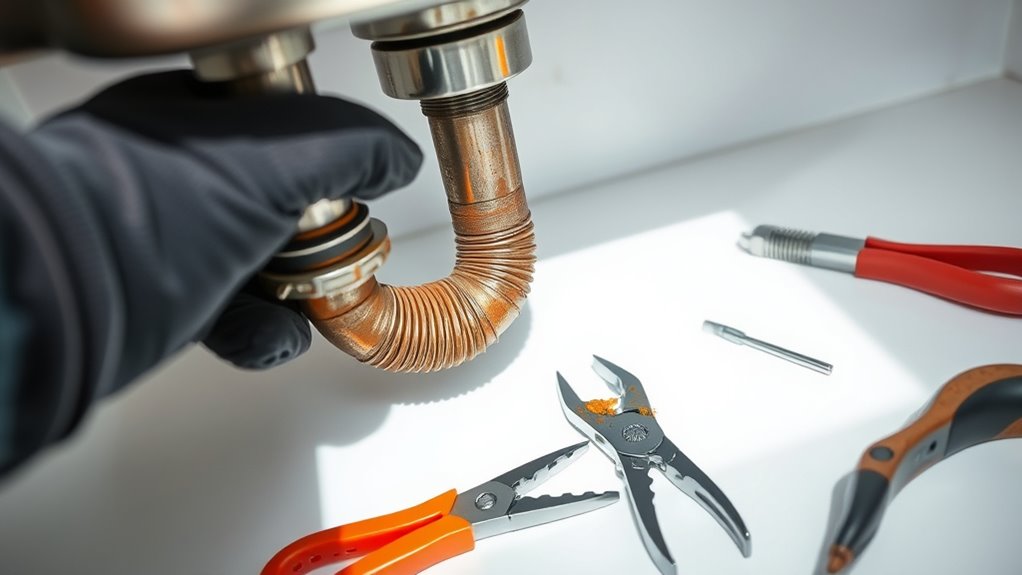
Identify the drain type and disconnect it carefully by loosening slip nuts and removing the assembly. If you encounter stubborn fittings, apply penetrating oil or tap gently.
Once removed, inspect and clean parts before installing a new drain.
Keep going to uncover tips for a leak-free setup and ongoing drain maintenance.
Key Takeaways
- Turn off the water supply and place a bucket beneath the drain to catch any water and debris.
- Use a wrench or pliers to loosen the slip nuts that connect the drain components.
- Gently lift and remove the drain assembly. If it resists, apply steady pressure.
- If fittings are stubborn, try using penetrating oil, wire brushes, or gentle tapping to loosen them.
- After reinstallation, check for leaks and ensure proper drainage.
- Don’t forget to clean or replace drain guards regularly to keep everything working smoothly.
Gather Tools and Prepare Your Kitchen for Drain Removal
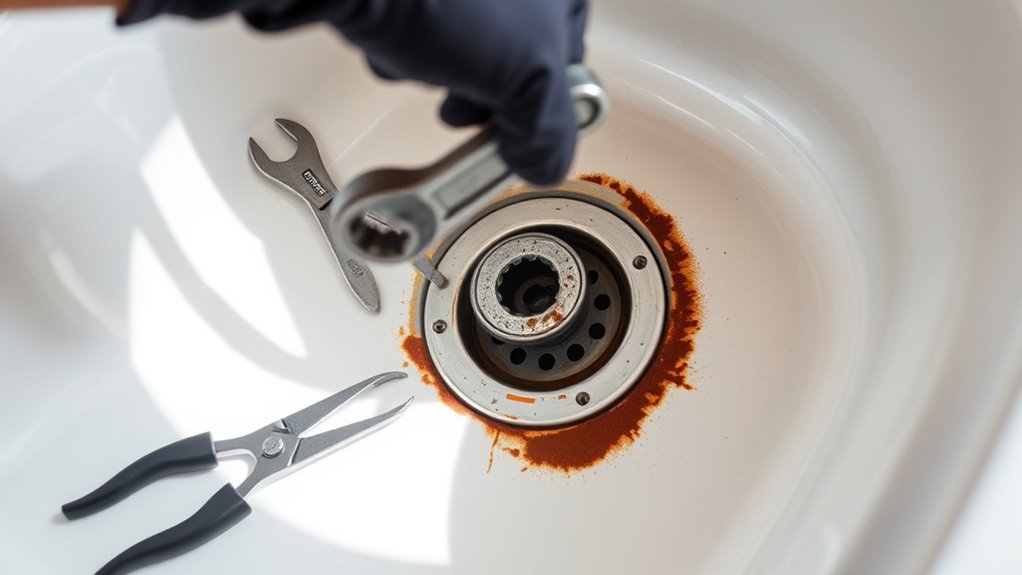
Gather all the tools you need and clear your workspace before starting the sink drain removal. You’ll want a wrench, pliers, a bucket or container, rags or towels, and maybe a screwdriver.
Make sure the area around your sink is free of clutter so you have enough room to work comfortably. Turn off the water supply to prevent leaks, and place a bucket beneath the drain to catch water and debris.
Ensure the area is clear, turn off water, and place a bucket to catch drips for smooth drain removal.
Wearing gloves can protect your hands from grime and sharp edges. Clear the countertop and cabinet beneath the sink for easy access.
Having everything within reach saves time and stops you from scrambling for tools mid-project. Proper preparation makes the drain removal process go more smoothly and efficiently.
Identify Your Sink Drain Type and Components
Understanding the different types of sink drains and their components is key to a smooth removal process. First, figure out if you have a compression, ball, or waste disposal drain, because each one needs a different approach.
Check if your drain has a pop-up assembly or a lift-and-turn mechanism. Look for the strainer or basket at the sink’s surface, which connects to the pipe below.
Next, examine the tailpiece, the pipe that extends from the drain to the trap. Finally, see if there’s a P-trap or S-trap, which keeps odors from escaping. Recognizing these parts helps you understand how everything fits together.
Knowing these components makes the removal process easier and helps you avoid unnecessary damage. Familiarity with the parts ensures you’re prepared and confident when working on your sink.
Safely Loosen and Remove the Sink Drain
Start by placing a bucket or container underneath the drain to catch any water or debris that might spill out. Use a wrench or pliers to loosen the slip nuts securing the drain assembly. Turn these counterclockwise to loosen them carefully.
If they’re tight, apply steady pressure, but avoid forcing them, which could cause damage. Once the nuts are loose, gently lift the drain assembly out of the sink. If it resists, wiggle it slightly to break any seal.
Be cautious of remaining water or debris in the drain, and keep the area clean. If the drain is stuck, double-check for additional fasteners or corrosion. Removing the drain safely prevents damage and sets the stage for a successful replacement or repair.
Troubleshoot Common Problems During Removal
When removing a kitchen sink drain, you might run into common problems like stubborn fittings or corrosion that make disassembly tricky. If a fitting won’t move, don’t force it. Instead, try applying penetrating oil and wait a few minutes.
For rusted parts, a wire brush can help remove buildup before you try to take it apart. If you come across a corroded nut or flange, use a wrench carefully to avoid damaging the pipe.
Sometimes fittings are over-tightened, so using extra support or a longer tool can help. If parts are stuck, gently tap around fittings with a rubber mallet to loosen them.
Keep these tips in mind:
- Apply penetrating oil regularly
- Use the right size wrench
- Gently tap stubborn fittings
- Avoid excessive force
- Work patiently to prevent damage
Install Your New Sink Drain Correctly
To guarantee your new sink drain functions properly and doesn’t leak, it’s essential to install it correctly from the start. Begin by applying plumber’s putty or a gasket around the drain flange to create a watertight seal.
Insert the drain body into the sink’s drain hole, then tighten the locknut underneath carefully to hold it in place. Make sure the rubber washer or gasket is positioned correctly to prevent leaks.
Attach the drain tailpiece to the drain and secure it with a slip nut, ensuring it’s tight but not overtightened. Connect the P-trap, adjusting the length if necessary, and tighten all slip nuts.
Check that everything is aligned properly to avoid issues later. Proper installation now will save you headaches and repairs down the line.
Check for Leaks and Ensure Proper Drain Function
After installing your drain, turn on the water and check for any drips around the connections.
Make sure the drain flows smoothly without backups or slow drainage.
If you see leaks or it’s not draining properly, tighten the fittings or double-check your installation.
Inspect for Drips
Before removing the drain, it’s important to check for leaks and make sure the drain is working properly. Look for drips by carefully observing the area around the sink, especially after running water.
Check under the sink for dampness or water stains. Run water and watch for drips around the drain assembly. Feel for moisture on the pipes or fittings as well.
Listen for dripping sounds when water is flowing. Make sure the water drains smoothly without hesitation or backup.
Taking these steps helps you catch any issues early. Fixing leaks now can prevent messes or damage later. Proper inspection makes the removal process easier and avoids complications.
Test Drain Performance
Checking the drain’s performance guarantees it’s functioning correctly before removal. Turn on the faucet and let the water run to see if the drain empties smoothly. Watch for any signs of leaks around the pipes or beneath the sink.
Pay attention to how quickly the water drains; slow drainage may mean a clog. Listen for unusual sounds like gurgling or bubbling, which can signal drainage issues. Make sure water stays within the sink without overflowing or leaking out of joints.
If you notice any leaks or poor drainage, fix these problems before moving forward. Ensuring the drain works properly now helps you identify existing issues and prevents surprises when removing or reinstalling it.
Maintain Your Kitchen Sink Drain to Prevent Clogs
To keep your kitchen sink drain clog-free, set up a regular cleaning routine to clear out buildup.
Always dispose of waste properly and avoid pouring grease or large food scraps down the drain.
Using drain guards can catch debris before it causes blockages, saving you time and trouble.
Regular Cleaning Routine
Regularly cleaning your kitchen sink drain is key to preventing stubborn clogs and bad odors. To keep it working well, set up a simple routine.
First, rinse the drain with hot water every day to flush out debris. Second, once a week, pour a mix of baking soda and vinegar down the drain to break down buildup. Third, scrub around the drain opening with a brush or old toothbrush to remove grime.
Next, run hot water after each use to wash away leftover food particles. And finally, avoid pouring grease or oil down the drain because they solidify and can cause blockages.
Sticking to this routine will help reduce clogs and keep your sink smelling fresh and functioning smoothly.
Proper Waste Disposal
Proper waste disposal is essential for maintaining a healthy and clog-free kitchen sink. You should avoid pouring grease, oil, or fats down the drain because they harden and cause blockages over time. Instead, let these substances cool and dispose of them in the trash or use a compost bin if appropriate.
Food scraps, especially coffee grounds and fibrous vegetables, can also cause clogs. Always scrape leftovers into the trash or compost instead of rinsing them down. Avoid flushing large quantities of food waste or non-degradable items like paper towels or plastic wrappers.
Use Drain Guards
Installing drain guards is one of the simplest and most effective ways to prevent kitchen sink clogs. They catch food particles, hair, and debris before they enter your pipes, reducing blockage risks. When choosing a drain guard, pick one that fits your sink’s size and shape to guarantee a snug fit.
Regularly clean the guard to remove trapped debris and keep water flowing smoothly. Using a drain guard also reduces the need for harsh chemical drain cleaners, which is better for your pipes and the environment.
Use guards with fine mesh to catch small particles. Remove and clean the guard weekly to prevent buildup. Replace damaged or worn-out guards promptly to keep your sink protected.
Avoid metal guards that can rust and consider pairing your drain guard with other maintenance tips for the best results.
Frequently Asked Questions
How Do I Prevent Damage to My Countertops During Drain Removal?
To prevent damage to your countertops during drain removal, protect the surface with a cloth or plastic sheet. Use painter’s tape around the edges to secure the covering and avoid scratches.
Be gentle when loosening fittings, and don’t force parts that resist. Taking your time and working carefully minimizes the risk of chipping or cracking your countertop.
This way, your countertop stays in good shape throughout the process.
Can I Remove the Sink Drain Without Turning off the Water Supply?
You can remove the sink drain without turning off the water supply, but it’s risky.
Imagine a homeowner, Sarah, who didn’t shut off the water and accidentally caused a small leak. To avoid this, prepare by placing a bucket beneath the drain to catch any water and loosen the drain carefully.
Be aware that water might still escape, so proceed cautiously. Consider turning off the water for safety.
What Safety Precautions Should I Take During Drain Removal?
You should wear gloves and eye protection to prevent contact with dirty water or debris.
Make sure to turn off the water supply before starting, even if it’s not strictly necessary, to avoid leaks.
Use a bucket to catch any residual water in the pipes.
Work carefully with tools to avoid damaging the plumbing or injuring yourself.
Keep your workspace organized to prevent accidents.
How Long Does the Entire Sink Drain Removal Process Typically Take?
Removing your sink drain usually takes about 30 minutes to an hour, kind of like a dance that finds its steady groove. You’ll loosen fittings, unscrew pipes, and clear the way for the new.
Rushing through this can turn a simple task into a tangled mess, so take your time and stay organized. With patience and a bit of elbow grease, you’ll have your drain out and ready for a fresh start in no time.
Is It Necessary to Replace the Plumber’s Putty When Reinstalling the Drain?
Yes, you should replace the plumber’s putty when reinstalling the drain. Over time, putty can dry out, crack, or lose its sealing ability, which could cause leaks.
Applying fresh putty guarantees a watertight seal and prevents future problems. Make sure to remove any old putty residue before putting on new putty.
This simple step helps maintain a secure, leak-free connection and prolongs the life of your drain.
Conclusion
By following these simple steps, you’ll have your kitchen sink drain cleared or replaced in no time. Imagine tackling a stubborn clog and then installing a new drain that works flawlessly, preventing future backups.
For example, Sarah replaced her old drain and now enjoys a clog-free sink, saving her from costly plumbing calls. With a little patience, you can confidently maintain your sink and keep it running smoothly for years to come.
By mastering these steps, you’ll be able to remove or replace your kitchen sink drain with ease. This simple process helps ensure your drain stays clear and functions properly, avoiding future headaches.