8 Essential Tips to Pack Your Kitchen for Moving
Moving your kitchen can feel overwhelming, right? Many people struggle with organizing everything and packing efficiently. But don’t worry—you’re not alone, and a little planning can make all the difference.
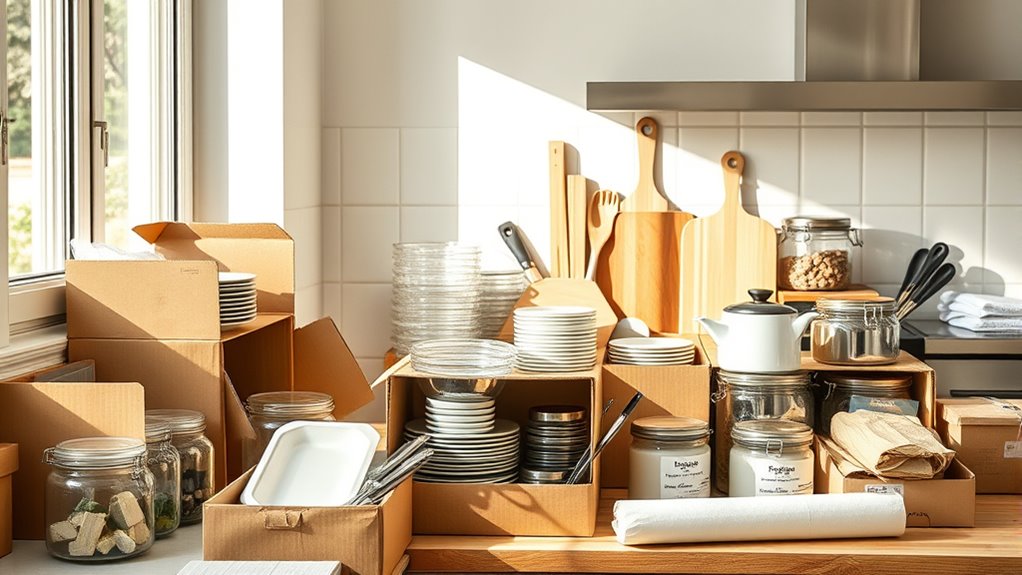
Start by taking inventory and clearing countertops to see everything clearly. Use sturdy boxes, packing paper, or bubble wrap to protect fragile dishes and glassware, labeling boxes clearly for easy unpacking.
Organize small appliances and tools, grouping similar items together. Pack pantry items in airtight containers, and keep perishables cool if needed.
Prioritize packing essentials first for a quick setup when you arrive. Keep an organized, labeled system to save time and effort.
There’s more helpful advice ahead to make your move smoother.
Key Takeaways
- Use sturdy boxes and packing materials like bubble wrap to protect fragile dishes and glassware. It’s worth investing in quality packing supplies to keep everything safe during the move.
- Label and color-code boxes by category or kitchen area. This makes unpacking much easier and helps you stay organized from the get-go.
- Pack items you rarely use first. This way, you can keep essentials accessible for immediate use at the new place without any hassle.
- Create a packing timeline, starting with non-essentials. Having a plan helps you stay systematic and makes the whole process feel less overwhelming.
- Disassemble small appliances and secure cords. This prevents damage during transit and makes packing more efficient.
How to Prepare Your Kitchen for Moving: Planning and Organizing
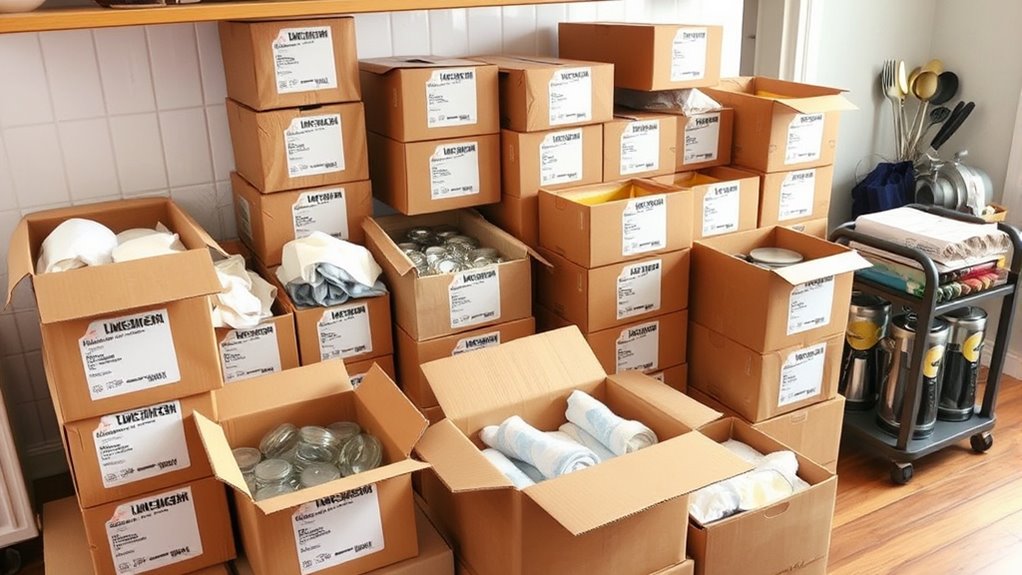
Before you start packing, it’s important to plan and organize your kitchen belongings. Take inventory of everything, separating essentials from non-essentials. Decide what you’ll need right away and what can be packed early.
Clear countertops and cabinets so you can see all items clearly. This makes it easier to categorize and label everything properly. Creating a packing timeline helps, too, so you can start with items you rarely use like seasonal dishes or extra cookware.
Gather storage bins or boxes and label them clearly for easy identification later. Be sure to discard or donate items you no longer need to reduce clutter and make packing simpler.
Use clearly labeled storage bins and donate unused items to simplify your packing process.
Set up a system for fragile items to prevent damage during the move. Proper planning will make the entire process smoother, saving you time and reducing stress when it’s time to pack everything up.
What Packing Supplies Do You Need for Your Kitchen Move?
To pack your kitchen efficiently, you’ll need a variety of supplies designed to protect your items and keep everything organized. Start with sturdy, corrugated boxes in different sizes—small boxes for heavy items like canned goods and larger ones for bulkier items.
Gather packing paper or bubble wrap to cushion fragile items and prevent breakage. Packing tape is essential to securely close boxes, while labeling markers help you identify contents easily.
Consider using dish packs or specialized boxes for fragile items, and get plastic containers or resealable bags for small essentials. Don’t forget scissors or box cutters for easy opening, and packing peanuts if you need extra cushioning.
Having these supplies ready makes your move smoother and helps prevent damage to your kitchen essentials.
How to Pack Dishes and Glassware Safely
Once you’ve gathered your packing supplies, carefully wrapping each dish and glassware piece is the first step toward safe transport. Use packing paper or bubble wrap to cushion each item, making sure it’s fully protected from impacts.
Wrap each dish and glass carefully with paper or bubble wrap for safe transport.
Place wrapped dishes vertically in sturdy boxes, filling gaps with crumpled paper to prevent shifting. For glasses, hold the stem or bowl and wrap each piece individually.
Use dividers or create compartments within boxes to keep items separated. Remember, proper packing minimizes breakage and makes unpacking easier.
Wrap items individually to prevent chips and cracks. Fill empty spaces to avoid shifting during transit.
Label boxes clearly with fragile stickers. Keep similar items together for easy unpacking.
Organize Small Appliances and Kitchen Tools for Easy Unpacking
To make unpacking easier, start by labeling and categorizing your small appliances and tools.
Use proper packing materials like boxes, padding, and tape to keep everything secure.
Clear organization now will save you time and frustration later.
Label and Categorize Items
Labeling and categorizing your small appliances and kitchen tools is key for a smooth unpacking process. It helps you find what you need quickly and keeps clutter under control.
Start by grouping similar items, like baking tools, utensils, or coffee makers. Use clear labels on boxes so you can easily identify what’s inside, saving time during unpacking.
Consider color-coding labels for different categories, such as red for everyday items and blue for specialty tools. This makes organizing even easier and faster.
This system helps you set up efficiently and reduces frustration. Remember, the goal is to create an organized space from the start so you can settle in faster and enjoy your new kitchen.
- Save time by easily locating essentials
- Prevent damage by packing similar items together
- Simplify unpacking with clear labels
- Maintain organization during your move
Use Proper Packing Materials
Using the right packing materials is essential to protect your small appliances and kitchen tools during the move. Start with sturdy boxes that fit your items snugly to prevent shifting.
Use bubble wrap or packing paper to cushion fragile items like blenders, mixers, and glassware. For small tools, consider dividing them into smaller containers or zip-top bags to keep everything organized and prevent damage.
Wrap sharp or heavy items separately to avoid punctures or crushing other belongings. Label each box clearly with its contents and the level of fragility.
Don’t forget to seal boxes securely with packing tape to keep everything intact during transport. Investing in quality packing materials guarantees your appliances arrive in one piece and makes unpacking smoother.
Smart Strategies for Packing Pantry Items and Non-Perishables
When packing pantry items and non-perishables, choosing the right containers helps keep everything secure and organized.
Be sure to label each box clearly to make unpacking easier and prevent confusion later.
Staying organized from the start ensures your supplies arrive intact and ready to use.
Proper Container Selection
Choosing the right containers is key for safely packing pantry items and non-perishables. You want containers that protect your food, prevent spills, and make stacking easier.
Use sturdy, airtight containers to keep items fresh and prevent pests. Clear containers let you see what’s inside quickly, saving you time when unpacking.
Opt for uniform sizes to make the most of your storage space. Avoid flimsy or oversized boxes that might crush or topple over.
Keep these points in mind: durable, airtight containers help with freshness and pest control, clear ones make identification easy, and uniform sizes maximize efficiency.
Avoid containers that are flimsy or too large, as they can collapse or spill. Proper container choice keeps your pantry organized, protected, and easy to unpack after your move.
Labeling and Organization
Organizing and labeling your pantry items effectively can save you time and frustration during unpacking. Start by grouping similar items together—canned goods, spices, snacks—so you know exactly where everything belongs.
Use clear, durable labels on boxes or baskets to identify their contents at a glance. For non-perishables, consider labeling by category or meal type, like “Breakfast Snacks” or “Cooking Staples.”
Keep an inventory list for quick reference, especially for frequently used items. When packing, place heavier items at the bottom and lighter ones on top to prevent crushing.
As you pack, label each box with its contents and destination room. This system guarantees a smooth unpacking process, saving you hours of searching and reorganizing once you arrive.
Protect Your Perishables and Special Items During Transit
To guarantee your perishables and special items arrive in good condition, take extra precautions during transit. Keep perishable foods cold by packing them in insulated coolers with ice packs.
Ensure your items arrive safely by keeping perishables cold in insulated coolers with ice packs.
For delicate or valuable items, use sturdy boxes and wrap them with bubble wrap for extra protection. Label these boxes clearly so you handle them with care.
Consider using waterproof containers for liquids to prevent leaks. Keep a list of your most fragile items for easy reference.
- Use insulated containers for perishables
- Wrap fragile items with plenty of padding
- Seal liquids tightly to avoid spills
- Clearly mark boxes containing delicate or valuable items
Label Your Boxes Clearly to Make Unloading Easier
Label your boxes clearly so you can quickly see what’s inside and decide what to unpack first. Use large, easy-to-read writing and include details like “Pots and Pans” or “Utensils.”
To stay organized, try color-coding your boxes for different kitchen areas, like prep stations or storage. A simple table can help categorize your boxes:
| Box Label | Contents | Destination Area |
|---|---|---|
| Dinnerware | Plates, bowls, cups | Cabinets |
| Cooking Supplies | Pots, pans, utensils | Stove area |
| Small Appliances | Blender, toaster | Countertop |
This method makes unloading smoother, avoids confusion, and saves time during setup. Clear labels make your move easier and less stressful.
Unpacking Tips to Set Up Your Kitchen Quickly After Moving
Start by focusing on the essentials you’ll need right away, like plates, utensils, and basic cookware. Unpack these first so your kitchen is functional from day one.
Once you’ve got the basics set up, you can move on to organizing the less urgent items. To make the process quicker, try these tips:
Organize less urgent items with designated zones, grouping similar items, and labeling for easy access.
Create a designated unpacking zone for boxes with non-essentials to keep clutter at bay. Keep similar items together to make finding things easier. Label storage areas so you remember where everything goes.
Set up a cleaning station early on to keep your workspace tidy and organized.
Frequently Asked Questions
How Can I Prevent Damage to Fragile Kitchen Items During Transport?
You can prevent damage to fragile kitchen items by wrapping them securely with bubble wrap or packing paper. Use sturdy boxes and fill any gaps with soft padding to prevent movement.
Label boxes as fragile and handle them carefully during transport. Make sure heavy items go on the bottom, and fragile items are on top.
Taking these precautions helps protect your delicate items from breaking during the move.
What’s the Best Way to Pack Bulky or Awkwardly Shaped Kitchen Appliances?
Did you know that improperly packed appliances can cause 30% of moving damages? To pack bulky or oddly shaped kitchen appliances, start by cleaning and drying them thoroughly.
Use the original boxes if you still have them, or find sturdy, appropriately sized boxes. Wrap appliances with bubble wrap or packing paper, and secure everything with tape.
Fill any extra space with packing peanuts or towels so they don’t shift during transport. Once everything is snug and secure, seal the boxes tightly to keep everything safe.
How Do I Prioritize Which Kitchen Items to Pack First?
You should prioritize packing items you use least often first, like specialty gadgets or seasonal cookware. Daily essentials, such as utensils, plates, and glasses, should be packed last to make sure you’re covered during the move.
Start with less fragile items, then move on to delicate or valuable pieces. Label boxes clearly to avoid confusion. This way, you minimize stress and keep your most needed items accessible until moving day.
Are There Any Safety Tips for Packing and Handling Sharp Kitchen Tools?
Think of safety as your guiding star. When packing sharp kitchen tools, always wear cut-resistant gloves to protect your hands.
Wrap blades in thick paper or bubble wrap, then secure them with tape to prevent accidents. Store them upright in a sturdy, labeled container, away from other fragile items.
Handle each tool with care, knowing that cautious packing keeps you safe and your belongings intact during the move.
How Can I Efficiently Store and Transport Perishable Food Items?
You should use insulated coolers or thermal bags to store and transport perishable food. Keep items cold by adding ice packs or dry ice, and make sure they stay below 40°F during transit.
Pack perishable foods last so they stay cold longer, and keep the coolers upright to prevent leaks. Label the containers clearly to avoid any mix-ups.
Plan to unload and refrigerate or freeze perishables promptly at your new home to prevent spoilage. This way, your food stays fresh and safe during your move.
Conclusion
Remember, a well-packed kitchen makes moving smoother and less stressful. Stay organized, label everything clearly, and pack carefully to protect your essentials.
Keep in mind the saying, “A stitch in time saves nine.” Preparing now can save you headaches later.
With these tips, you’ll settle into your new kitchen faster and enjoy your new space sooner.
Happy moving!