8 Simple Steps to Change Your Kitchen Faucet
Many homeowners find changing a kitchen faucet to be more challenging than it looks. If you’ve ever felt overwhelmed by the task, you’re definitely not alone.
Luckily, with a little guidance, you can master this small but important DIY project.
To change your kitchen faucet, start by turning off the water supply and clearing your workspace. Carefully remove the old faucet, noting how parts fit, then clean the area.
Install the new faucet by securing it tightly and connecting the supply lines properly. Turn the water back on and check for leaks. Tighten fittings if needed.
Regular maintenance keeps your faucet working smoothly. If you follow these steps, you’ll master the process and be ready for any issues that come up.
Key Takeaways
- Turn off the main water supply and clear the sink area before you start.
- Remove the old faucet by loosening the mounting nuts and disconnecting the supply lines.
- Take a moment to clean the surface and install the mounting plate or gasket for your new faucet.
- Insert the new faucet into the mounting hole and tighten the nuts securely.
- Connect the supply lines, then turn the water back on and check for any leaks.
Why Updating Your Kitchen Faucet Is a Smart Move

Updating your kitchen faucet is a smart move because it directly improves the functionality and appearance of your space. An outdated or leaking faucet can waste water and increase your utility bills, while a modern, efficient model saves you money in the long run.
Plus, a new faucet can give your kitchen a fresh, updated look, making the whole space feel more modern. If you’re dealing with low water pressure or frequent leaks, replacing the faucet is a quick fix.
A new faucet refreshes your kitchen’s look and quickly solves low water pressure or leaks.
It also makes cleaning easier, especially with newer designs that have better spray options. Overall, upgrading your faucet boosts your kitchen’s efficiency, saves you money, and adds a polished, stylish touch.
It’s a simple change that offers big benefits.
Gather the Tools and Supplies You Need Before You Start
Before you start removing your old faucet, gather all the tools and supplies you’ll need. This will make the job smoother and help avoid unnecessary delays.
You’ll typically need an adjustable wrench, basin wrench, screwdriver, and pliers. Keep a bucket or towel nearby to catch any residual water that might drip.
Have replacement washers, O-rings, and plumber’s tape ready to ensure a proper seal. Check if your new faucet requires specific tools or parts, like mounting brackets or supply lines.
Having everything ready in advance prevents multiple trips to the store or searching for missing tools mid-job. Clear your workspace so you have enough room to work comfortably.
Preparing your tools and supplies before you start makes the faucet replacement process quicker and more efficient.
Turn Off the Water and Prepare Your Workspace
Before you start, turn off the main water valve to stop the flow.
Clear the area around the sink and drain any remaining water from the faucet to prevent messes.
This will help you create a clean and safe workspace for replacing the faucet.
Shut Off Main Valve
Turning off the main water valve is the first step before replacing your faucet. Find the main shutoff valve, which is usually near the water meter or where the main line enters your house.
Turn the valve clockwise to close it and stop all water flow. Check if the water is off by opening a nearby faucet—water should no longer come out.
This step prevents water from spilling when you disconnect the pipes. It’s a good idea to have a bucket or towels ready just in case any residual water remains.
Once the water is shut off, you can safely remove the old faucet without making a mess or risking water damage. Taking this step makes the whole process smooth and leak-free.
Clear Workspace Area
Clear your workspace to guarantee a smooth faucet replacement. Remove any items from the sink area, including dishes, sponges, and soap bottles.
Make sure your tools—wrenches, pliers, and screwdrivers—are within reach and organized. Cover the surrounding countertop with a towel or rag to protect it from scratches or drips.
Clearing the area prevents accidents and keeps small parts from getting lost. If you have a soap dispenser or accessories attached to the faucet, detach them now and set them aside.
Ensure the sink is clean and dry so you have a clear view of all connections. A tidy, organized workspace helps you work efficiently and reduces frustration during the replacement.
Drain Remaining Water
Shut off the water supply valves beneath the sink to prevent leaks during the faucet removal. Turn both the hot and cold valves clockwise until they stop.
Open the faucet handle to release any remaining water in the lines. Place a bucket or towel under the drain to catch residual water.
If your sink has a pop-up drain assembly, loosen the nut behind the drain flange to drain leftover water. Be prepared for some water to drip out, so keep the towel handy.
Once you’ve drained as much water as possible, double-check that the water supply valves are fully closed. This step guarantees a dry workspace and helps prevent messes as you proceed with removing the faucet.
Remove Your Old Kitchen Faucet Carefully and Safely
Before removing your old faucet, make sure the water supply is completely turned off.
Carefully detach all the faucet components, being mindful of rust and debris that might cause issues.
Taking your time will ensure a safe removal process and help prevent any potential damage.
Turn Off Water Supply
To safely remove your old kitchen faucet, start by turning off the main water supply. Locate the shut-off valves under your sink and turn them clockwise until they’re fully closed.
If you don’t have individual shut-offs, turn off the main water valve to your home. Once the water is off, open the faucet handles to drain any remaining water and release pressure.
Check that no water is flowing before proceeding. This step prevents water from spilling or causing damage as you remove the faucet.
Be sure to have a bucket or towels nearby to catch any residual water. Confirm that the water supply is completely shut off before moving on to disconnect the faucet components.
Detach Faucet Components
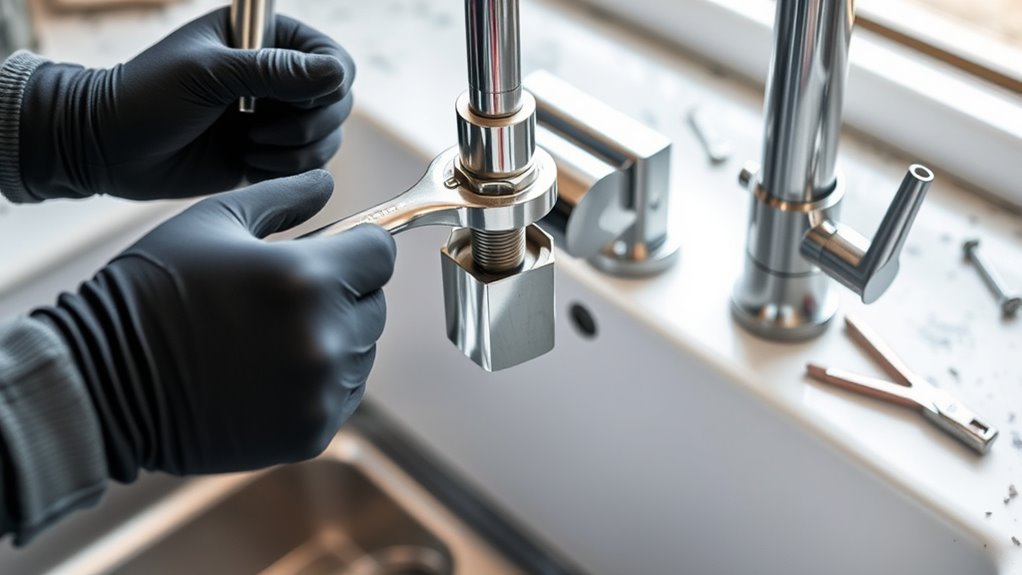
Carefully detach the faucet components by loosening the nuts and fittings that secure it to the sink. Use a wrench to turn these counterclockwise, applying steady pressure. Keep a bucket nearby to catch any residual water.
As you loosen the fittings, note their positions for reassembly. Be cautious not to damage the sink or surrounding surfaces. Once loose, gently lift the faucet out of the sink.
| Step | Action | Tools Needed |
|---|---|---|
| 1 | Loosen mounting nuts | Wrench |
| 2 | Disconnect water supply lines | Adjustable pliers |
| 3 | Remove faucet from sink | Hands or pry tool |
Handle Rust and Debris
If rust or debris has built up around your faucet, it’s important to handle these issues carefully to avoid damage. First, turn off the water supply to prevent leaks.
Use a soft cloth or brush to gently remove loose debris and rust from the handle area. For stubborn rust, try applying a rust remover or a mixture of vinegar and baking soda.
Let the solution sit for a few minutes before scrubbing. Be careful not to scratch or damage the surrounding surfaces.
Once everything is clean, wipe the area with a damp cloth to remove any leftover residue.
- Use a soft brush or cloth to clear debris
- Apply rust remover or vinegar solution for stubborn rust
- Let solutions sit for a few minutes before scrubbing
- Avoid using abrasive tools that can damage the finish
- Wipe thoroughly to remove any leftover residue
Install Your New Kitchen Faucet Step by Step
Start by turning off the water supply valves beneath your sink to prevent leaks during installation. Remove the old faucet, including mounting hardware, using a wrench if needed.
Clean the area around the mounting holes to guarantee a secure fit for your new faucet. Place the gasket or mounting plate that came with your new faucet onto the sink’s surface.
Carefully insert the faucet’s shank through the mounting hole. From underneath, tighten the mounting nuts by hand, then secure them further with a wrench, but don’t overtighten.
Make sure the faucet is level and aligned properly. Double-check that all parts are secure before proceeding to connect the water supply lines.
Once installed, you’re ready for the next step of testing for leaks.
Connect Water Supply Lines Securely and Check for Leaks
After making sure your faucet is securely mounted and level, it’s time to connect the water supply lines. Attach the supply lines to the faucet’s tailpieces and tighten the nuts by hand. Then, use a wrench to make sure they’re snug—just don’t overtighten.
Next, connect the other ends to the shutoff valves, again tightening securely. Once everything’s hooked up, turn on the water supply slowly to check for leaks.
Make sure the connections are tight but not over-tightened. Use a basin or towel to catch any drips during testing. Turn on both hot and cold water supplies gradually and watch for leaks around fittings and connections.
If you notice any leaks, tighten the fittings gently until they stop. Avoid overtightening to prevent damage and ensure a good seal.
Troubleshoot Common Faucet Installation Problems
Even with careful installation, you might run into common faucet problems that can mess with your sink’s function. If the faucet leaks after installing it, check that all nuts and fittings are tight, especially under the sink. Loose connections are often the cause of drips.
If water flow is weak, take a look at the aerator. Sometimes it gets clogged, so remove and clean it to restore proper flow. For persistent leaks, examine the cartridge or valve and replace them if they’re damaged.
When the handle is hard to turn, it might just need some lubrication or even a replacement. Sometimes the issue comes from improper installation of the supply lines, so double-check all those connections.
Always turn off the water supply before adjusting or swapping out parts to stay safe. Spotting these issues early can save you time and prevent further damage, making sure your faucet works smoothly.
Maintain Your New Kitchen Faucet for Long-Term Use
To keep your new kitchen faucet in top shape for years, regular maintenance is key. Keep it clean and functioning smoothly by checking for leaks, cleaning aerators, and inspecting hoses from time to time. Catching small issues early helps prevent bigger problems down the line.
Here are some simple tips:
- Wipe the faucet with a soft cloth to prevent mineral buildup
- Remove and clean aerators once a month
- Check for leaks and tighten fittings if needed
- Replace worn-out washers and seals promptly
- Avoid harsh chemical cleaners that can damage the finish
Following these steps will help your faucet stay efficient and look great. Staying proactive with maintenance reduces costly repairs and extends its lifespan. Regular care keeps your kitchen running smoothly and your faucet working like new.
Frequently Asked Questions
How Do I Choose the Right Kitchen Faucet Model for My Needs?
To choose the right kitchen faucet, think about your sink size and style, as well as your water pressure.
Consider features you might want, like pull-down sprayers or touch controls, to make your kitchen tasks easier.
Your budget and how durable you need the faucet to be are also important. Focus on materials like stainless steel or brass for longevity.
Read reviews to see how reliable different models are.
Visiting stores to try out various faucets can help you get a feel for what works best.
Can I Install a New Faucet Without Professional Help?
Yes, you can install a new faucet yourself—think of it as assembling a complex puzzle with the right pieces.
Start by turning off the water supply and disconnecting the old faucet. Follow the manufacturer’s instructions carefully, and use basic tools like wrenches and pliers.
Take your time, double-check connections, and verify everything is tight. With patience, you’ll have your new faucet up and running without professional help.
What Are the Signs My Current Faucet Needs Replacing?
If your faucet leaks constantly, drips even when off, or has low water pressure, it’s a sign you need a replacement.
You might also notice corrosion, rust, or mineral buildup that affects performance.
If the handle is hard to turn or the faucet wobbles, it indicates wear and tear.
These signs suggest it’s time to replace your faucet for better functionality and to prevent further damage.
How Often Should I Clean and Maintain My Kitchen Faucet?
You should clean and maintain your kitchen faucet at least once a month to keep it sparkling like new. Regular cleaning helps prevent buildup of grime, limescale, and bacteria.
This ensures smooth operation and extends your faucet’s lifespan. Wipe it down with a gentle cleaner and a soft cloth for best results.
Check for leaks or drips weekly to catch issues early. Consistent maintenance keeps your faucet functioning flawlessly and looking great.
It also saves you money and headaches down the line. Staying on top of cleaning is the easiest way to keep your kitchen faucet in top shape.
Are There Eco-Friendly Options for Kitchen Faucets?
Yes, there are eco-friendly options for kitchen faucets. You can pick models with low-flow aerators that use less water but still work well.
Look for faucets labeled as WaterSense certified. These meet environmental standards for efficiency and help you save water and money on utilities.
You might also consider faucets made from sustainable or recycled materials. That way, you’re reducing your environmental impact even more.
Switching to eco-friendly options is a smart and responsible choice for your home and the planet.
Conclusion
And there you have it—your shiny, new kitchen faucet ready to impress guests and hide the inevitable spaghetti splatters. Who knew replacing a faucet could be so thrilling?
Just think: next time someone complains about your “boring” kitchen, you can proudly say, “Well, I personally installed this beauty,” and toss in a knowing wink.
Now sit back, enjoy your upgraded sink, and marvel at how you’ve turned a simple job into a brag-worthy masterpiece.
With your new kitchen faucet, you’ll be the envy of all your friends.